Lucky 8-Ball
If you and your group have any questions or get stuck as you work through this in-class exercise, please ask the instructor for assistance. Have fun!
-
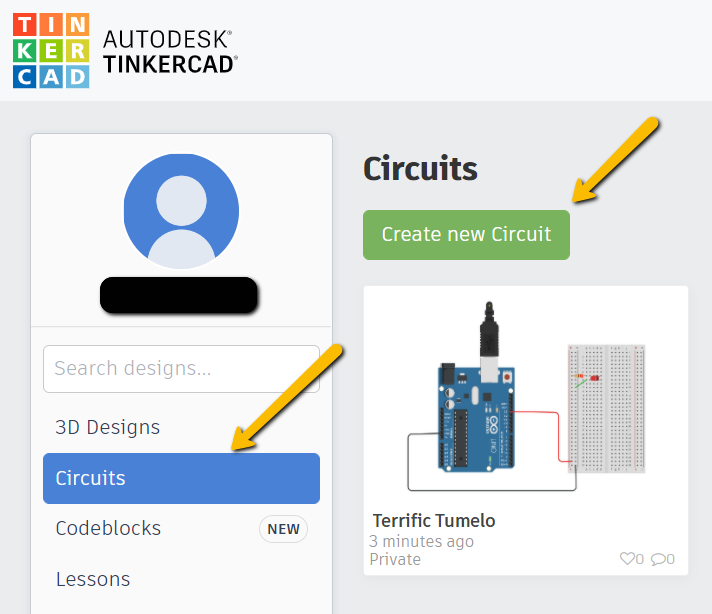
If you haven’t already, please go to the TinkerCad website and create an account
Once you have the account created, go to Dashboard -> select Circuits on the left side panel -> select Create new Circuit
Materials needed (searching for these components can be helpful):


- 1 LCD screen (see below)
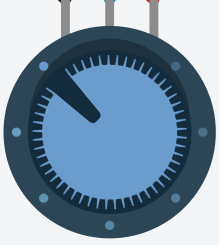
- 1 Tilt Switch
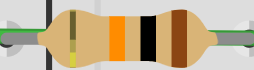
- 1 10k-ohm (or 10kΩ) Resistor with the following coloured bands: brown, black, orange, gold
- 1 220-ohm (or 220 Ω) Resistor with the following coloured bands: red, red, brown, gold
- 1 Potentiometer
-
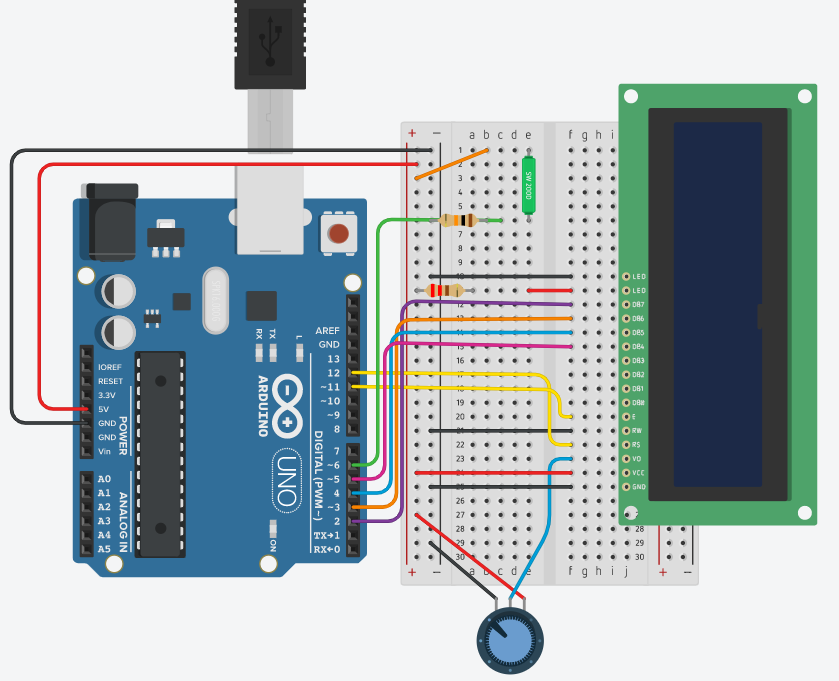
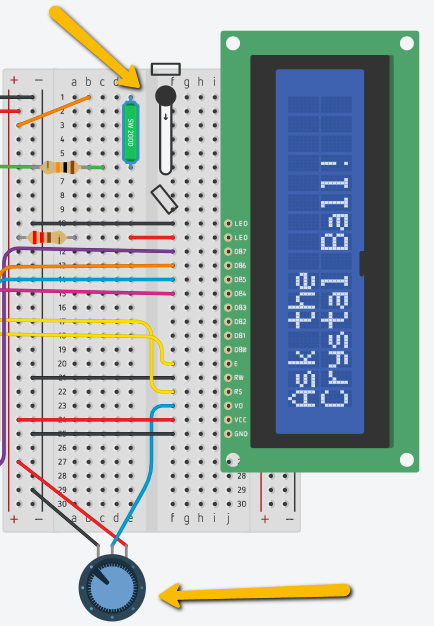
Connect the black wire to the GND pin on the Arduino and then the “-” pin on the breadboard (see the diagram below for details).
-
Connect the red wire to the 5V pin on the Arduino and then the “+” pin on the breadboard.
-
Connect all the other wires as can be seen in the diagram below.
Note: You can check out a simulated version of this Arduino project
-
TinkerCad would not produce the desired code by itself, so once everything is connected, go to the Code section, switch the option to Text and paste the following code (replacing the code that is already there):
#include <LiquidCrystal.h> LiquidCrystal lcd(12,11,5,4,3,2); const int switchPin = 6; int switchState = 0; int prevSwitchState = 0; int reply; void setup(){ pinMode(switchPin, INPUT); lcd.begin(16, 2); lcd.print("Ask the "); lcd.setCursor(0, 1); lcd.print("Crystal Ball!"); } void loop(){ switchState = digitalRead(switchPin); if(switchState != prevSwitchState){ if(switchState == LOW){ reply = random(8); //pick a number from 0 to 7 lcd.clear(); lcd.setCursor(0, 0); lcd.print("The ball says: "); lcd.setCursor(0,1 ); switch(reply){ case 0: lcd.print("Yes"); break; case 1: lcd.print("Most likely"); break; case 2: lcd.print("Certainly"); break; case 3: lcd.print("Outlook good"); break; case 4: lcd.print("Unsure"); break; case 5: lcd.print("Ask again"); break; case 6: lcd.print("Doubtful"); break; case 7: lcd.print("No"); break; } //end of switch } //end of nested if() } //end of outer if() //update the tilt switch status prevSwitchState = switchState; } //end of loop() -
Once the code is in, click Start Simulation, then twist the potentiometer (the blue dial at the bottom) until you see words appear on the screen.
-
You trigger your Lucky 8-Ball by moving its base gently up and down to trigger the tilt sensor.

- You should probably customize the responses of your lucky 8-Ball by going into the Arduino software and scrolling down to almost the bottom of the code for the project and look for, lcd.print(“Yes”);, and lcd.print(“Most likely”);. Go ahead and change any or all of the 8 different responses that your Lucky 8-Ball gives out (just keep in mind that your custom responses should still display on the LCD screen). Upload your revised code, and you’re off to the races. Enjoy!
