Hello World
If you and your group have any questions or get stuck as you work through this in-class exercise, please ask the instructor for assistance. Have fun!
-
If you haven’t already, please go to the Arduino website and download the “Arduino IDE” for either Windows or Mac, and then install the software on your computer.
Materials needed:

- 1 LED Light
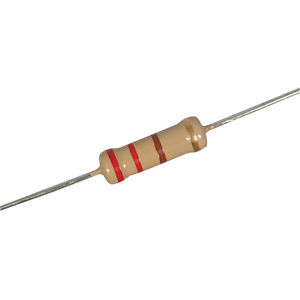
- 1 220-ohm Resistor with the following striping in order: red, red, brown, gold
- 1 Long Red Wire
- 1 Long Black Wire
- 1 Short Wire
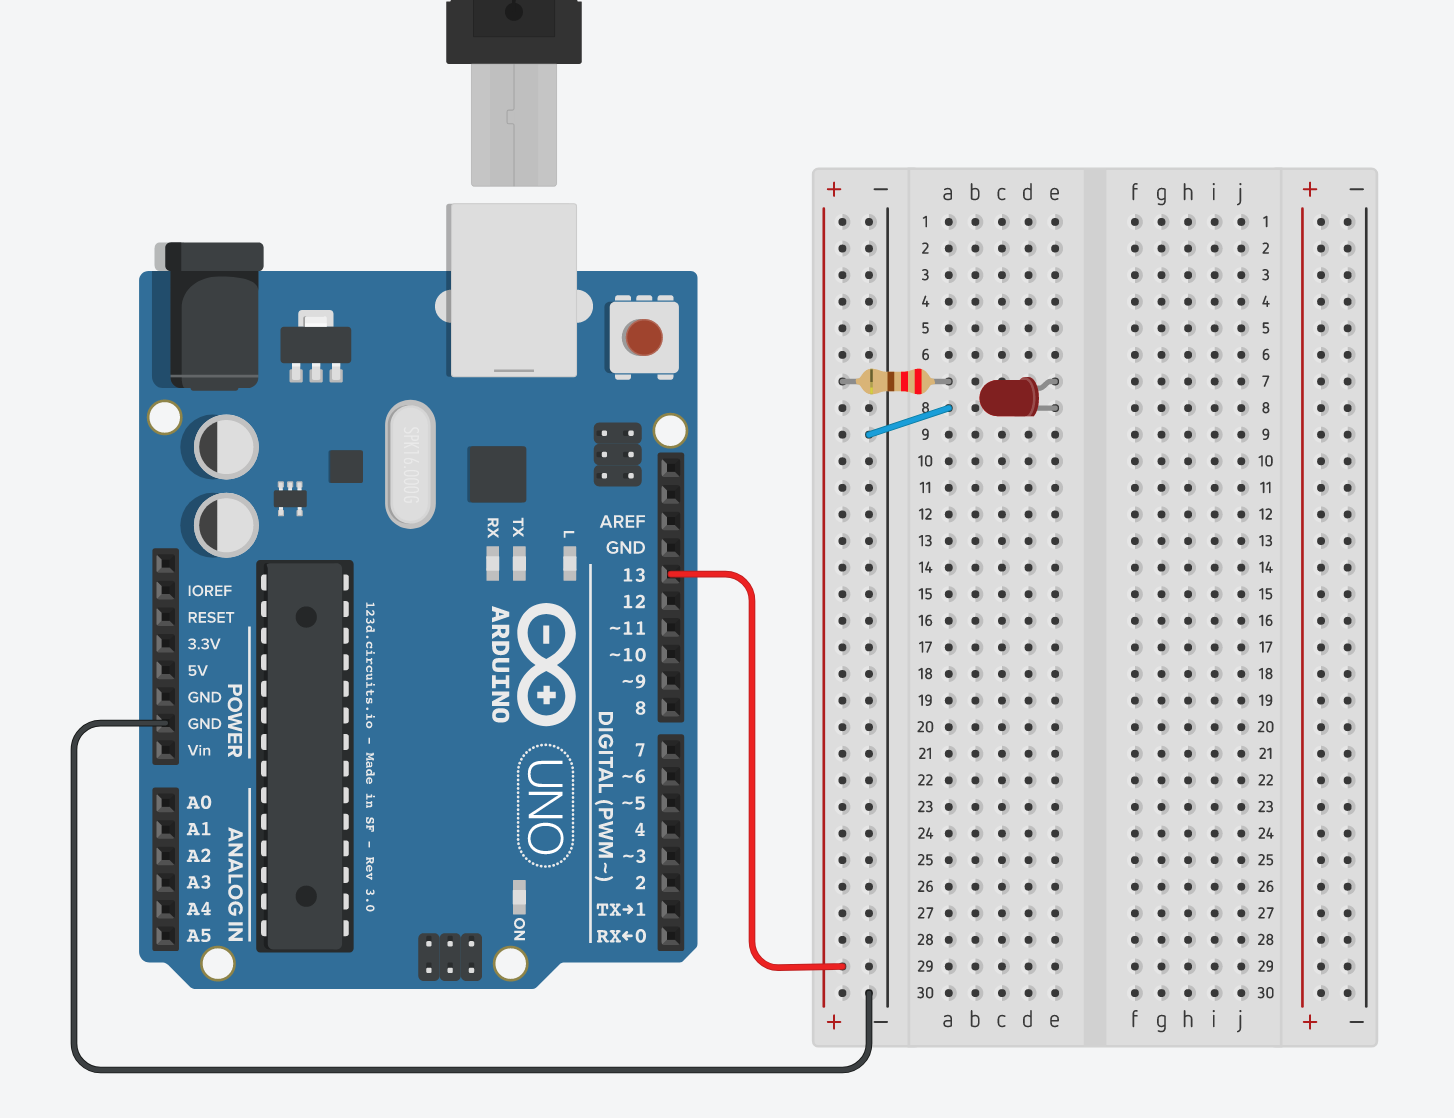
Connect as shown in this diagram:
-
Using the provided USB cable plug your Arduino into your computer.
-
Launch the Arduino software.
-
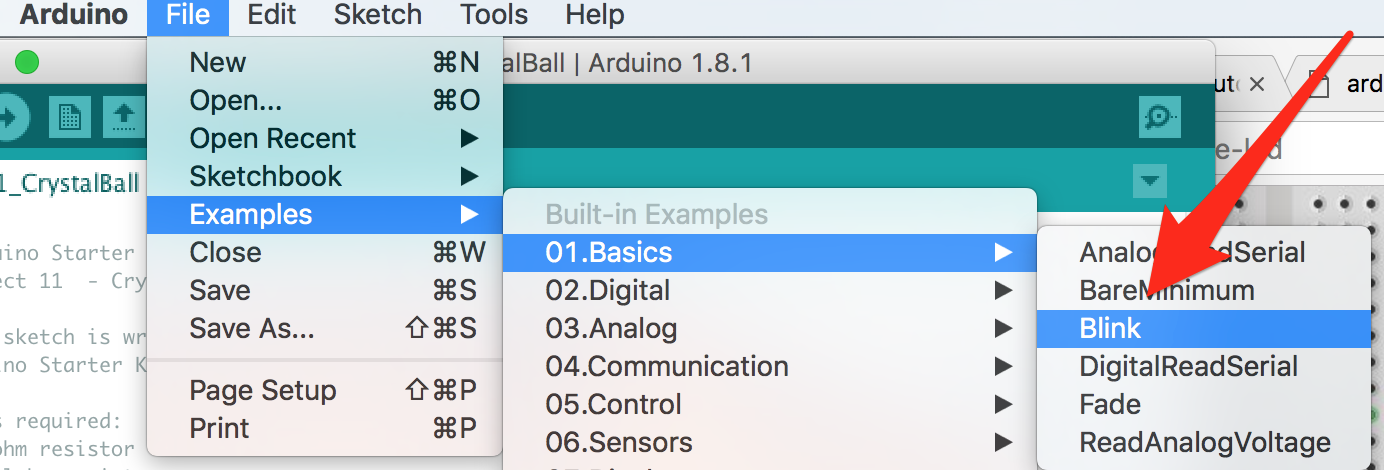
Go to the top menu and select: Files -> Examples -> 01.Basics -> Blink
-
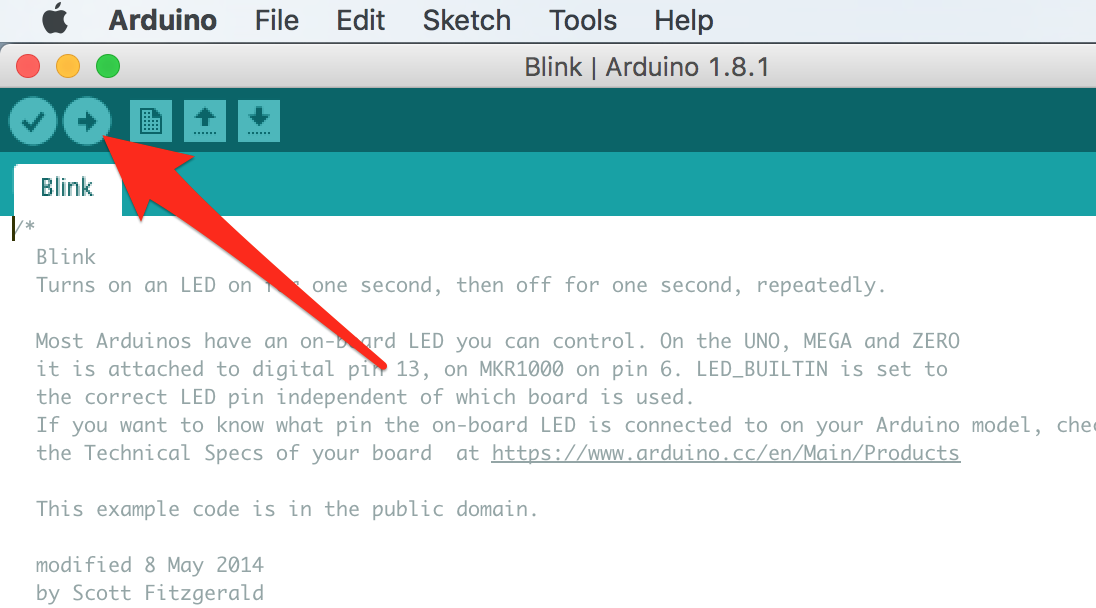
Upload the Blink code to your Arduino by pressing the Upload button.
-
Your LED light should now be blinking! Congratulations!
-
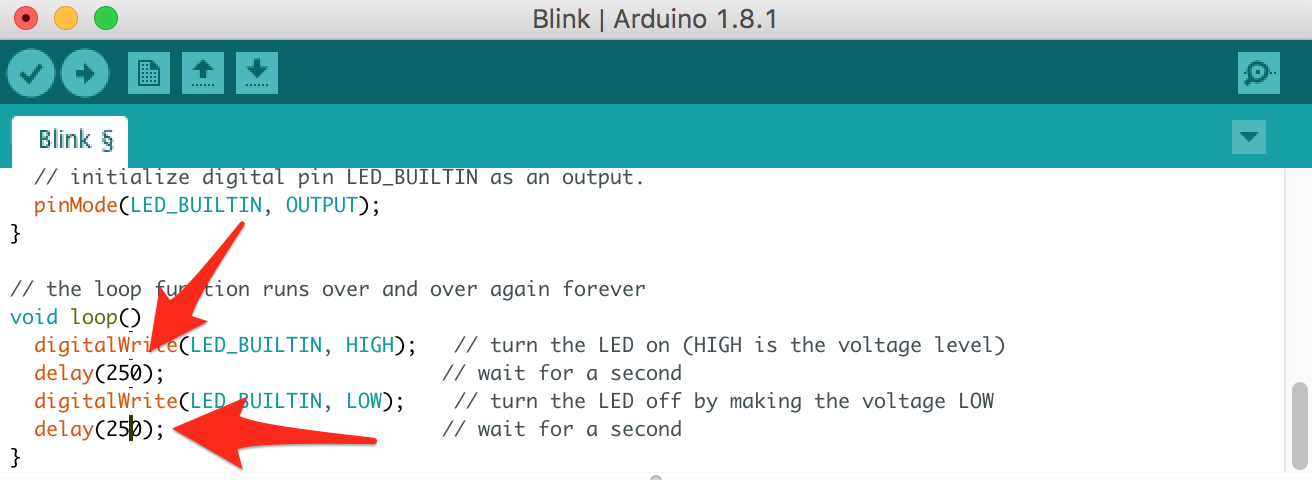
For fun, let’s make the LED light blink faster. In the Arduino IDE, scroll to the bottom of the code and change the two lines that say, delay(1000) to delay(250). Press upload and see the difference. Feel free to play around with the code to see what changes. Have fun!