2 Meter COVID Sensor
If you and your group have any questions or get stuck as you work through this in-class exercise, please ask the instructor for assistance. Have fun!
-
If you haven’t already, please go to the TinkerCad website and create an account
Once you have the account created, go to Dashboard -> select Circuits on the left side panel -> select Create new Circuit
Materials needed (all of the materials are located in the Basic Components section on the right side, except for wires. You can also search for items):


- Arduino Uno R3
- Breadbord Small
- 2 LED Lights
- 2 220-ohm (or 220 Ω) Resistor with the following striping from left to right: red, red, brown, gold
- 1 Ultrasonic Distance Sensor (HC-SRO4)
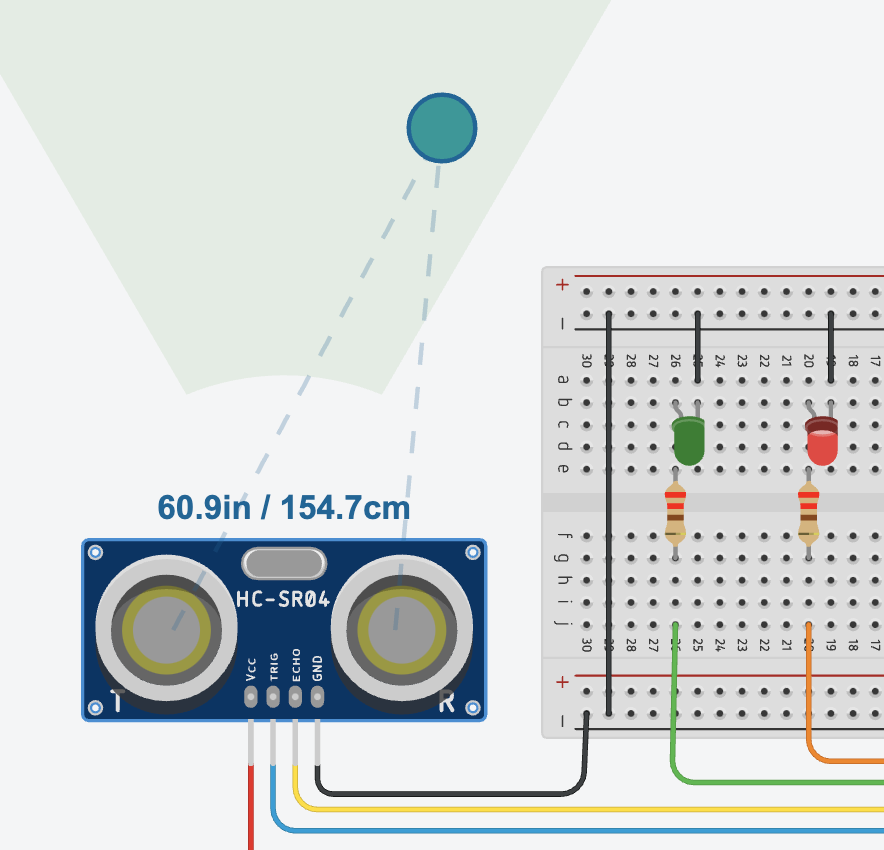
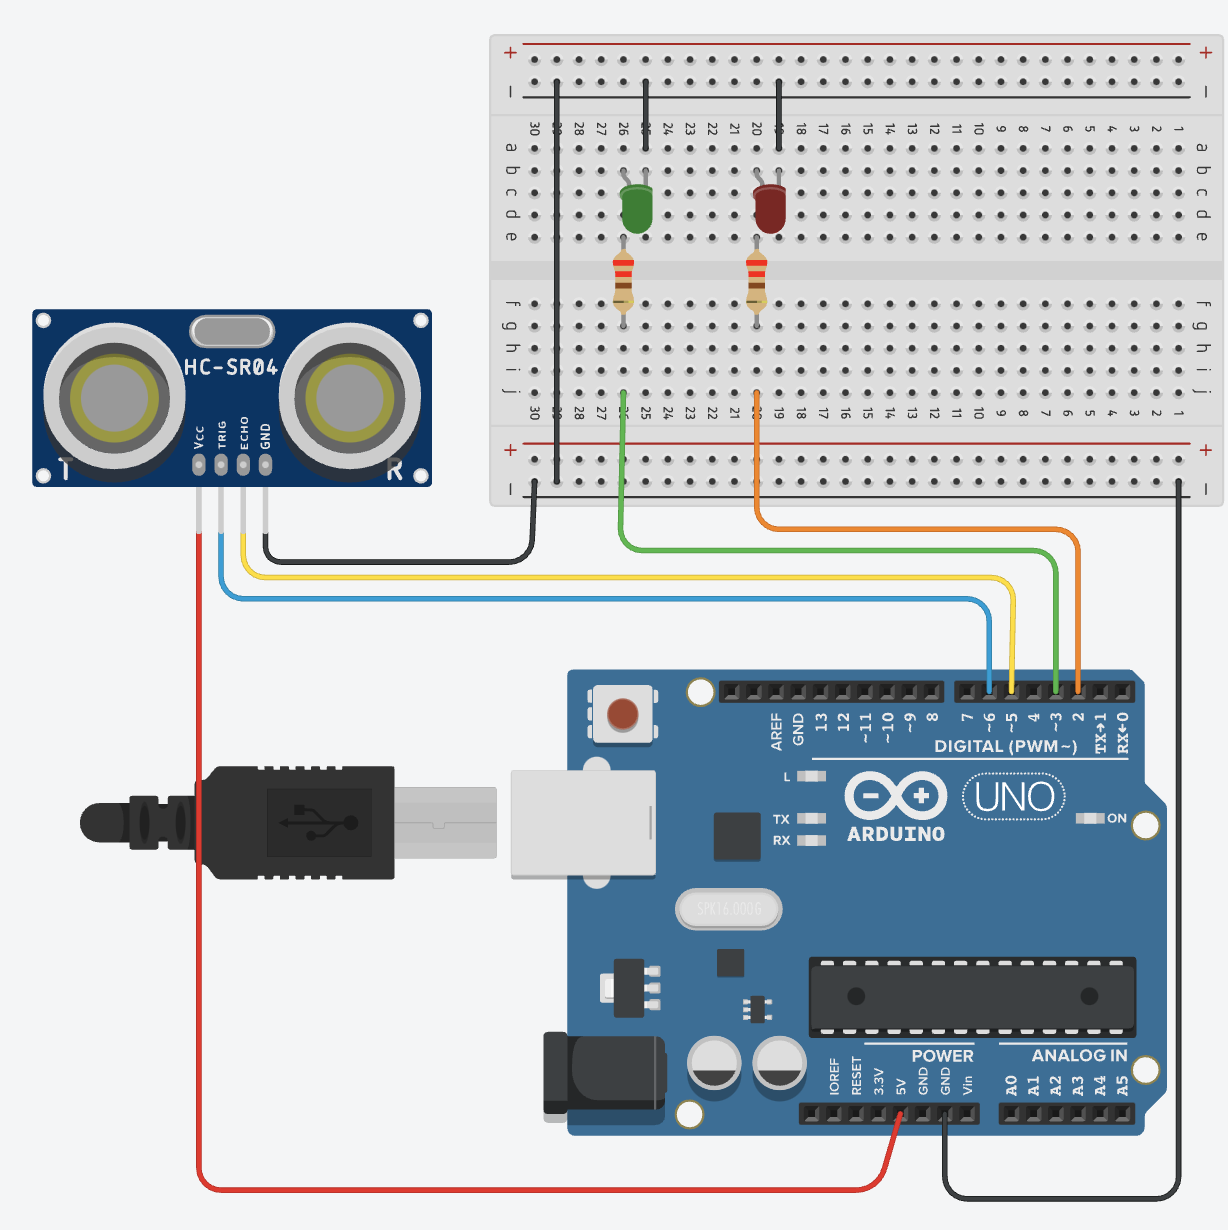
Connect as shown in this diagram:
-
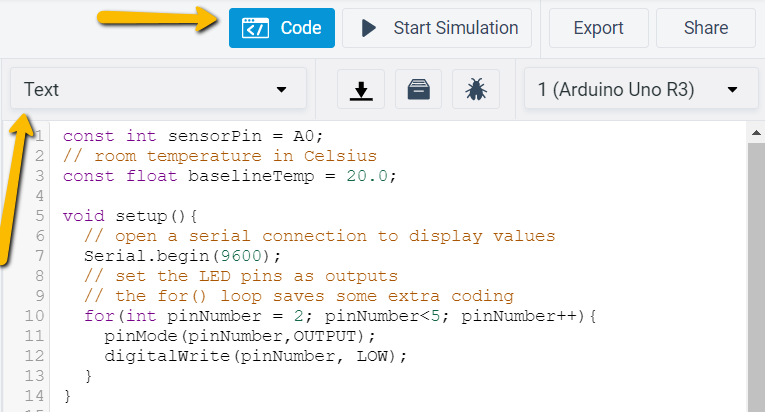
Tinkercad would not produce the desired code by itself, so once everything is connected, go to the Code section, switch the option to Text and paste the following code (replacing the code that is already there):
int LED_GREEN = 3; int LED_RED = 2; int TRIG_PIN = 6; int ECHO_PIN = 5; // the setup function runs once when you press reset or power the board void setup() { Serial.begin(9600); // initialize led pins as output. pinMode(LED_GREEN, OUTPUT); pinMode(LED_RED, OUTPUT); // initialize sensor pins pinMode(ECHO_PIN, INPUT); pinMode(TRIG_PIN, OUTPUT); } // the loop function runs over and over again forever void loop() { delay(300); // Clears the TRIG_PIN condition digitalWrite(TRIG_PIN, LOW); delayMicroseconds(2); // Sets the TRIG_PIN HIGH (ACTIVE) for 10 microseconds digitalWrite(TRIG_PIN, HIGH); delayMicroseconds(10); digitalWrite(TRIG_PIN, LOW); // Reads the ECHO_PIN, returns the sound wave travel time in microseconds long duration = pulseIn(ECHO_PIN, HIGH); // Calculating the distance // Speed of sound wave divided by 2 (there and back) int distance = duration * 0.034 / 2; // Displays the distance on the Serial Monitor Serial.print(distance); Serial.println("cm"); // Set the led state based on the distance digitalWrite(LED_GREEN, distance >= 200 ? HIGH : LOW); digitalWrite(LED_RED, distance < 200 ? HIGH : LOW); } -
Once everything is connected, click Start Simulation in the top right corner. You should see the light starting to blink

-
Now click on the Ultrasonic sensor, and then move the green button around with your mouse to simulate objects being more or less than 2M away from the sensor. Have fun playing around!