Connecting to Data
if you and your group have any questions or get stuck as you work through this in-class exercise, please ask the instructor for assistance. Have fun!
Please note that creating a Tableau account and using the application requires your email address and data you load into Tableau Public to be stored on/shared with Tableau servers located outside Canada. B.C. privacy legislation requires we inform you of this and obtain your consent to this arrangement. Participation in this workshop will be considered as your consent.
- Getting Familiar with Tableau
- If you haven’t already, download and install Tableau for Students (Instructions on how to download are located in the pre-workshop activites)
- Open Tableau Desktop and get familiar with the interface
- Discover Pane (right): Educational resources and links to relevant content
- Recent Flows (middle): Previous files are displayed here
- Connections Pane (left): Select a data source
- Getting Started With Data
- In the Connections Pane (left), click Microsoft Excel. Open the Global_Superstore_Orders_2016.xlsx file you downloaded to your computer. If you haven’t already downloaded it, download it now.
- In the Connections Pane (see animation below), you will see all the sheets in the Excel file. Drag the Orders sheet into the Flow Pane as shown.
- The Orders sheet can be renamed by simply double-clicking on the sheet name. Rename the sheet to Global Superstore Orders.
- The data can be viewed in the data grid. You can rename a column by double-clicking on the column name (see animation below).
- You can also change the default data type by clicking on the data icon as shown. There are five data types: numeric (
 ), text (
 ), geospatial (
 ), date (
 ), and date-and-time (
 ).
).

- Working With Data
- Click the Sheet 1 tab on the bottom toolbar to create your first worksheet

- You will see column names on the left-side menu, broken up into dimensions (blue) and measures (green). Dimensions are fields that contain qualitative or categorical information, while measures are fields that contain quantitative information and can be aggregated or used in mathematical operations.
- Let’s explore the relationship between two variables: Sales (in Measures) and Order Date (in Dimensions).
- Click and drag the Sales measure into the Rows shelf (top).
- In the dialog box that appears, select AVG(Sales) to display the average sales.
- Click and drag the Order Date dimension into the Columns shelf (top).
- In the dialog box that appears, click YEAR(Order Date) if it is not already selected. Tableau will automatically create a visualization

- Click the ”+” in the YEAR(Order Date) blue pill and drill down to get quarters
- Click Show Me (top right) to display the different plot types that Tableau recommends. Try a few and think about their effect on the 4 data visualization principles
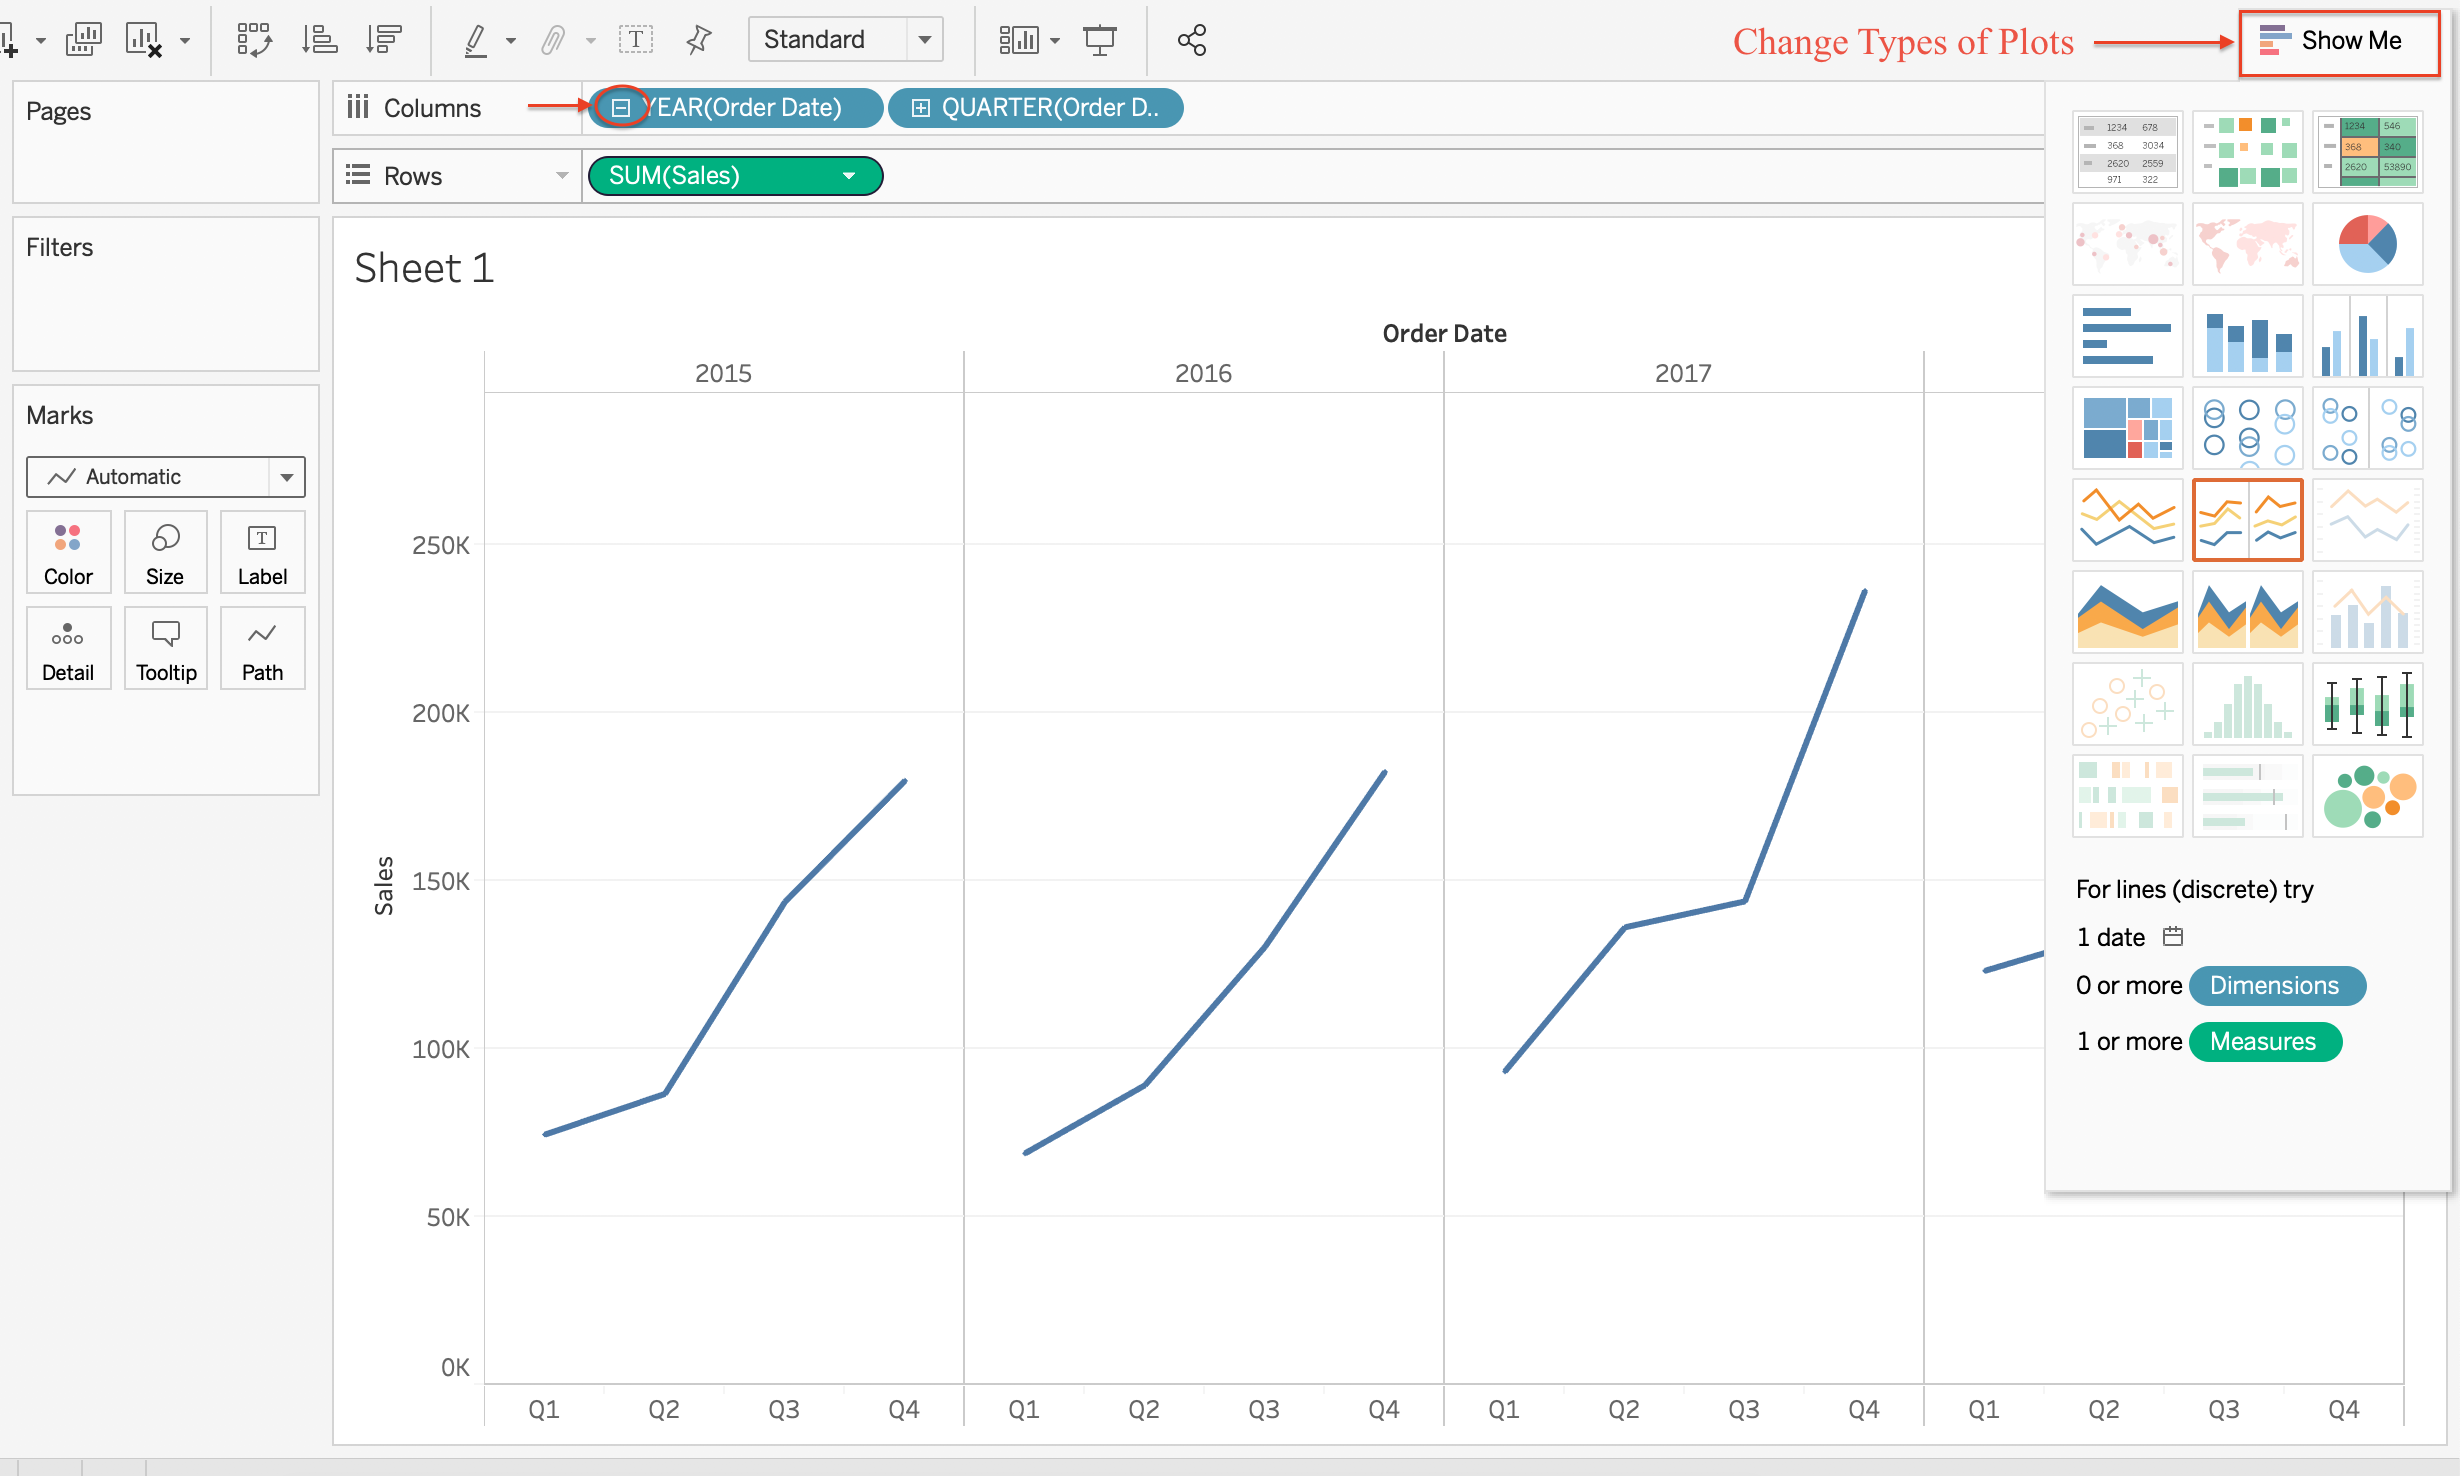
- The Marks card (to the left of the visualization) is where you can control the visual features of your plot. Try changing the colour and size.
- You can also control the visual appearance of your plot based on dimensions of interest. For example, right-click and drag the Category dimension onto the Color card. Select Category in the dialog box that appears. Please note that the dialog box does not always appear.