Next level Audacity tips
This section is our Audacity tips and troubleshooting guide. It is intended for folks who have some practice with the basics of working in Audacity, as described in the Podcast recording with Audacity workshop and who want to learn more tricks and tips to improve audio quality, or level-up their Audacity skills a little more.
We have curated this list to appeal to beginners. Where helpful, we provide links to Audacity’s Manual pages, for those wishing to dive deeper into certain Audacity features.
Audacity tips
Noise Reduction
Purpose: to remove unwanted background noise(s), like the hums of background traffic, or the hiss of a fan or other electronics. The Noise Reduction effect generally works best with consistent noise, not sharp spikes in sound.
Menu location: Effect > Noise Removal and Repair > Noise Reduction…
How to use Noise Reduction
In overall terms, we first have to teach Noise Reduction tool to identify the noise we want to remove, then we apply the effect.
- Use the Selection Tool to select a portion of the waveform that contains only the noise we want to remove. For example, in the case of a buzzing sound during an interview, you would select the part of the waveform between people talking.
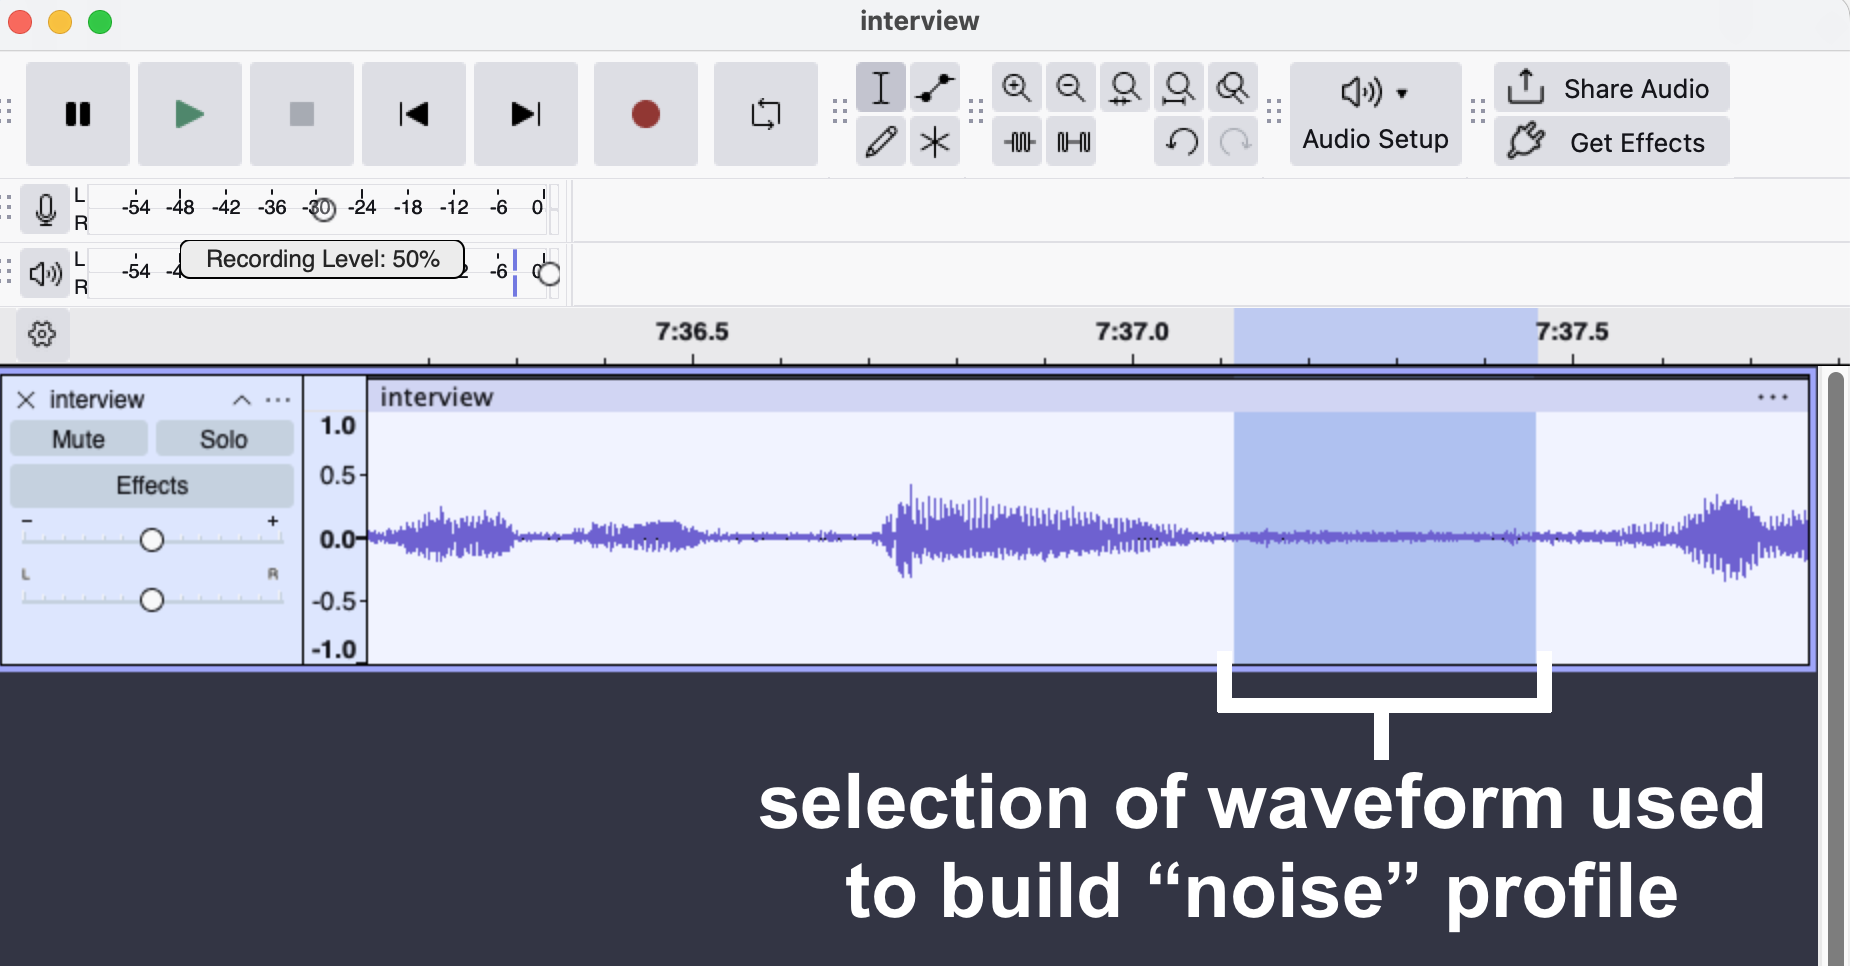
- In Audacity’s main menu, select Effect > Volume and Compression > Noise Reduction. You will see the Noise Reduction popup.
- In Noise Reduction popup, click on the Get Noise Profile button. NOTE that the popup window will close. This is normal: it has now gathered a noise profile that will remain until you close Audacity.
- Select all or some of the track to which you want to apply the Noise Reduction effect.
- In Audacity’s main menu, select Effect > Volume and Compression > Noise Reduction. You will see the Noise Reduction popup again.
- Experiment with the Noise Reduction option (the sliders) to produce the desired effect:
- Noise Reduction (dB): controls the volume of reduction to be applied to the noise, in other words, how much of the noise to remove, relative to the rest of the sounds. The default setting is 6, but this will likely need to change.
- Sensitivity: determines how much of the audio is considered “noise.” This setting is important to get right. If you set this too high, then your track will have “artifacts,” like strange tones or chirps. The default setting is setting is 6.00, but experiment with this.
- Frequency Smoothing (bands): sounds are collections of various frequencies, and this tool allows you to tweak which ranges of frequencies are changed by the Noise Reduction effect, based on the noise profile you gathered when you clicked on the Get Noise Profile button. If your noise is light, try setting this to 0 (off). In general, settings lower than 6 (the default) favour music and higher settings favour spoken word.
- TIP: to preview just the noise being removed, select on the Residue button, then the Preview button.
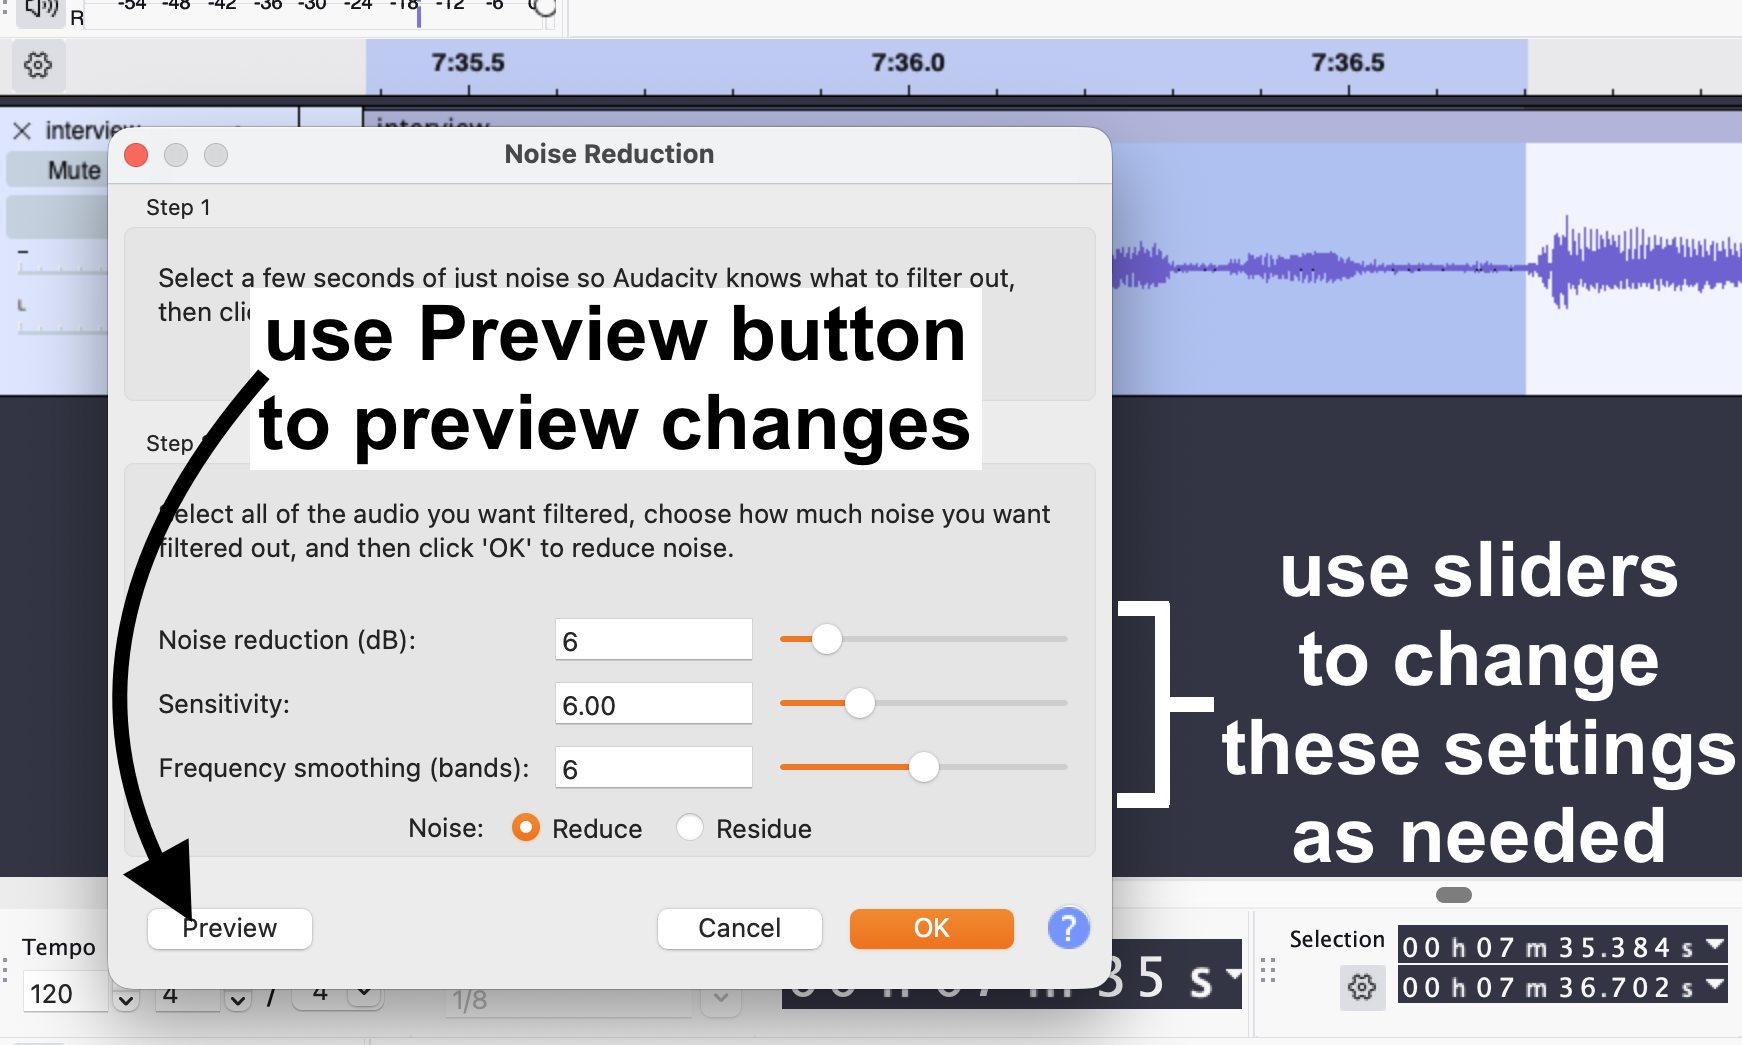
- Assuming that you are happy with the results of your tweaks, click on the OK button to apply your effect.
Tips: remember to use CTRL/CMD + Z to undo any unwanted changes. Closing Audacity will remove the saved Get Noise Profile. So, if you need to start again, and get a new noise profile, save your project, close Audacity, and reopen it.
More info: see the Audacity Manual page on Noise Reduction for more details.
Normalize
Purpose: The Normalize effect, among other things, sets the same peak amplitude (volume) within a track, or selection of a track. You can apply this effect to multiple tracks (or all your tracks) to make sure that they all have the same peak level.
This effect is different than Amplify, and is very helpful in cases where you have, for example, multiple interview and music tracks, each with their own amplification levels (loudness), and you want them to all have the same peak levels.
Menu location: Effect > Volume and Compression > Normalize…
How to use Normalize
For this example, we will use a selection of a mono audio track that is much louder than the audio on either side of it.
The goal is to make sure that this section of audio sounds similar to the rest, and to make sure that it does not clip, or be so loud as to be distorted.
- Use the Selection Tool to select a portion of loud audio.
- In Audacity’s main menu, select Effect > Volume and Compression > Normalize. You will see the Normalize popup.
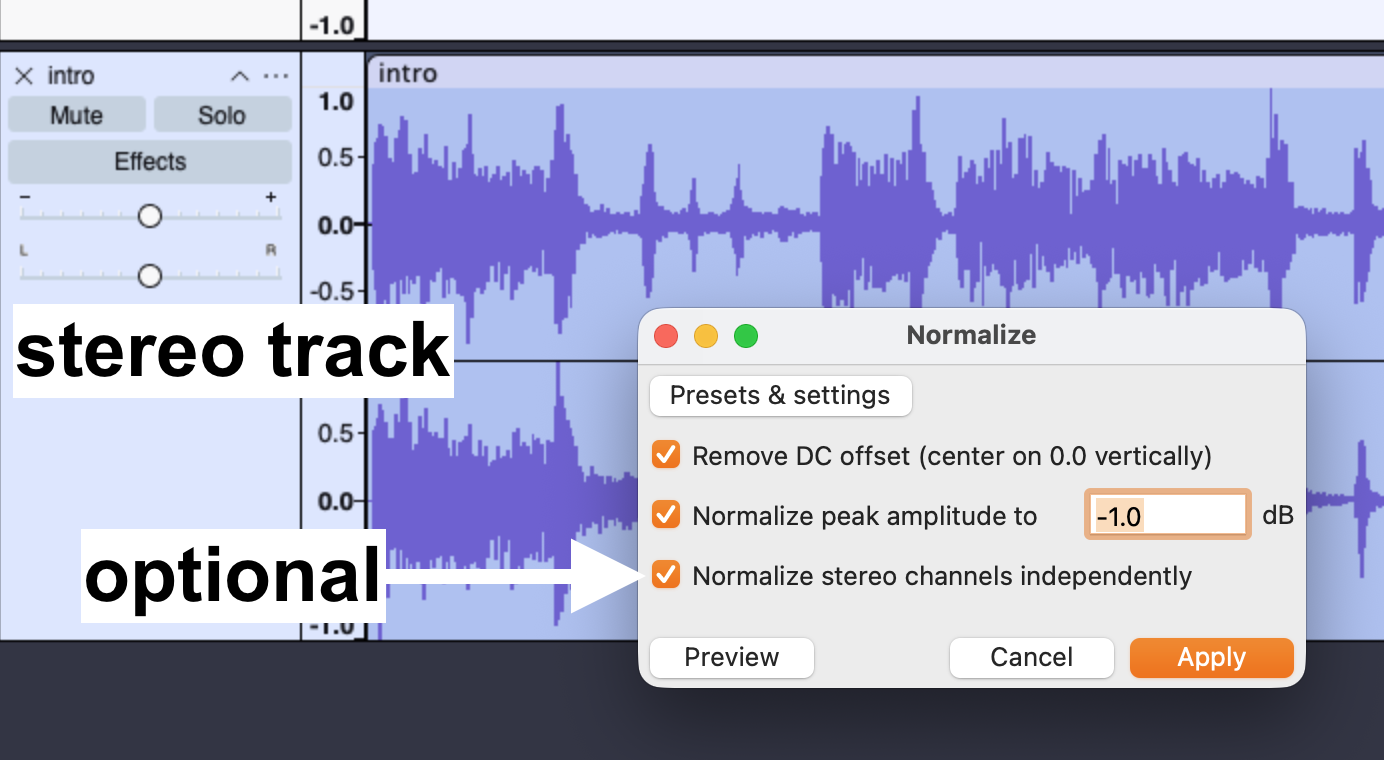
- Leave the default settings alone and click on the Apply button. Here is an image of the process:
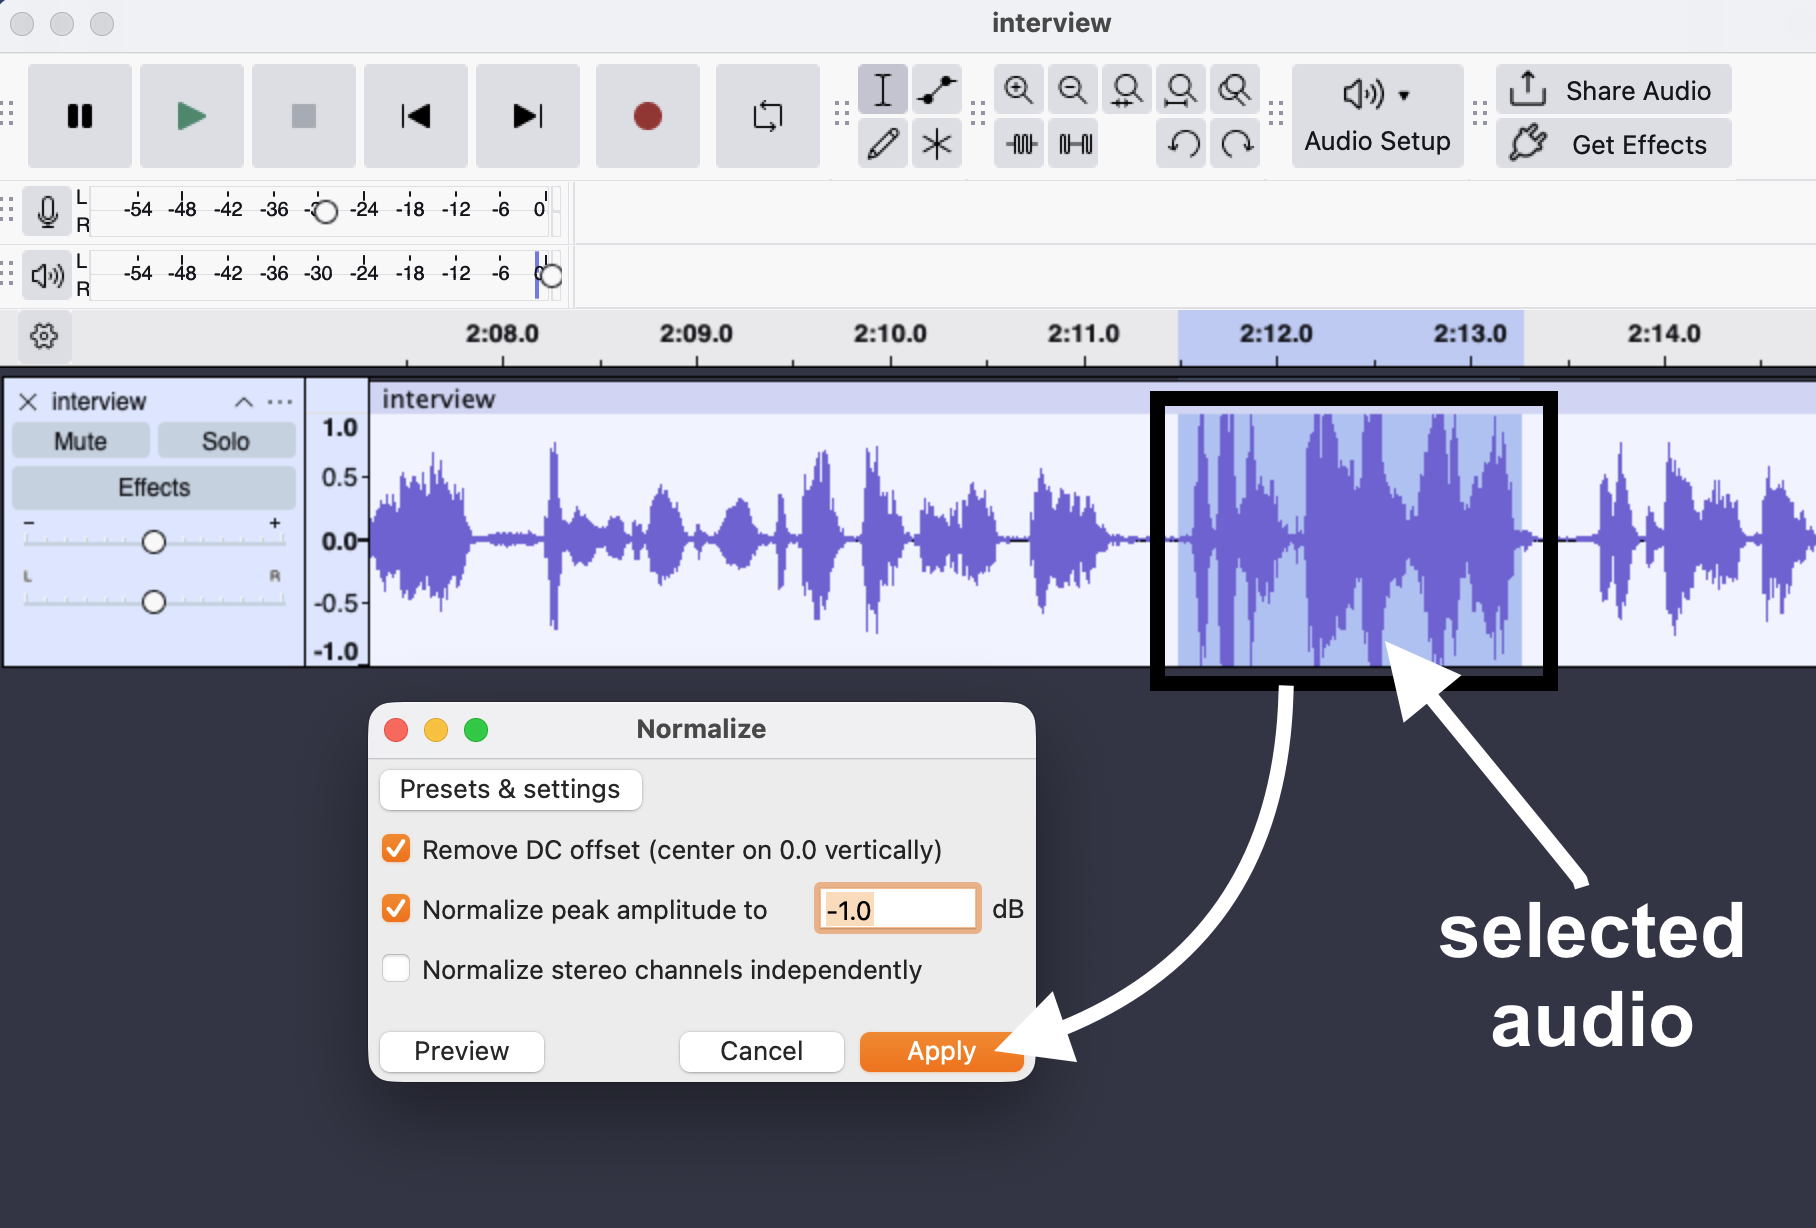
And here is an image of the results on the selected audio. Notice how the clip we selected has peaks much closer to the audio on either side of it: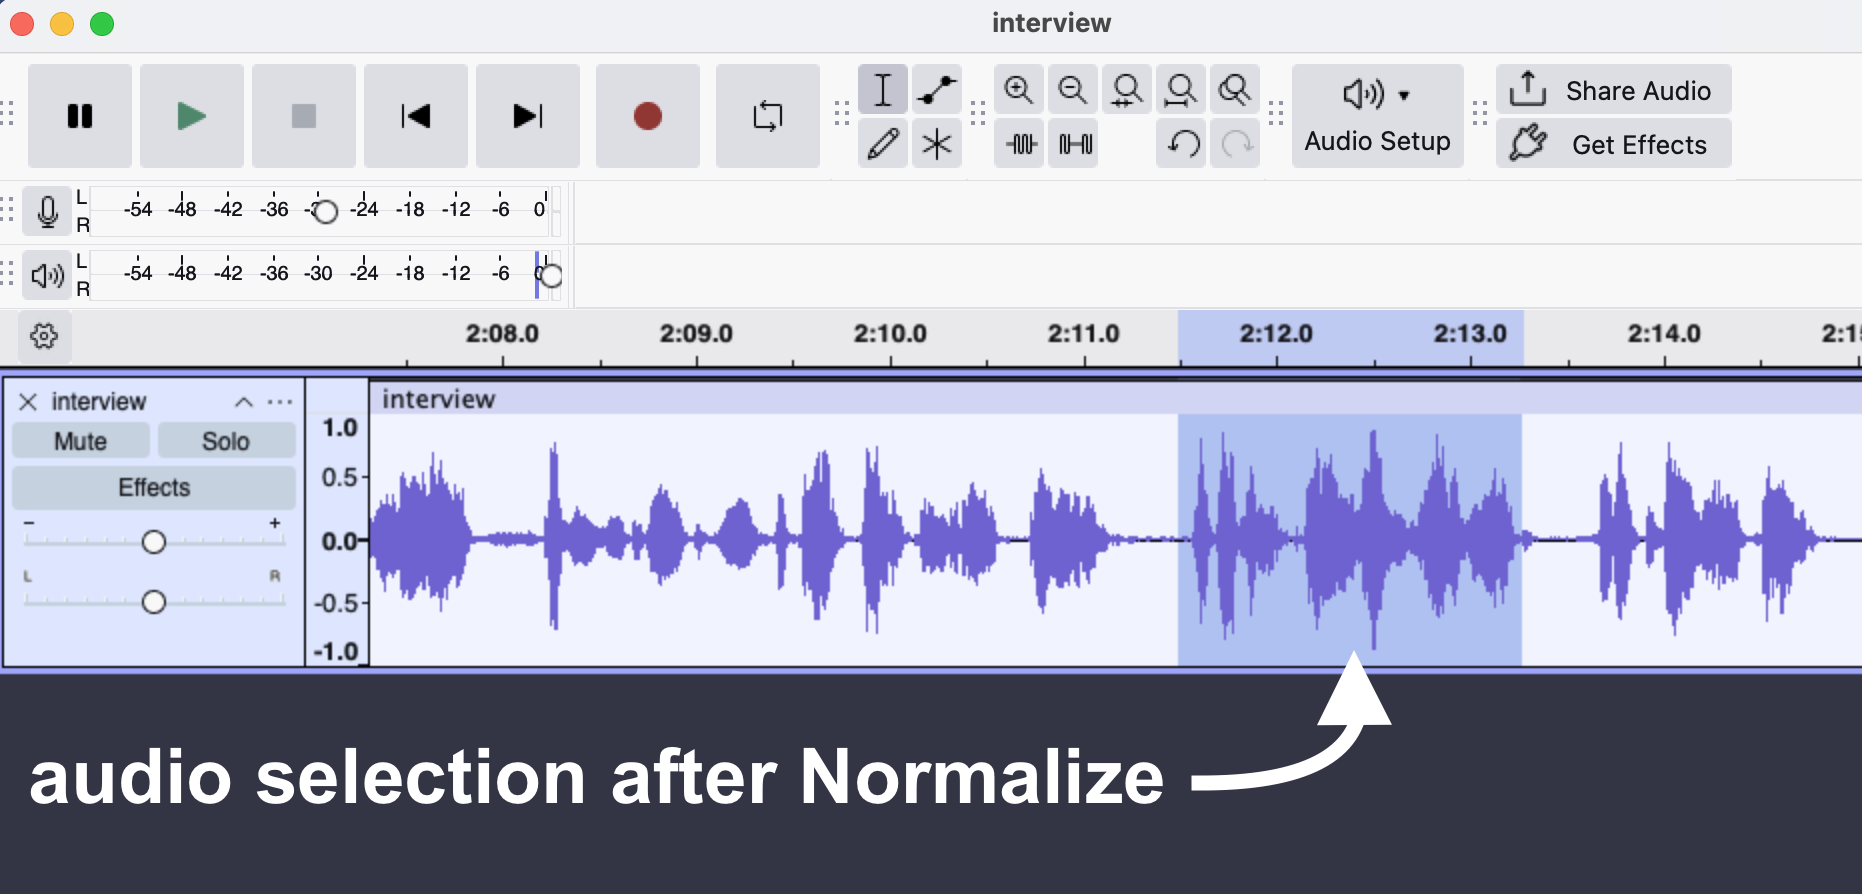
Tips: you can apply Normalize to an entire clip (mono or stereo) by double-clicking anywhere in the track to select it (the track will have a blue overlay to show it is selected), and applying Normalize.
Note that with stereo tracks, you have the option to “Normalize stereo channels independently.” This option can be helpful when you want to preserve the relative balance of levels in each track independently.
More info: see the Audacity Manual page on Normalize for more details. See also Audacity’s Amplify and Normalize guide for the differences between Amplify and Normalize, and ideal times to use each.
Compressor
The Compressor compression effect literally “compresses” the dynamic range (the differences between loud and quiet/low and high amplification) of audio. Put another way, it brings the loud and the quiet parts of a track closer together.
This effect can be useful in interview audio tracks that have a mix of quiet and loud parts. Were you to use the Amplify effect on the track to hear the quiet parts better, you might force the louder parts to clip, or be so loud as to be distorted.
Using the Compressor effect will press the loud parts down and lift the quiet parts up, so that the next time you apply Amplify, the whole track can be amplified without the same risk of clipping.
Finally, compression, as an effect on vocals, tends to make voices sound “closer” to the mic, or more rich and full of depth. A classic example of compression used in popular music is the way Thom Yorke’s vocals sound in Radiohead.
As with all effects, overdoing it can have strange and unwanted consequences. So, for the purposes of this tutorial, we will use one of Audacity’s built-in presets.
Menu location: Effect > Volume and Compression > Compressor…
How to use Compressor
For the purposes of this demonstration, we will apply the Compressor effect to an entire mono audio track (and interview recording).
- Double-click anywhere in the track to select it (the track will have a blue overlay to show it is selected).
- In Audacity’s main menu, select Effect > Volume and Compression > Compressor. You will see the Compressor popup.
- Click on the Presets & settings button, hover over Factory Presets, then select Podcast/Radio.
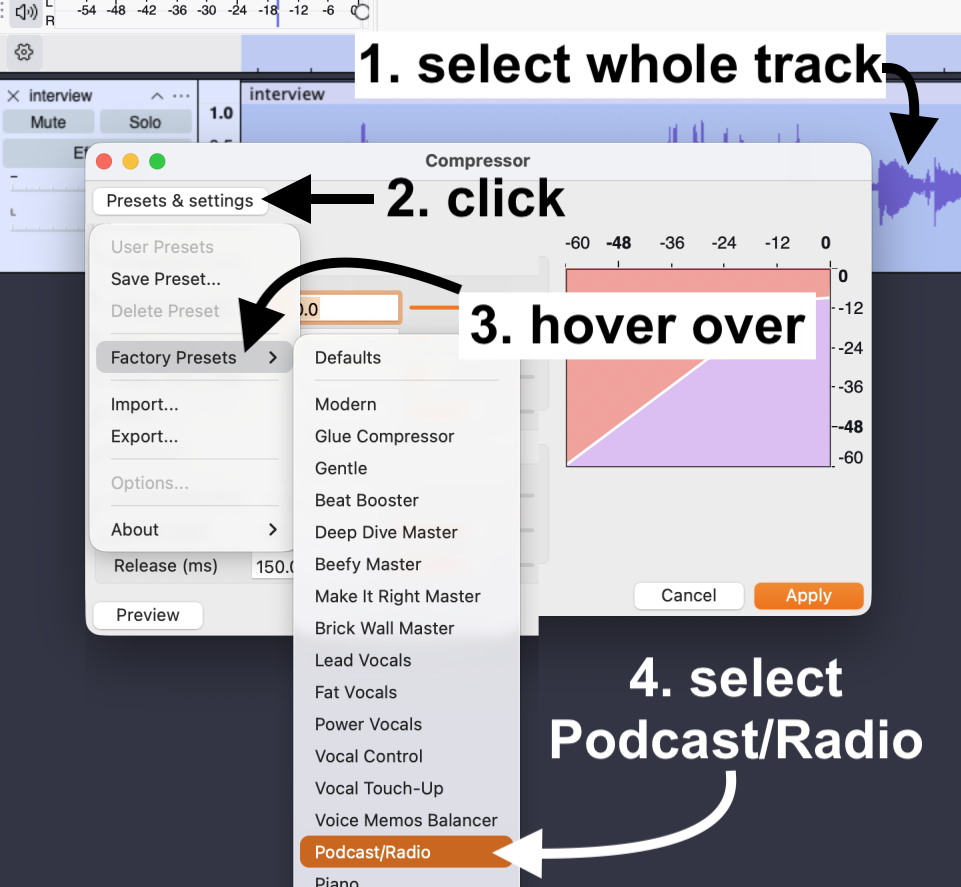 This will return you to the Compressor popup, so we can preview the effect before applying it.
 - In the Compressor popup, click on the Preview button.
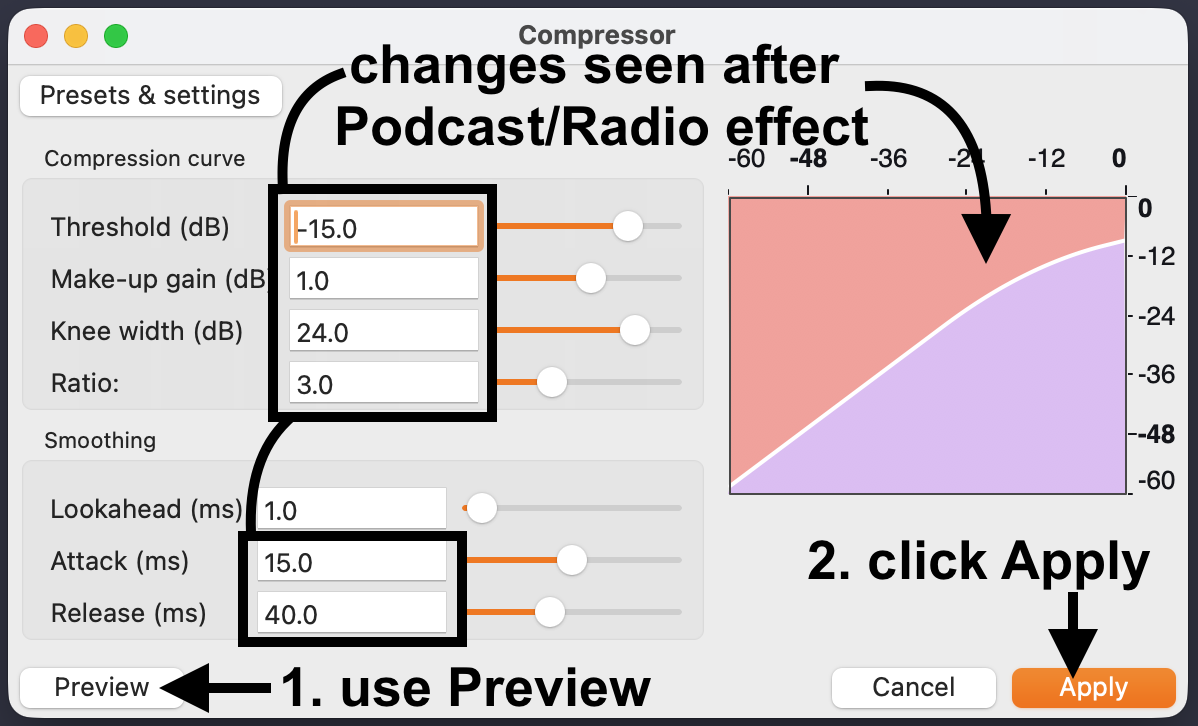
- Assuming that you are happy with the results, click on the Apply button to complete your changes.
Tips: assuming that you are working with spoken word voice tracks from your podcast interview(s), try other Compressor Factory Presets to see if they work better for you. For example, Audacity has Vocal Touch-Up and Voice Memos Balancer, which might work well for spoken word recordings.
More info: see the Audacity Manual page on Compressor for more details. Using compression is a huge subject with many varied opinions, but if you want to play with the finer points of the process in Audacity, see their Reducing dynamic range (Compressor / Limiter) Support page.
Audacity troubleshooting
Installing FFmpeg
Depending on what type of audio files you import or export in Audacity (and your version of Audacity), you might be prompted by Audacity to install a software suite called FFmpeg.
Basically, FFmpeg allows you to work with a variety of audio file types not already handled by Audacity by default. In other words, you will be able to import and export pretty much any file type you would ever need to if you have FFmpeg installed.
Audacity’s Support website walks you through how to install FFmeg for Windows, Mac, and Linux. See Installing FFmpeg for more.