Podcast recording with Audacity
Introduction
Once you’ve planned out your show, you can begin recording audio. Podcasts can be made with the simple set-up of a computer with a built-in microphone and access to the internet. But, you will produce a higher quality podcast if you use better recording equipment and put a little work into your recording location.
NOTE: If you are participating remotely, some find it difficult to participate in the video conference session and record audio in Audacity. If that is the case for you, please install Audacity, then practice recording audio as outlined in the activities that follow. You can also use this optional audio file, which is provided in the Editing Audio section of this workshop.
Before you record
Before we use Audacity to record, we need to consider a few things to make the process easier and to produce higher quality audio.
Getting your equipment setup properly for your particular space will save you the hassle of having to tweak your recordings in “post.”
Location tips

- Find a quiet room. Typically, bedrooms and closets are good locations, as they already have features like beds and fabrics, which “baffle” sounds.
- Pick a room free from background noises—which are often sounds we do not usually notice in daily life. Modern microphones are sensitive, so they will pickup the buzz of a fridge, or outside traffic noise, or the hum of a fan running in a nearby room.
- Choose a smaller room with with minimal reflective surfaces, which can cause echos. One way to test for echos is to stand on the centre of your space and clap loudly. It might take a few claps to hear it, but rooms with a lot of flat surfaces will have a more sustained echo “flutter” than a smaller room with soft surfaces.
- Little acoustic changes can make big differences: placing a soft rug under your chair and sitting next to some thick curtains could be enough to provide a balanced acoustic space. The goal is not to eliminate all echos, as that will make the room sound acoustically “dead.”
NOTE for UVic students, staff, and faculty: UVic offers resources for podcasting and audio recording, including bookable media-creation rooms. The Mearns Centre for Learning, in the McPherson Library, has a dedicated podcast room. UVic students can also use the podcast corner in the Human & Social Development Building. In addition, the McPherson Library and HSD building have dedicated sound and video rooms. Another option is to borrow media equipment from the McPherson Library by going to the Ask Us Desk on the main floor.
If you haven’t done so already, please download and install Audacity on your laptop. If you missed it, step 1 of the Pre-Workshop Activities page has download links for Mac and Windows computers.
Assuming that you have successfully installed Audacity, let’s take a look at some time-saving and recording-quality tips. After that, it will be time to do a test recording.
Equipment tips

- If possible, use a high-quality microphone to record with, rather than your laptop’s built-in microphone.
- We recommend over the ear headphones when recording, so that you can more easily hear any background noises that you do not want to be recorded.
- Place your microphone strategically: the appropriate distance between your mouth and the microphone is roughly 6 to 12 inches. This distance prevents “popping” noises and heavy breathing in your recording. If you sound thin and distant, get slightly closer to the microphone.
- Speak clearly and articulate your words, but try to speak conversationally, as if speaking to a friend. If you are sitting in a chair, try to sit up straight. Some people prefer to stand while recording, as this can help to give more energy to your voice.
TIP: once you get your room setup the way you like, take pictures of the space and setup. Most of us do not have dedicated recording rooms. Having reference pictures for later will make it easier to repeat your setup, and to capture a consistent sound for your recordings.
Now that we have some basics in hand, let’s move on to the recording process in Audacity.
If you have any questions, or get stuck, as you work through these in-class exercises, please ask the instructor for assistance. Have fun 😀
Setting up the microphone in Audacity

Getting your computer to record from an external microphone (if you are using one) takes a bit of setup.
- Plug your USB microphone into your computer and turn it on before opening Audacity. Audacity may not recognize the microphone unless you do this. If Audacity is already open, save your project, quit Audacity, turn on the microphone, and then re-open your project.
- Change Audacity’s settings in Audio Setup. All the following changes are accessed using the Audio Setup menu button (in both Windows and Mac computers).
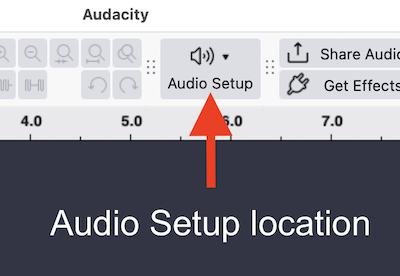
Here is an animation of the general process in Windows, but the overall process is the same in all versions of Audacity:

Windows settings to record from an external microphone:
- click on Audio Setup (menu button), hover over Host, select MME
- click on Audio Setup, hover over Playback Device, select Speakers (USB Condenser Mic)
- click on Audio Setup, hover over Recording Device, select Microphone (USB Condenser Mic)
- click on Audio Setup, hover over Recording Channels, select 1 (Mono) Recording Channel
Mac Settings to record from an external microphone:
- click on Audio Setup (menu button), hover over Host, select Core Audio
- click on Audio Setup, hover over Playback Device, select Speakers (USB Condenser Mic); tip: if you do not find a USB mic as an option in the Audio Setup menu, confirm that the device is plugged in and turned on (if it has a power button), then exit and restart Audacity
- click on Audio Setup, hover over Recording Device, select Microphone (USB Condenser Mic)
- click on Audio Setup, hover over Recording Channels, select 1 (Mono) Recording Channel
Assuming that your Audacity settings are complete, let’s try a test recording.
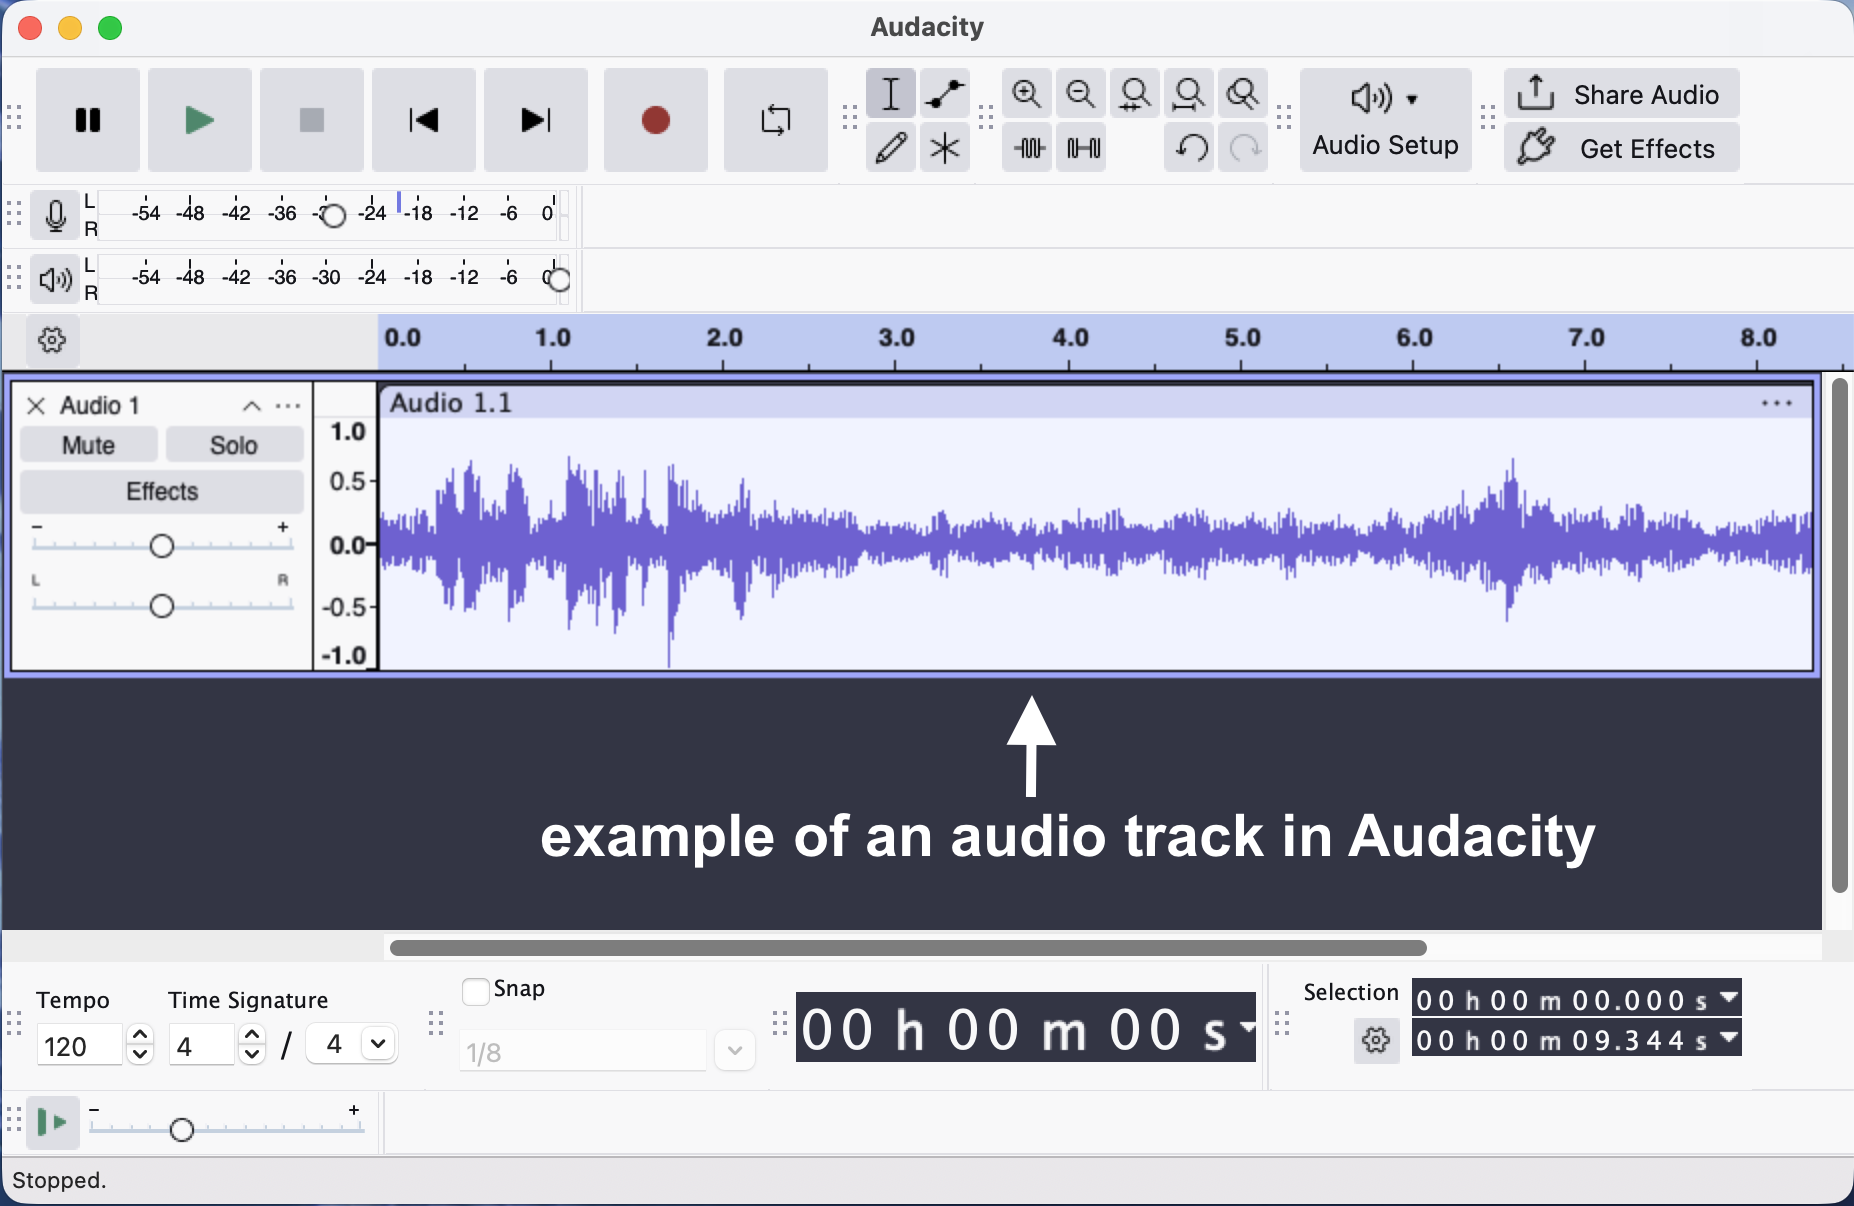
Record some test audio in Audacity
Ideally, you will record your test audio in the same location you intend to conduct your interview.
Here are the steps to testing your recording setup quality:
- Put on your headphones (or insert your earbuds) in order to hear the audio.
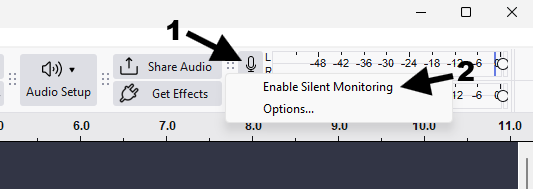
- In Audacity, check your levels by looking for the microphone icon on the top ribbon, click on the microphone icon and select “Start Silent Monitoring.”
- Talk into your microphone and make sure your audio levels do not peak into the red as you talk. The optimal point for your microphone levels is just below the red.
- Stop talking for 10 or 20 seconds to determine if your recording spot has any background noise that would be disruptive to your podcast recording.
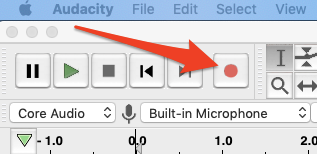
- Record some test audio by clicking on the red “record” button on the top navigation bar (see image at right). After 20 to 30 seconds, press the square “stop” button. In case you do not know what to say, here is a Sample Podcast Script to get you started.
NOTE: ignore and close any popups that report slow hard drive speed.

Review your audio

.jpg)
Now that we have recorded some test audio, it is time to hear how it sounds.
Here are the steps to listen to your recorded audio:
- In Audacity, click your cursor at the beginning of the blue audio timeline and then press the spacebar on the computer—hitting the spacebar is how we play or pause the track.
- Listen to the track to determine that you are getting good quality audio. If you are recording with others, listen to see if their voices are clear and at roughly the same volume as the others.
TIP: if you are not getting the quality of sound you like, please refer to our Planning and Tips section for suggestions on how to improve audio quality: Podcasting Tips
Record your first podcast
Assuming that you are happy with your audio levels and quality, you can now record your first podcast 🎤
NOTE: if you are doing the in-person this workshop, there may be a lot of background noise. This noise is not ideal, but for the purposes of this workshop, it is fine.
At this phase of the workshop, we want you to record between 2 and 5 minutes of audio for you to edit in the next step.
Do your best and have fun being a podcast host 😎
Once you have finished your recording, it is time to edit your audio…