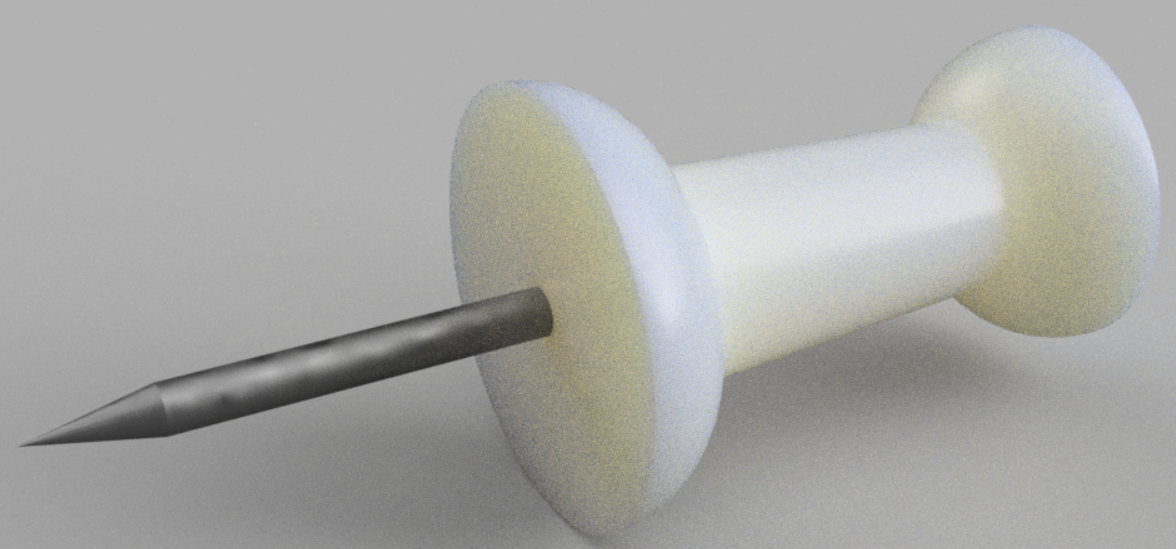
Create a Push Pin
If you or your group have any questions or get stuck as you work through this in-class exercise, please ask the instructor for assistance. Have fun!
- Download and install Fusion 360:
- Check your laptop specs to ensure it’s able to run Fusion 360. System requirements are listed here: https://autode.sk/2qg8ryB
- Follow this link to make an Autodesk account and download Fusion 360: https://autode.sk/3DW7TRB
- Create a new part:
- Open Fusion 360
- Click on your name in the top-right of the screen, then click on Preferences.
- On the top-right menu, select File, and then New Design.
- Make the plastic part of the push pin:
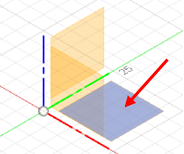
- Select the Create Sketch
 feature. Select the Top plane.
 - Select the Line tool
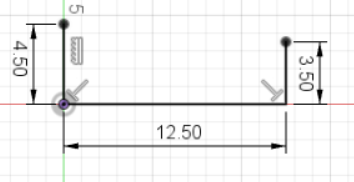
 . Make a “U” shape with lines by clicking on the green axis, then on the origin, then on the red axis, then straight up from that point. Click the Esc key to exit the Line tool.
 - Select the Sketch Dimension tool
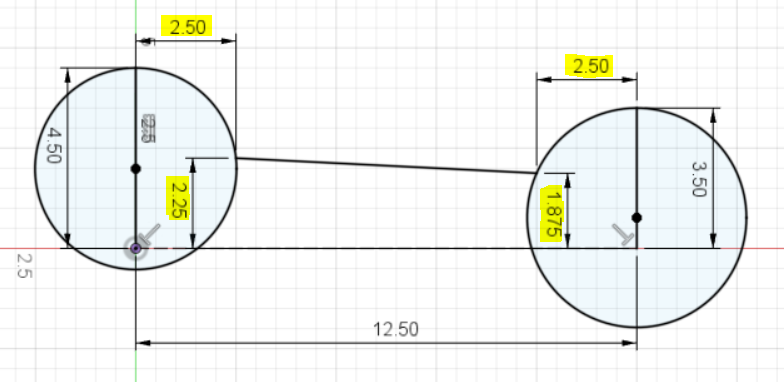
 . Click on the right line, move your mouse slightly to the left the line and click again. Enter 4.5 as the dimension. Repeat with the other two lines and follow the dimensions in the picture to the right. Click the Esc key to exit the Sketch Dimension tool.
- Click on the Center Diameter Circle tool
 . First, click somewhere on the 4.5 mm line, then on the endpoint of the line. Repeat with the 3.5 mm line.
 - Select the Line tool
 . Click on one circle, then click on the second circle.
- Select the Sketch Dimension tool
 . The 2.25 mm dimension can be added by hovering over where the line meets the circle until a point appears, clicking on the point, then clicking on the horizontal 12.5 mm line. Following the same method, add the dimensions highlighted in the picture above.
- Select the Trim tool
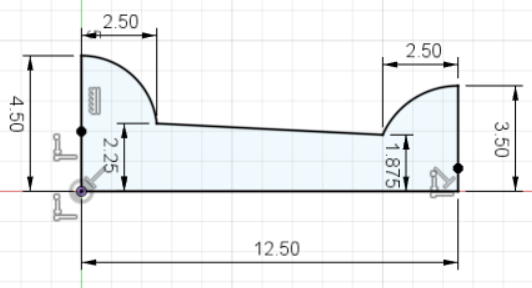
 . This tool allows you to remove sketch entities that are not needed. Click and drag over part of a circle, then release the mouse. Delete parts of the circles until it looks like the diagram to the right.
- Click over to the Solid tab on the top menu, and click on the Revolve feature
 . It will automatically select the interior area of the sketch to revolve. Select the 12.5 mm line as the Axis. Click OK in the Revolve pop-up box.
- Select the Create Sketch
- Add a hole for the metal pin:
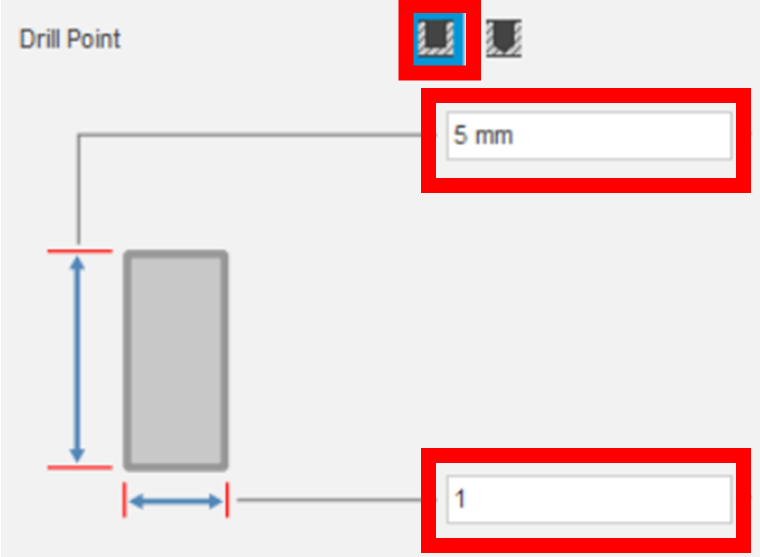
- Click on the Left face of the object. Select the Hole feature
 .
. - Drag the hole so it’s snapped to the origin.
- In the Hole Feature window, change the Drill Point end condition to Flat, change the depth to 5 mm and the width to 1 mm.
- Click OK in the Hole Feature window.
- Click on the Left face of the object. Select the Hole feature
- Make it into a component:
- Click on the arrow next to Bodies in the Browser.
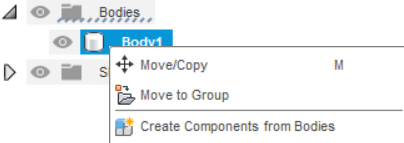
- Right-Click on Body1 and select Create Components from Bodies. This has converted the pushpin body into a component. Components are the individual parts needed in an assembly, while bodies are just building blocks for components.
- Another way to make a component is to specify it before building any bodies. At the top of the screen, click on the New Component feature
 . Click OK in the pop-up box.
- Click on the arrow next to Bodies in the Browser.
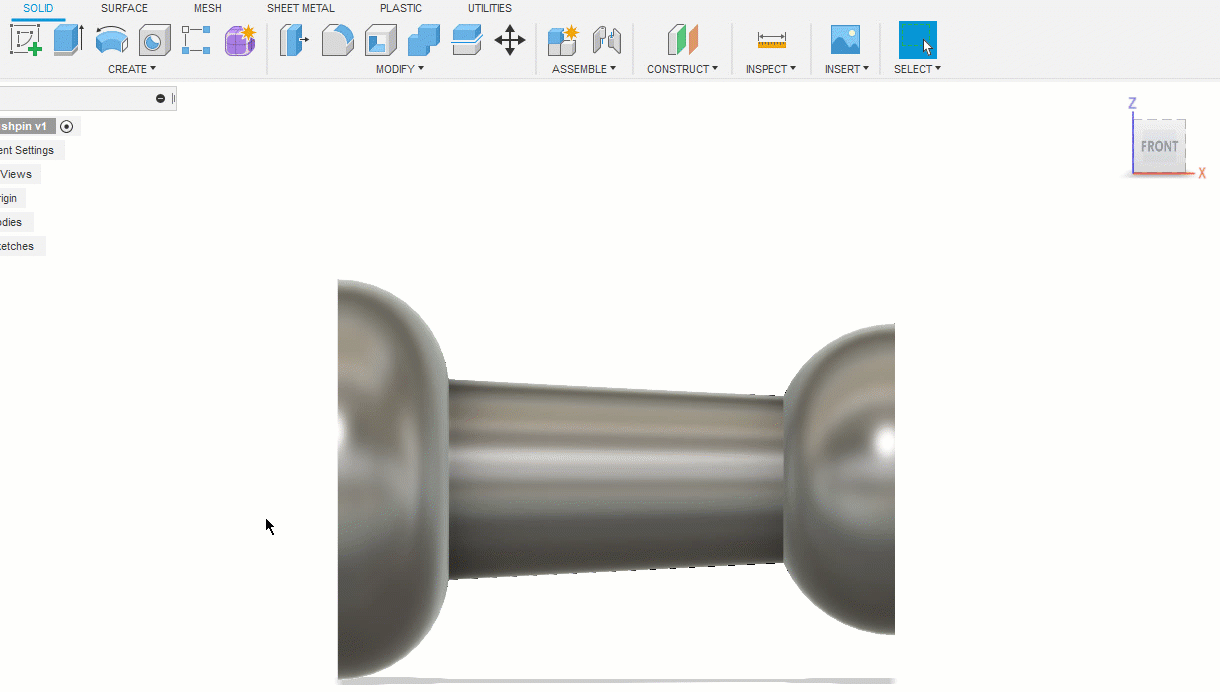
- Make the metal pin:
- Orient the push pin so you can look down the hole. Select the bottom face of the hole.
- Click on the Extrude feature
 . In the Extrude pop-up box, enter 15 mm as the Distance. Select New Component from the Operation drop-down. Click OK.
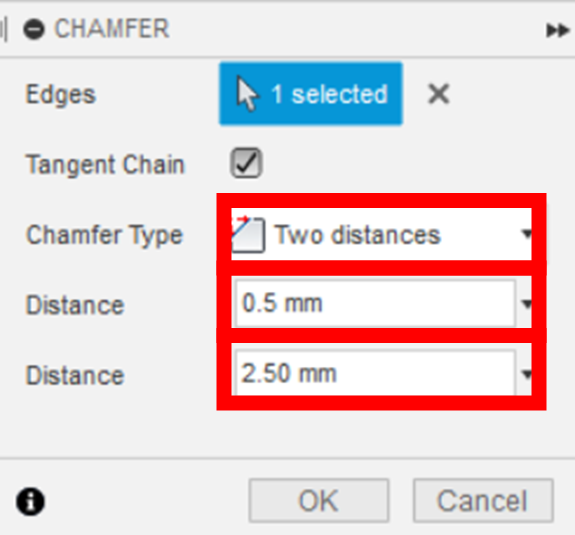
 - Click on the Modify drop-down menu and select the Chamfer tool
 . Select the edge of the metal pin that isn’t in the plastic. Change the Chamfer Type to Two distances, change the first distance to 0.5 mm and the second to 2.5 mm. Click OK.
 - To activate both components at once, hover over the file name in the browser and click the small circle that appears next to the name.


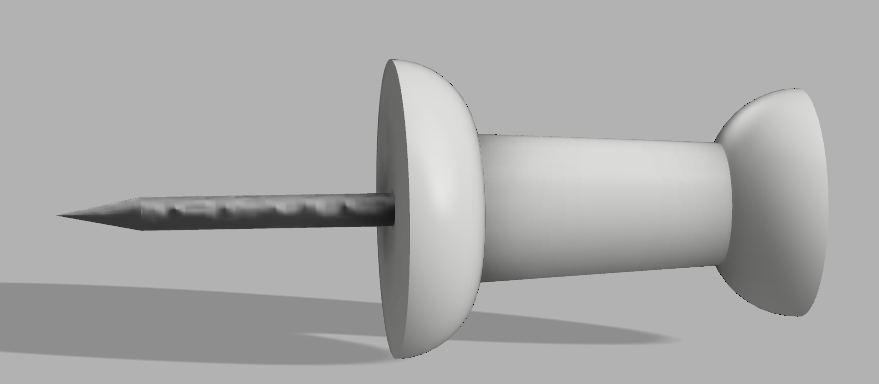
Congratulations! You have modelled an assembly of two components in Fusion!
- OPTIONAL: Add appearances to the components of the push pin.
- Click on the Modify drop-down menu and select Appearance. Scroll down to the bottom of the window.
- Click on the Metal folder, then on the Steel folder, drag the Steel-Cast block and drop it onto the pin.
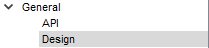
- Click on the Plastic folder, drag and drop the ABS(White) block onto the plastic part of the pushpin. If you want, you can try to make a render of the pushpin by clicking on Design in the top-left corner and selecting Render.