First Blog Post
The animations and instructions below use Wordpress.com, which differs slightly from the OpenEd user interface. If you have any questions or get stuck as you work through this, please ask your instructor for assistance. Have fun!
- Create some content for your website by writing a blog post with an image:
- In the left sidebar navigation, click on Posts and then click on the button in the top right of the page that says Add New Post.
- Give the post a title, and then type some text in the field below the title.

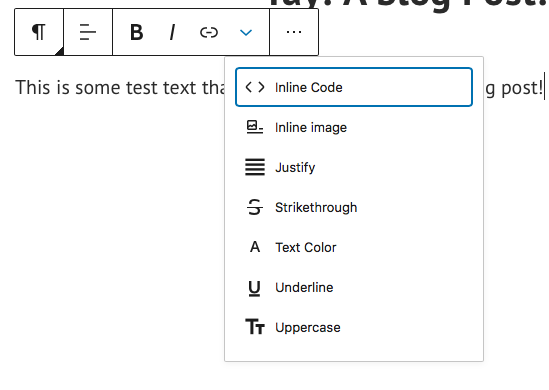
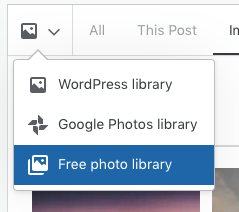
- Now let’s add an image by first clicking on the down arrow in the menu just above your post text to bring up the additional menu options, and click on Inline Image. This will bring up a pop up menu with an image gallery. If you click on the little Image icon with the down arrow and then on Free photo library, you can search for more photos to use. When you find an image you want, click Copy to media library and then Insert.
- Note: If you are using OpenEd, there is no free photo library - you will need to search and upload your own images
- Note: If you are using OpenEd, there is no free photo library - you will need to search and upload your own images
- To resize the image, click on it and change the image width by entering a number of pixels.

- Next, copy and paste a YouTube URL onto the last line of the blog post.
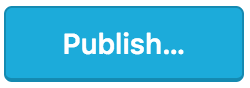
- Publish these changes by selecting the blue Publish button at the top right of page and again to confirm. Congratulations on your first blog post! (Note: your site does not get launched publicly until you verify your account with your email address.)
- Return to the Wordpress admin page by clicking the back arrow in the top left of the page.

- Let’s add an “About” web page to showcase professional information about yourself:
- Select Pages on the left navigation bar and then click on the red button in the middle of the page that says Add New Page, and then select the About page template. Click on the blue Use About layout button in the top right corner.
- Type some information about yourself in the fields below. If there is a photo, you can replace it with another one by clicking on it to bring up the Replace option.
- Publish this page by selecting the Publish button in the top right of the webpage, and then a second time to confirm.

- Return to the Wordpress admin page by clicking the back arrow in the top left of the page.
- Add as many pages as you want for your website.
- Select a new template to change the look and feel of your website:
- In the left toolbar, click on Design and then click on Themes. Scroll to the bottom of the themes and click on the Show All Themes button.
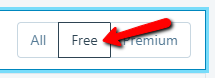
- Now press the Free button on the right side of the web page so that all of the paid templates are hidden.
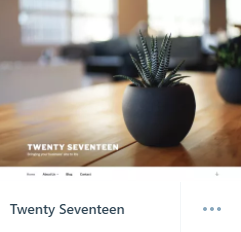
- Select the template you want, by clicking on the theme image. Note: The rest of this tutorial will use the Twenty Seventeen theme which we recommend you search for. Customization options depend on which theme you choose.
- Click on the one you want and then click the Activate this design button near the top middle of the webpage. You can switch to other themes later, too. When prompted click on Customize site.
- In the left toolbar, click on Design and then click on Themes. Scroll to the bottom of the themes and click on the Show All Themes button.

- Customize your new website template:
- Click on Site Identity and then Site Title in the left sidebar to give your site a name. Click on the Save Changes button. And then click the back arrow next to Site Identity to get back to the menu.
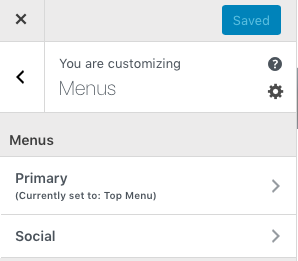
- Select the Menus button in the left toolbar, and then select Primary. (Note, if you have not confirmed your email address, you’ll need to do that step now.)
- Your menu list will show up under Primary. If you created pages and do not see them on this list, Click on the Add Items button in the left toolbar.
- Add a page by clicking on the page title link in the toolbar that just popped up.
- Select the checkbox beside Automatically, add new top-level pages to this menu at the bottom of the left menu.
- Press the blue Save Changes button at the top of the webpage. You are now looking at a preview of your website.
- To make other customizations to your website click the back arrow next to Primary to get back to Menus and then again to get back into Customizing.
- Click on Site Identity and then Site Title in the left sidebar to give your site a name. Click on the Save Changes button. And then click the back arrow next to Site Identity to get back to the menu.

- Let’s change the main website photo by selecting the Header Media option, and then the Add new image button in the left toolbar.
- You can now upload a photo you’d like to use, or click on the Media Library tab in the top left of the webpage to select one of the images you’re already using on your website.
- Select an image, and then click on Select and Crop in the bottom right of the webpage. Press the blue Save Changes button at the top left of the webpage.
- Lastly, press the Launch site button at the top right to make your new website live to the public! Congratulations on creating a website for yourself!
If you are met with another page asking you to give your site an address, the last option should be the first domain you chose with the option to “Skip Purchase”. And another page to Start with a free site.