Wordpress.com Website Setup
 Introduction to Personal Websites with WordPress #1: Getting Started
In this exercise, you will create your own Wordpress website that would be suitable for a personal portfolio or as a commercial website of some kind. If you have any questions or get stuck as you work through this, please ask your instructor for assistance. Have fun!
- Create a Wordpress account:
- In your web browser, navigate to Wordpress and create a new Wordpress account and username. Don’t worry too much about what your username will be, because you will pick a different name for your website address.
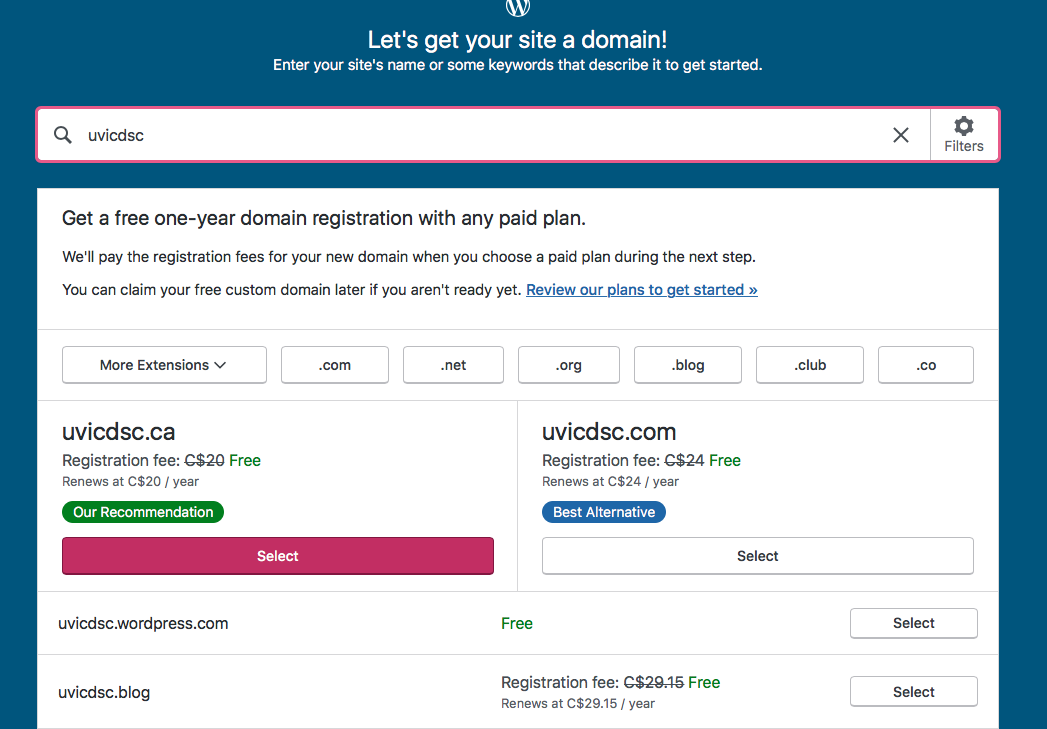
- Once you create an account, it will prompt you to create a domain – this will be the address people will type in to go to your website. Most people use their name for their portfolio to get started, or use a name for a business idea they have. If your name is already taken, try adding your middle initial or spelling out your middle name. Keep in mind that you can have multiple free websites in your Wordpress account so this can also be a practice website and you can choose one with a different name later.

- When you fill in your idea in the form at the top, a large list of ideas will come up, most of them for paid domains. However, at least one of them will be for a free option. If you don’t like the option that comes up, you can try entering another name and see what comes up. Sometimes they will be in the format of janedoe.home.blog or janedoe.wordpress.com
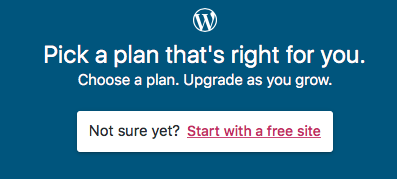
- Once you’ve chosen a Free domain, click on the Select button next to it. This will bring you to a page offering you options for various tiers of Wordpress accounts. Just at the top is an option for starting with a free site. Click the link to “Start with a free site”.

- Congratulations, you’ve created a “shell” or blank Wordpress website!

If you are met with another page asking you to give your site an address, the last option should be the first domain you chose with the option to “Skip Purchase”. And another page to Start with a free site.