Google Earth Narrative Maps
Google Earth is a multiplatform and web program that uses aerial photography, superimposed images, and GIS data to create a 3D representation of the earth. Users can enter addresses and geographical coordinates to view areas at various ages. In 2019, Google added creativity options that would allow individuals to tell their own stories using 3D street views, aerial footage, placemarks, routes, shapes, and descriptive text. Here is an example:
- The neighbourhood in Brazil where a DSC staff member and his family lived for four months here
- Creating Your Google Earth Project: Go to Google Earth
- Click on the light blue Create a New Project button at the top of the page. Note: If you aren’t already, there will be a prompt for you to sign into a Google Account once you click Create a New Project. If you need to create a Google account go here


- Adding to Your Google Earth Project
- Once you have done this, you can add your first location, route, or slide by clicking on the search bar.

- Once you have done this, you can add your first location, route, or slide by clicking on the search bar.
- Location
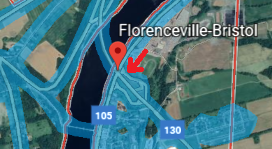
- To add a location, click on Search to add place and type in the location’s name. A red marker will appear at your chosen location

- You can choose to add this to your project by clicking on Save to project (located beneath the area description at the right ).
- To add a location, click on Search to add place and type in the location’s name. A red marker will appear at your chosen location

- Alternatively, you can click Add placemark, first click the placemark icon (highlighted in the photo to the right), then click the place on the map

- Finally click View

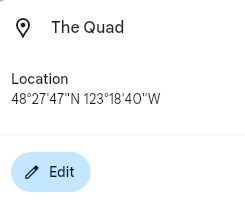
- If you would like to add a title, description, photo, or link click on the blue pencil Edit button.
- To add a photo or video, click on the + Media .
<img src=”images/googlemaps-04.png” width:180px” alt=”adding photo/video”> - or to add a description click ** + Description** button
- For photos, there are several options for uploading: computer file, google images, google drive, or using a URL. You can add as many photos and/or videos as you’d like!

- Location View
- To change the view that appears when a location on your map is clicked on, double click your chosen location on the left side bar and then click on the pencil icon Edit button (located on the far right). Google Earth will move to this location and show you an aerial view.

- To change from 2D to 3D go to the bottom right corner and click on the button
- To move the physical location, click, hold, and drag your mouse to move the map around.
- For adjusting the tilt (angle your view is at) and heading (place your view is facing), hold SHIFT while clicking, holding, and dragging the mouse vertically or horizontally, respectively.
- You can also adjust the altitude by using the mouse wheel.
-
Use -,+ at the bottom right corner to zoom in and out
-
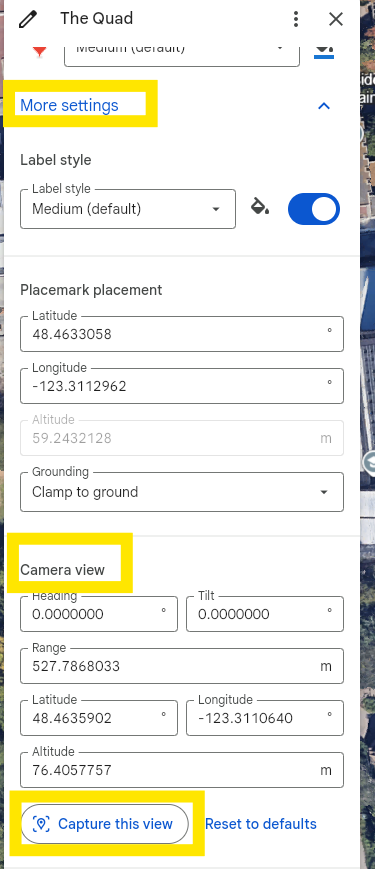
To adjust the view of your placemark, click edit, then select the more settings toggle. Scroll down to camera view to capture the view you want. Once you’ve got your desired view, click on Capture this view. Now when you click on your marked location in your map, you will be brought to this view!
- To get a Street View, go to the bottom right corner and click on the little person icon.
- Next, click on the location on your map in which you would like to set your view from. Note: you will be limited to the areas that are highlighted in light blue.
- Once you have clicked on this location, Google Earth will zoom in and switch to a real-image 3D view of it.

- To change the view, repeat the steps for the 2D example (Note: no need to use SHIFT to rotate and tilt; the mouse does everything)
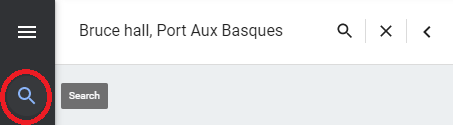
- Alternatively, using the search bar in the left column, you can search a specific place that is in your area and use that (in the example at the right, Bruce Hall is a centre in Channel-Port Aux Basques, NL that Terry Fox made a speech at during his Marathon of Hope) and click Save to project, g
- To edit the name of the overall location (e.g. Channel-Port Aux Basques). Click the three dots near the location on the left hand side and select edit. From there you can edit the title on the right hand side. See photo for details.
<img src=”images/googlemaps-06.png” width:260px alt=”edit”>

- Route
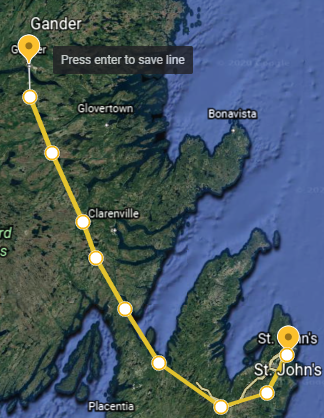
- Selecting the Draw line or shape will allow you to create a route. To do this, click on your desired starting location and move your mouse to your next location. When you reach this next location, click again and continue to make as many points as you’d like! To complete the path, press ENTER when you’re at your final point. You have now made a route!
Bonus: Slide: You can add a full screen slide with text, a background (image or colour)
- to add a slide you can click the + sign on the left side bar and then click add. You can title it and add description like a placemark.
- A slide can also be created based on your placemarks, click the three dots of one of your placemarks, then click start slideshow