Activity 4: Create Photo Text
In this activity we will be creating photo-based text. If you have any questions, please ask!
- Download this image for the exercise
- Open the photo in GIMP by going to File -> Open in the upper menu. Find where you saved the photo and open it. If your browser automatically saved it for you, it is probably in your Downloads folder. It may pop up with another window asking to Convert to RGB Working Space. (Note: there are certain circumstances where you may need to convert an image to a different color profile, such as when importing from a scanner or camera, but in this case, it is not necessary.)
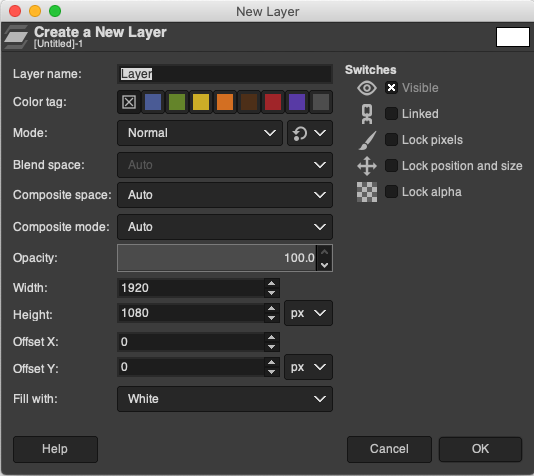
Click on Keep. If you wanted to do this project using one of your own images, it would be best to create a duplicate first, as descibed in previous activities. - Click on Layer in the top menu and then New Layer. In the dialog box that pops up, in the Fill With dropdown menu, choose White and then click OK. A new white layer will appear covering the image and you will see it listed in the Layers Panel on the right.

- Next, click on the Text Tool (“A” icon) in the left toolbar.

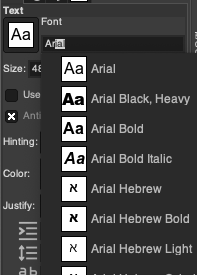
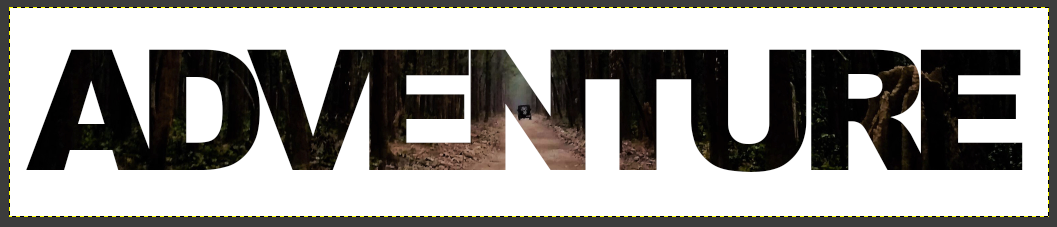
This will bring up the tool’s options below the left toolbar. We will be using the font Arial Black, Heavy (or Arial Heavy). To change the font, click in the font name field and start typing Arial, and a list of fonts will appear. Select Arial Black, Heavy. Below that, enter Size 504px, color black, and then lower there is an option for spacing between letters (icon with an “a b” with arrows beneath them). For spacing, we will use -61. - Click over on the canvas and start typing: type the word ADVENTURE in all caps.

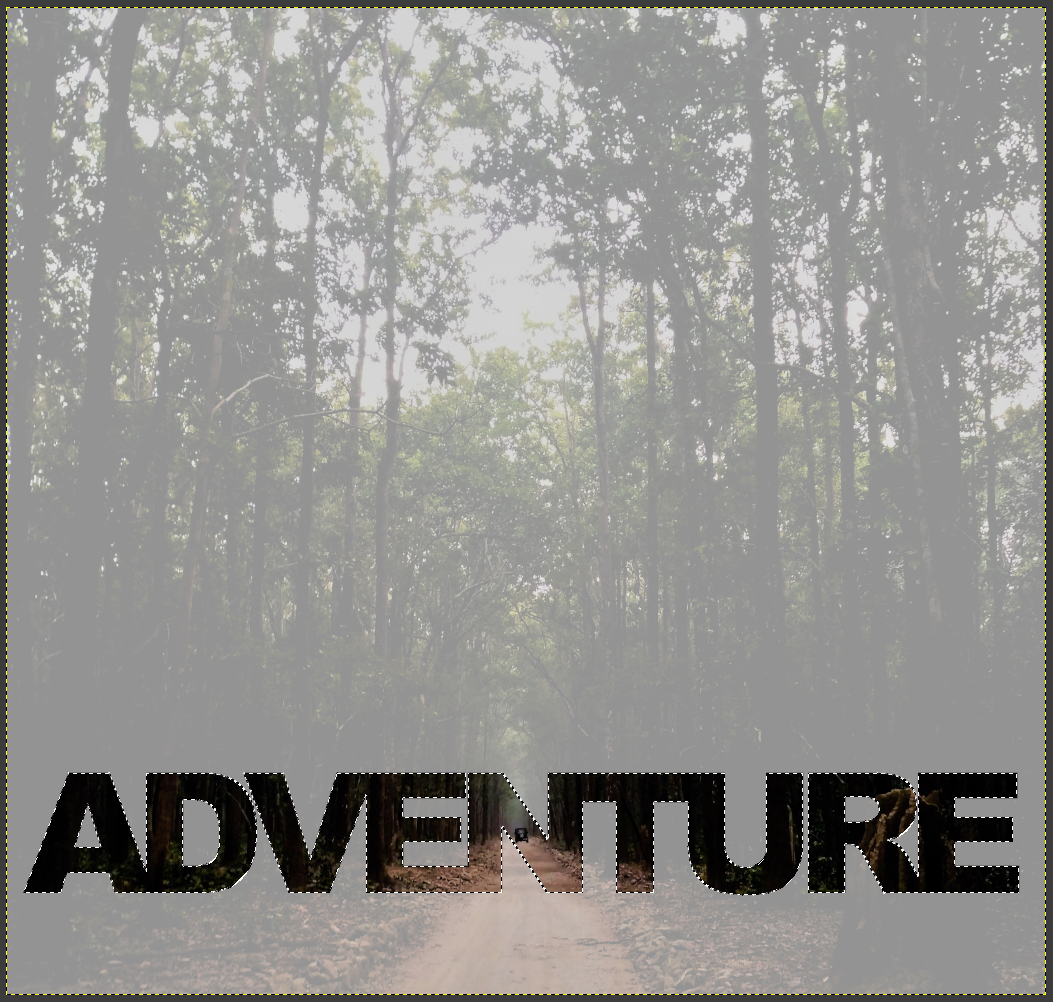
- In the Layers Panel on the right, click on the white layer to make it the active layer. Just above the layer names there is an option to change the Opacity. Decrease it to about 35 so that you are able to see the image beneath it.

- Click back onto the text layer. Over in the left toolbar, click on the Move Tool (four arrows icon).

** Use it to move the text so the center of the N in the text is over the car in the photo.

- Over in the Layers Panel, right click on the text layer and then click on Alpha to Selection. This will trace a selection around all the text. Next in the Layers Panel, click on the eye icon in the text layer to make the text invisible, and then click on the white layer to make it the active layer.

-
Go to Edit in the top menu and click on Cut. This will cut out the inside of the selection in the white layer. Then click on Select in the top menu and click on None to deselect the outlines.
- At this point, you can choose to go back to the Layers Panel and increase the Opacity of the white layer to 100% so that it is solid white or have it partially transparent so you can see part of the photo. Try turning the Opacity up and down to see the difference.

-
Note: If you only want to keep the lower part of the image with the text, you can use the Crop Tool (as described in an earlier activity) with Fixed unchecked to crop the lower part of the image.
- Save: Click on File -> Save As in the upper left corner. We are going to save this in the GIMP .xcf format, which is the working format within GIMP that will preserve the layers.
Choose where you would like to save the file, and give it a name you will remember. Click Save. You can export a JPG or PNG of the image using instructions from Activities #1 or #2.