Activity 2: Basic Photo Edits
Let’s move on with using GIMP and do some basic edits to a photo. If you have any questions, please ask!
-
Download this image for the exercise: woman in red and white shirt standing near white wall photo - Free Blonde Image

- Open the photo in GIMP by going to File -> Open in the upper menu. Find where you saved the photo and open it. If your browser automatically saved it for you, it is probably in your Downloads folder. It may pop up with another window asking to Convert to RGB Working Space. (Note: there are certain circumstances wherein you may need to convert an image to a different color profile, such as when importing from a scanner or camera. But in this case, it is not necessary.)
Click on Keep.

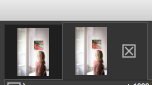
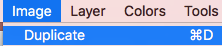
- We are first going to make a copy of this image before we edit it so that we keep a full size copy of our original. To do this, click on Image in the top menu and then click on Duplicate. This will create a new copy of the image. You will now see above your image that you have two tabs open in GIMP with the thumbnails of the two files. If you click on the thumbnails, a little “X” appears next to the active one and at the top of the software the filename appears.
The new copy will be called [Untitled] until you save it with a new name. Make sure you are working in the one you plan to resize. It’s best to close the original to avoid confusion by clicking on the little “X” next to the thumbnail.

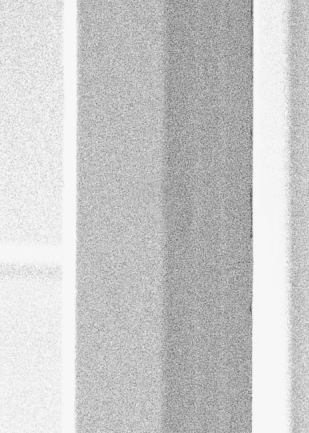
- Converting to Black and White:
- Click on Colors in the top menu (see right), then Desaturate, and then Desaturate…. A small window will pop up. Make sure Luminance is selected as the Mode. Click OK.

- Next, click on Colors in the top menu, then Desaturate, and then Mono Mixer. A small window will pop up. You can drag up or down each of these channels to increase or decrease each colour channel, which will impact their intensity in the image. (This can be particularly useful for photos with lots of the sky in them.) Click OK

- Click on Colors in the top menu again, and then click on Curves. This will bring up a small window. Click on the diagonal line in three places to create three evenly spaced round handles (see GIF animation below). Once the handles are there, you can grab them with your mouse and drag them up or down to make adjustments in your photo. The wave form in the back shows the lights and darks in your image. To the left of the waveform are the darks and the right side displays the lights. In the example GIF animation, the diagonal Curve line has been dragged to give an upwards bump to the brights and a downwards bump to the darks, which is a way to slightly increase the contrast of the image, if needed. Click OK.

- Save:
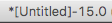
- Whenever you see the asterisk to the left of the file name up in the top center of the software, this is an indication that you’ve made a change to your file and have not saved it.
- Click on File -> Save As in the upper left corner. We are going to save this in the GIMP .xcf format, which is the working format within GIMP. Choose where you would like to save the file and give it a name you will remember. Click Save.
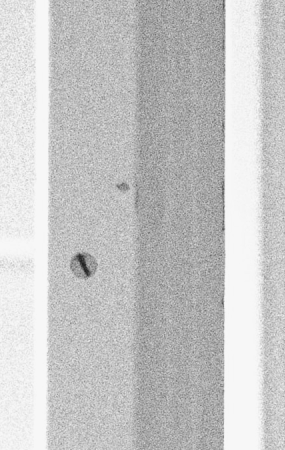
- Healing Tool: Next we will remove the visible screws in the post.

- First, zoom in on the top screw on the post by clicking on the Magnifying Glass tool in the left toolbar. The options for this tool will load beneath the toolbar. Make sure Zoom In is selected and then click on the screw to zoom in on it.


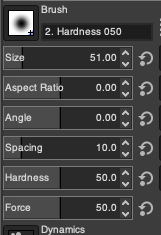
- Click on the Healing Tool in the left toolbar (bandaid icon). Beneath it, the options for this tool will load. In the options, you can choose a brush size, etc. The default of 51 should be big enough for this project.
- Hold down the Command key (Apple) or Ctrl key (Windows) while clicking on a clean spot of the pole that you want to duplicate and use to replace in the area where the screw is. Release the button and the mouse and then use your left mouse button to draw over the screw until it is gone. Go ahead and clean up the blemish right above it too. See to the right for a before and after. Optionally, use the Healing Tool to remove the screw at the base of the pole.

- Use the Zoom Tool to zoom back out to see the whole photo.
- Click on File -> Save to save your recent changes.
- First, zoom in on the top screw on the post by clicking on the Magnifying Glass tool in the left toolbar. The options for this tool will load beneath the toolbar. Make sure Zoom In is selected and then click on the screw to zoom in on it.
- Exporting:
- To export this to a full size JPG file, click on File -> Export As in the upper left corner. A window will pop up with options. Change the File Type to JPG in the dropdown in the lower left corner of the Export Image window. Choose your save location. Click the Export button in the bottom corner when ready. Another small window will pop up giving you some additional options. Change the quality to 100. Click Export
- You will now have your original unedited photo, an edited .xcf working format that you can go back and edit more, and a JPG file that is ready to print. If you want a smaller JPG to share online, you can scale down the pixels using the instructions from Activity #1