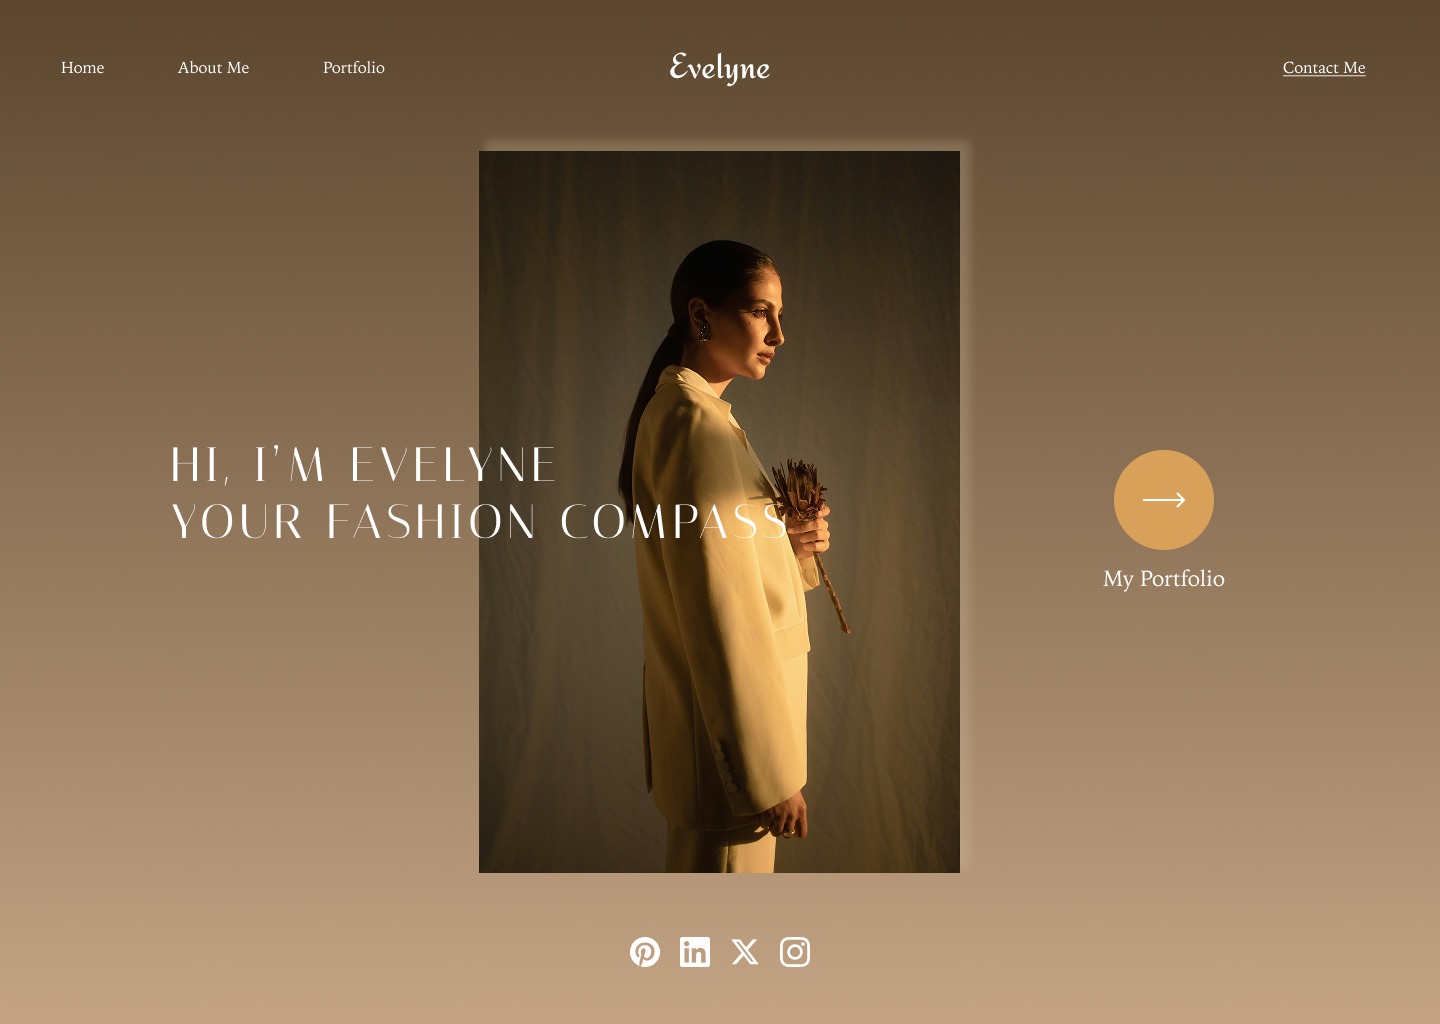
Section Preview
Before you begin, take a look at the final result you’ll be working towards in this section:
Adding the Center Image
To begin designing the home page, we will start by adding the main image. All the icons and images required are already provided in the assets you downloaded in step 2 of the Pre-Workshop Activities
Adding an Image to the Home Frame
- Ensure the Home Frame is selected in the Layers Panel.
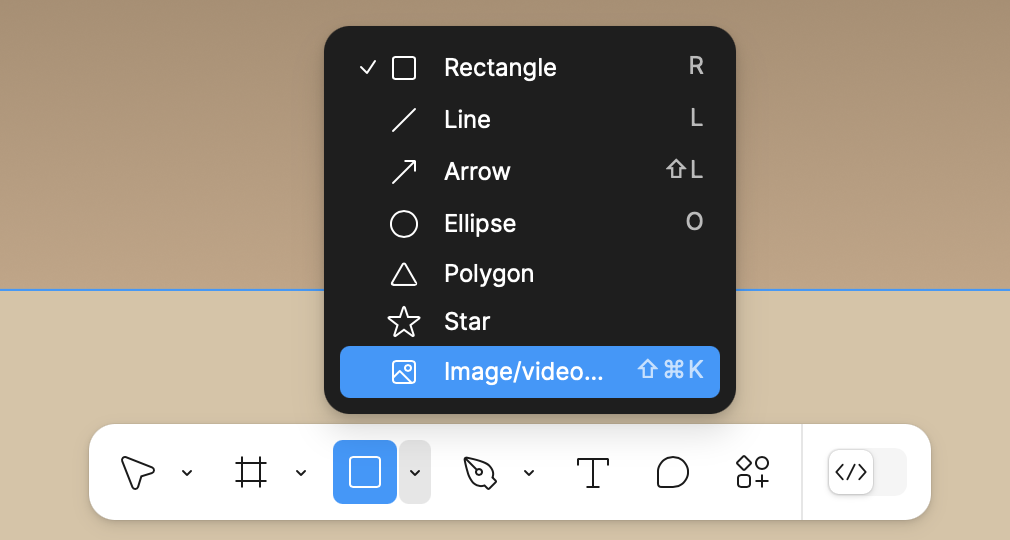
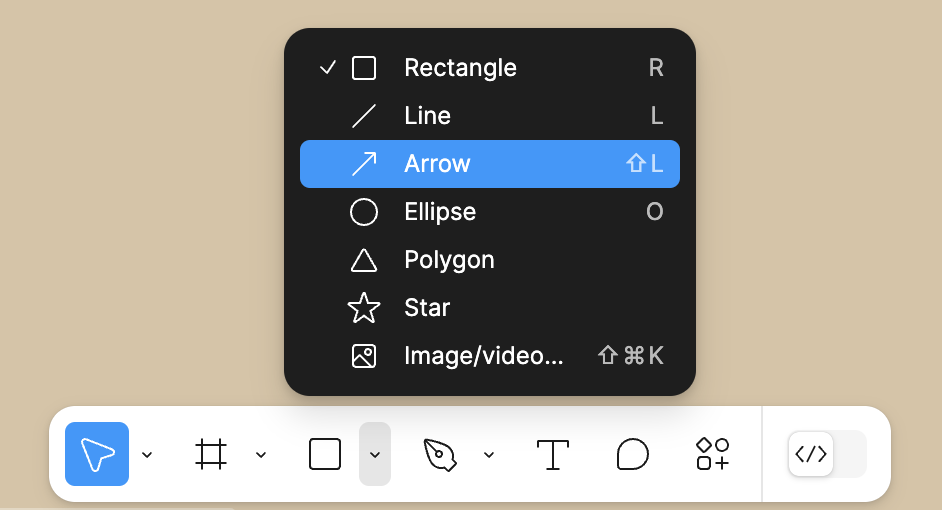
- Click on the shape icon (as seen below) in the bottom toolbar.
- From the dropdown menu, select “Image/video”.
- In the file selection window, choose the image titled woman-holding-flower
- Move your cursor over the Home Frame and click once to place the image inside the frame.
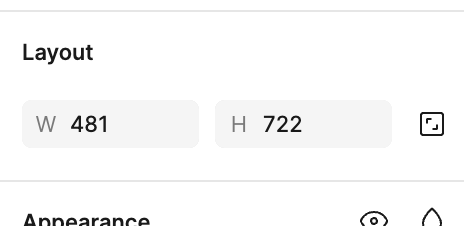
- With the image selected, go to the Right Sidebar and set the dimensions under Layout:
- Width: 481
- Height: 722
-
If the image seems to disappear: zoom out and you will likely find it near the top left of your Figma file. Manually drag it back to center it within the Home frame.

Adding a Drop Shadow
Now, let’s add a subtle drop shadow effect to enhance the image.
- With the image still selected, go to the Right Sidebar and scroll to the Effects section.
- Click the + icon to add a new Drop Shadow.
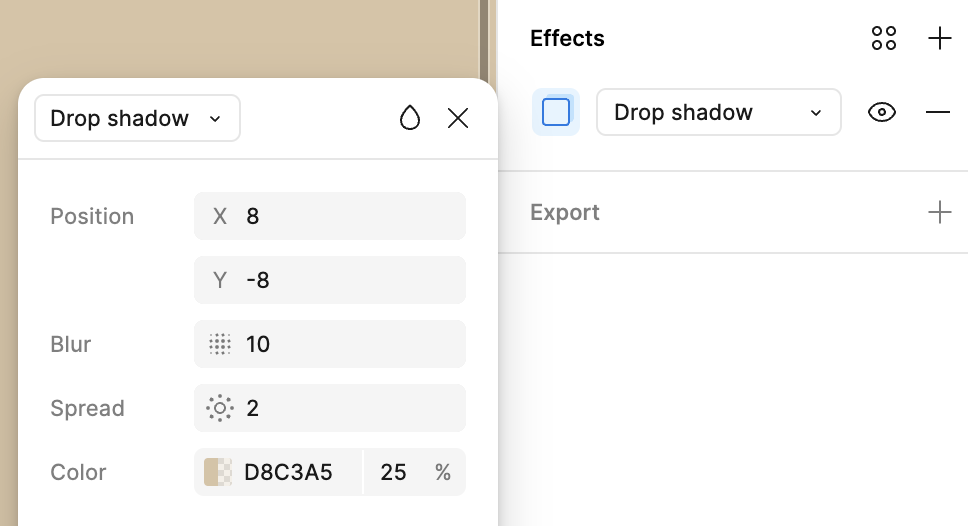
- Open the Effect Settings by clicking on the square icon to the left of the “Drop Shadow”
- Adjust the settings as follows:
- Position: X = 8, Y = -8
- Blur: 10
- Spread: 2
- Color: #D8C3A5 with 25% opacity
Adding the Headline Text
Now, we will add the main headline text to the home page and style it to match the design.
Adding the Text
- Ensure the Home Frame is selected in the Layers Panel.
- On your keyboard, press T to activate the Text Tool, or click on the Text icon in the bottom toolbar.
- Click inside the Home Frame and type the following text:
HI, I’M EVELYNE
YOUR FASHION COMPASS
- In the Layers Panel, select the newly created text layer.
Styling the Text
With the text selected, go to the Right Sidebar under Typography and set:
- Font Family: Italiana
- Font Size: 48
- Font Weight: Regular
- Letter Spacing: 10%
- Text Color: White (#FFFFFF)
-
Text Case: Uppercase

Aligning the Text
- Click and drag the text towards the left side of the Home Frame while observing the red alignment guides.
- Position it so that it is aligned horizontally with the center of the image but slightly offset to the left.
- Adjust the vertical positioning if needed to create a balanced layout.
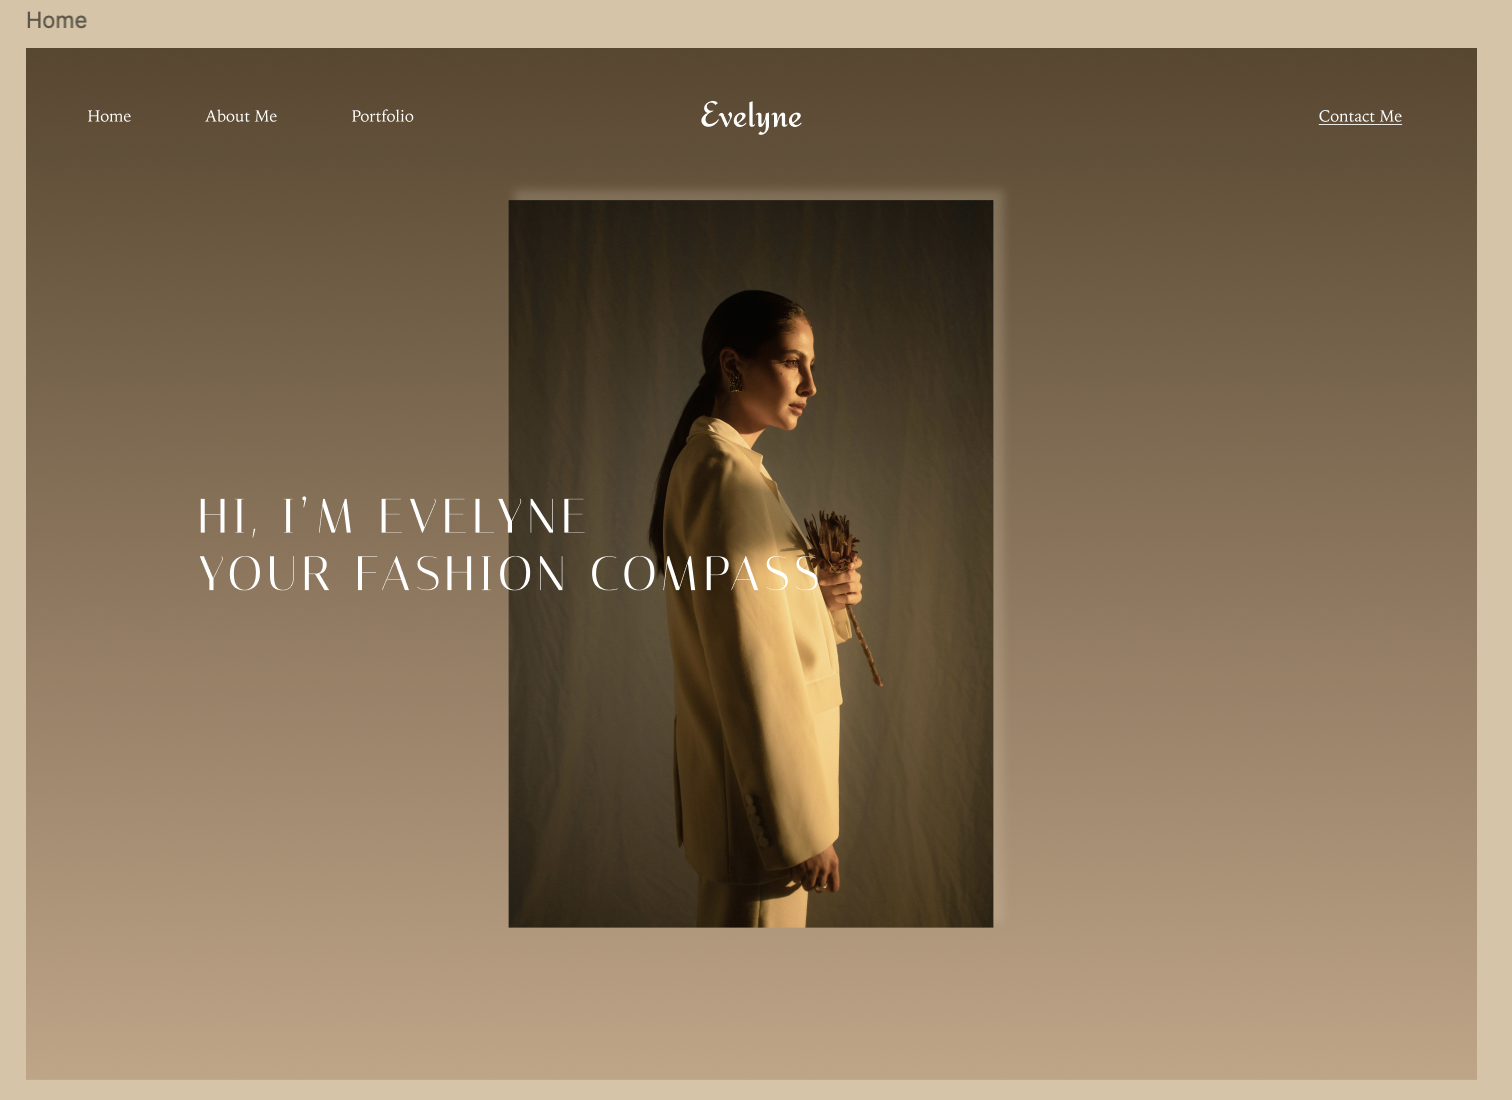
Adding the Portfolio Button
Now, let’s create the “My Portfolio” button with an arrow icon.
Creating the Button Shape
- Ensure the Home Frame is selected.
- On your keyboard, press O to activate the Ellipse Tool, or click on the Ellipse icon from the bottom toolbar.

- Click and drag to create a perfect circle.
- In the Right Sidebar, set the exact dimensions:
- Width: 100
- Height: 100
-
In the Fill section, change the color to #D9A159 (a warm gold tone).

Adding the Arrow Icon
-
On your keyboard, press Shift + L to activate the Arrow Tool, or click on the Arrow icon from the bottom toolbar. Draw a horizontal arrow pointing right.
- In the Right Sidebar, set the exact dimensions:
- Width: 41
- Height: 0
- Change the arrow color to White (#FFFFFF).
-
Position the arrow in the center of the circle using the alignment guides.

Adding the Button Label
- On your keyboard, press T to create a new text layer below the button.
- Type “My Portfolio”.
- In the Right Sidebar, adjust the text properties:
- Font Family: Noto Serif JP
- Font Size: 22
- Font Weight: Regular
- Text Color: White (#FFFFFF)
- Text Alignment: Center
- Drag the text below the button, ensuring it’s properly aligned using the red guidelines.
Grouping and Positioning
- Select the circle, arrow, and text together.
- Right-click and select Group Selection to keep them as one unit.
-
Drag the button group to the right side of the Home Frame, ensuring balanced spacing from the image.

Creating the Auto Layout for Social Icons
All the social media icons required are already provided in the assets you downloaded in step 2 of the Pre-Workshop Activities.
- Pick four icons that you would like to use. We’ll go with Pinterest, LinkedIn, Twitter (X), and Instagram.
- Add the image of each icon onto the Home Frame, just like you added the image earlier.
- Set the dimensions of each icon to a width and height of 30px.
- In the Layers Panel, select all the social media icons you added and use the shortcut Shift + A to create an Auto Layout.
- Adjust the horizontal spacing between icons to 20px.
- Align the Auto Layout at the bottom center of the Home Frame, ensuring a balanced design with proper spacing from other elements.
Now that the home page is complete, the next step is designing the Portfolio Page, where Evelyne showcases her work in a visually appealing layout.