
Automation with Macros
If you have any questions or get stuck as you work through this in-class exercise, please ask the instructor for assistance.
Macros are a powerful tool that can help you save time by easily automating repetitive tasks in Excel. Macros work by recording a set of actions (i.e., clicks and keystrokes) in Excel. When you create a macro, you tell Excel to record the exact actions that you are doing. Later, if you want to do the same actions, you can just tell Excel to run the macro, instead of having to repeat the same actions again and again.
-
Before you can record your first macro in Excel, first you need to enable the Developer option in the settings (you only have to do this once). This is done in slightly different ways in the Windows & Mac versions of Excel.
-
Enable Developer option in the Mac OSX version of Excel (you only have to do this once):
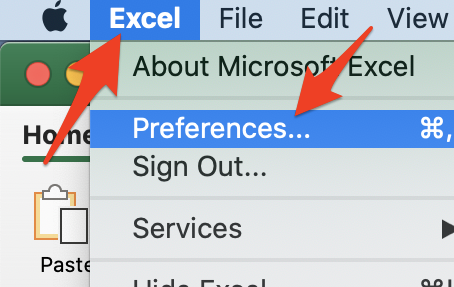

- On the top left select Excel > Preferences
- Next, click on the Ribbon & Toolbar icon.
- On the right side under Customize the Ribbon, select Main Tabs and then check Developer.
- Click Save and then close Excel Preferences.

-
Enable Developer option in Windows version of Excel (you only have to do this once):
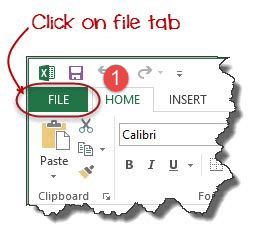
- Select the main FILE tab.
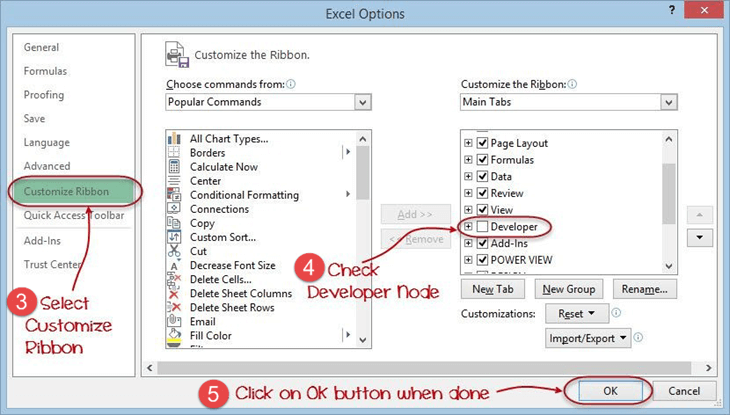
- Select Options at the bottom of the left-hand menu and then a popup window will appear.
- Select Customize Ribbon on the left navigation bar, then click the check box beside Developer. Click OK to close the dialogue box.
- You will now have a developer tab in your ribbon (on the right side).
-
Now that you’ve enabled the Develop tab on the ribbon, let’s download this spreadsheet with data for this exercise
-
Open the dsc-pivot-table.xlsx spreadsheet that you just downloaded. Note: You may have a yellow bar at the top with a button that says Enable Editing. Click on the button to enable editing.
- We are now going to record a macro to sort the spreadsheet by attendance (from high to low) and then add a sum of the total attendance:
- Start recording the Macro by clicking on the Developer tab in the ribbon, and then click on the Record Macro button.

- In the Macro name field type: SortAttendance (with no space between the words), and then press the OK button.

- Sort by attendance:

- Select columns A, B, & C.
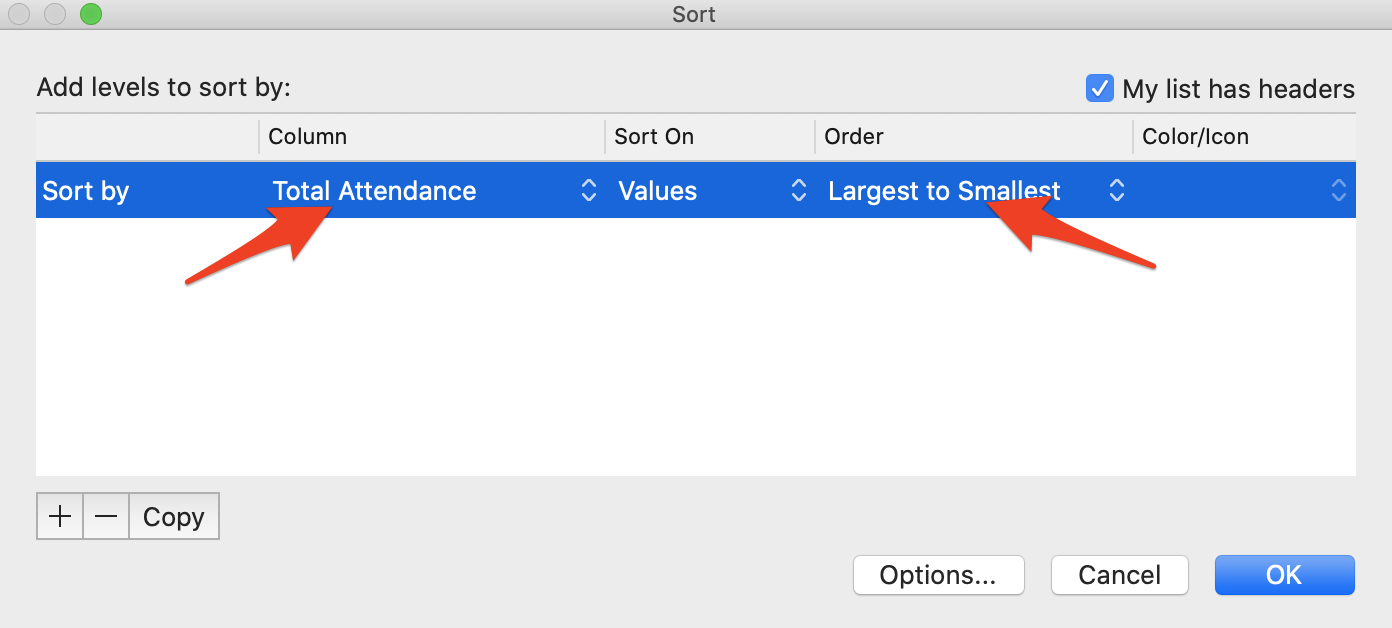
- Click on the Data tab on the ribbon and then click on the Sort button.
- Click on the Column drop-down and select Total Attendance.
- Click on the Order drop-down and select Largest to Smallest.
- Then click the OK button
- Select columns A, B, & C.

- Let’s add a sum of total attendance to the top right of the spreadsheet:
- In cell E2 type: Total
- In cell F2 type: =sum(C2:C34)

- In cell E2 type: Total

- Save as a macro by clicking on the Developer tab in the ribbon, and then click on the Stop Recording button.

- Save your spreadsheet by going to File > Save As… menu and then in the File Format field, select Excel Macro-Enabled Workbook (.xlsm), and press the Save button.
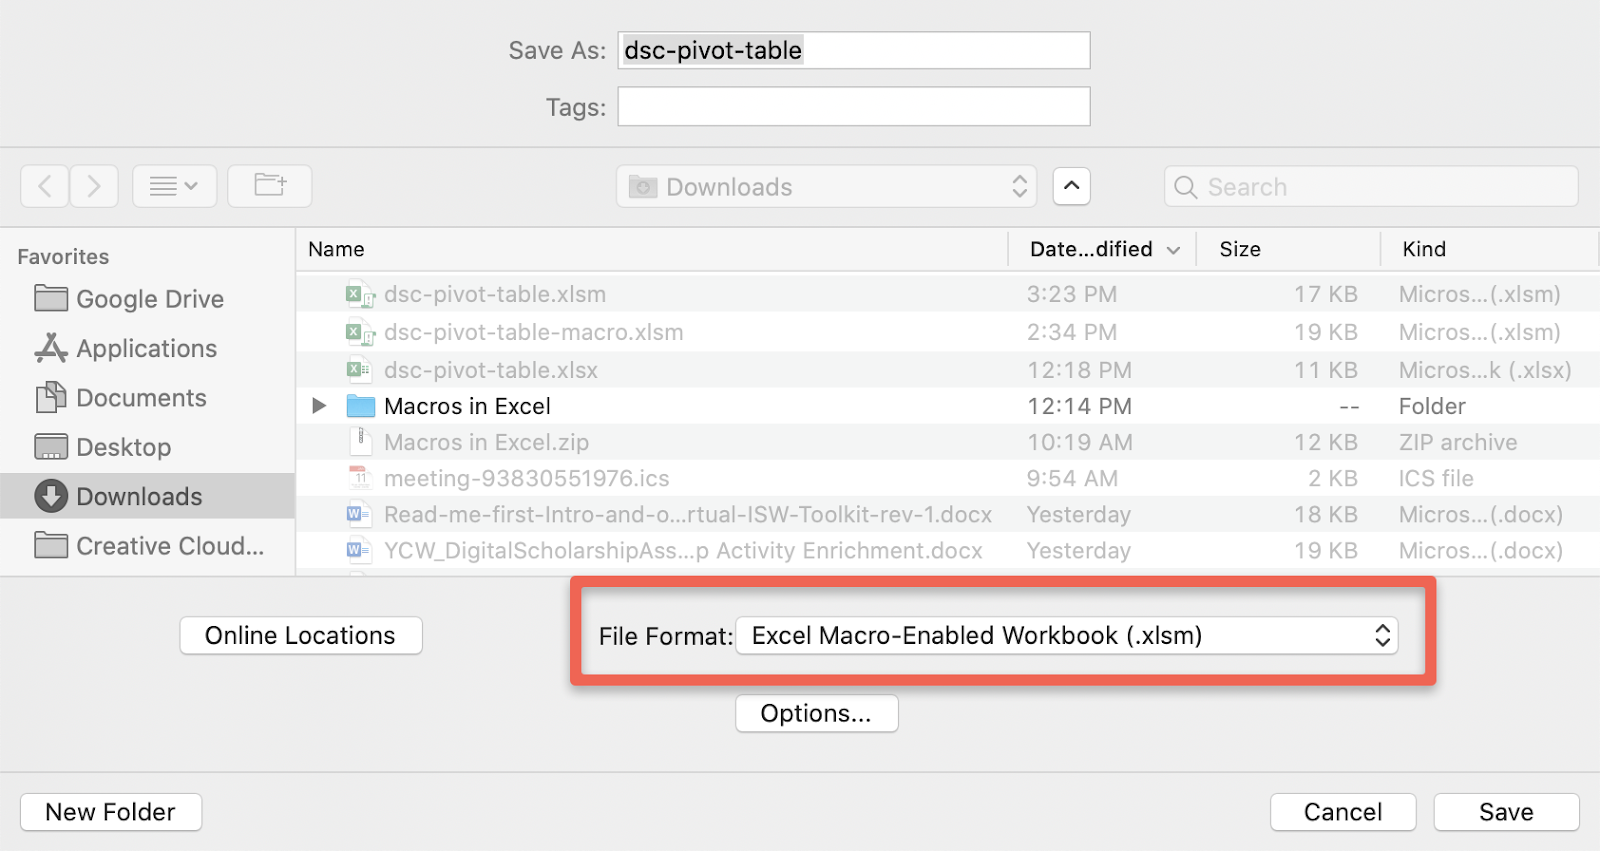

Please leave your dsc-pivot-table.xlsm spreadsheet Open in the background as you work through steps 7 and 8 or else you will have problems completing this activity! Also don’t change the tab name in the Macro and new spreadsheet as that will cause errors when you run the macro.
- Start recording the Macro by clicking on the Developer tab in the ribbon, and then click on the Record Macro button.
- Use the Macro on a different spreadsheet to sort it by attendance and sum the attendance:
- Download spreadsheet (while keeping the spreadsheet you created the macro in open in the background)
- Open the dsc-october.xlsx spreadsheet you just downloaded. Note: You may have a yellow bar at the top with a button that says Enable Editing. Click on the button to enable editing.
- Open the list of macros available to you by clicking on the Developer tab in the ribbon, and then click on the Macros button.

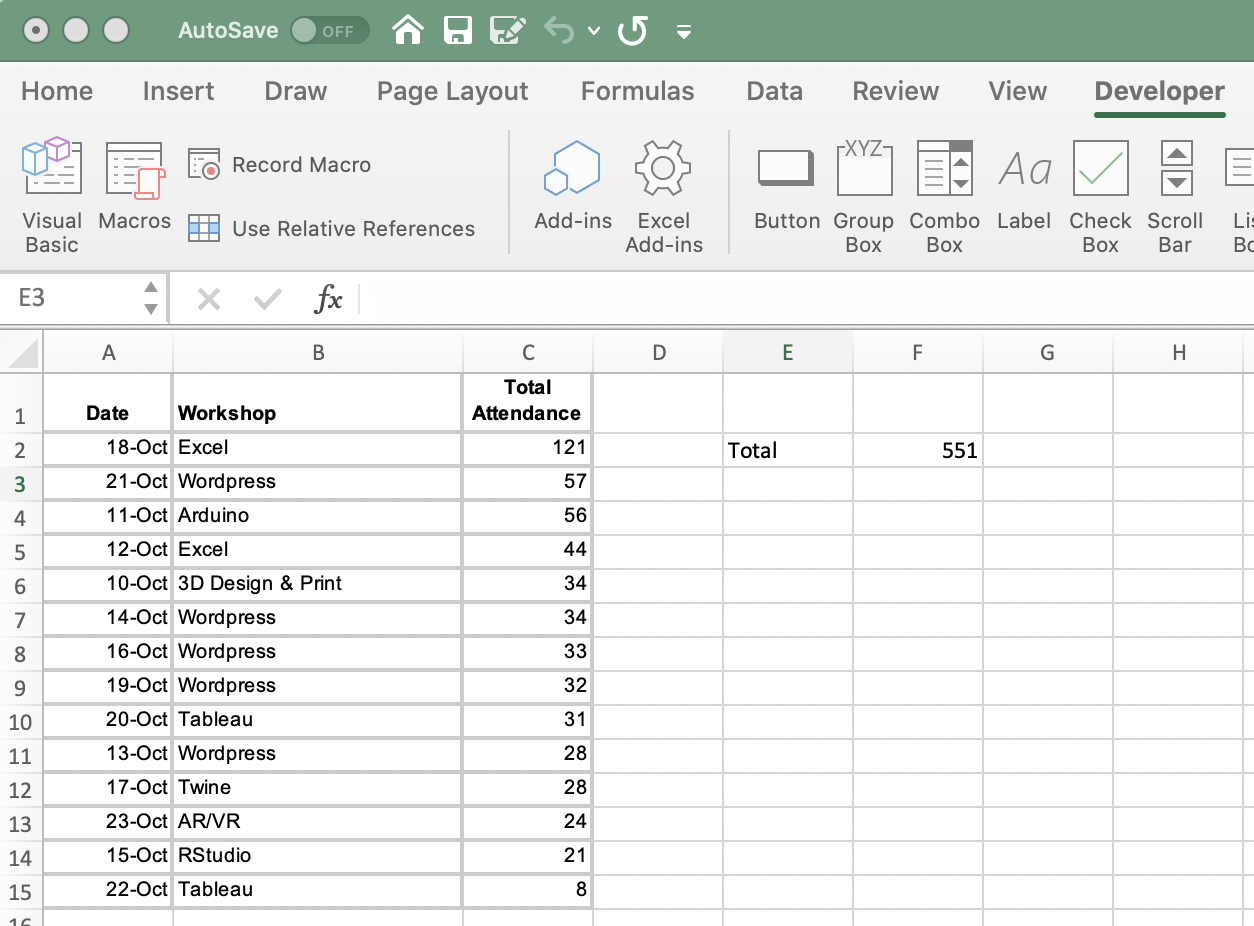
- Select the ‘dsc-pivot-table.xlsm’!SortAttendance macro and then press the Run button. Your spreadsheet should now look like this:

Great job!