Rendering
1. Using the camera
In Blender, every file you open typically has one camera and one light in it. These are two tools you can use for rendering or animation! Since we made a model, let’s try rendering it. Rendering means converting your 3D model into a 2D image or animation!
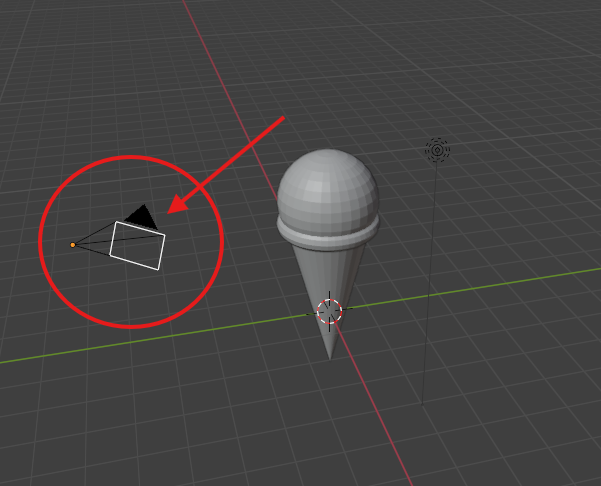
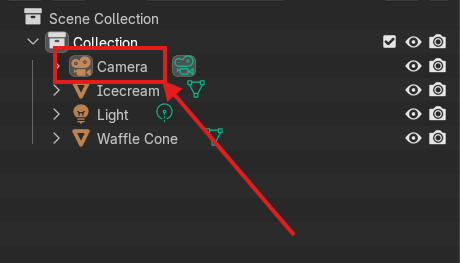
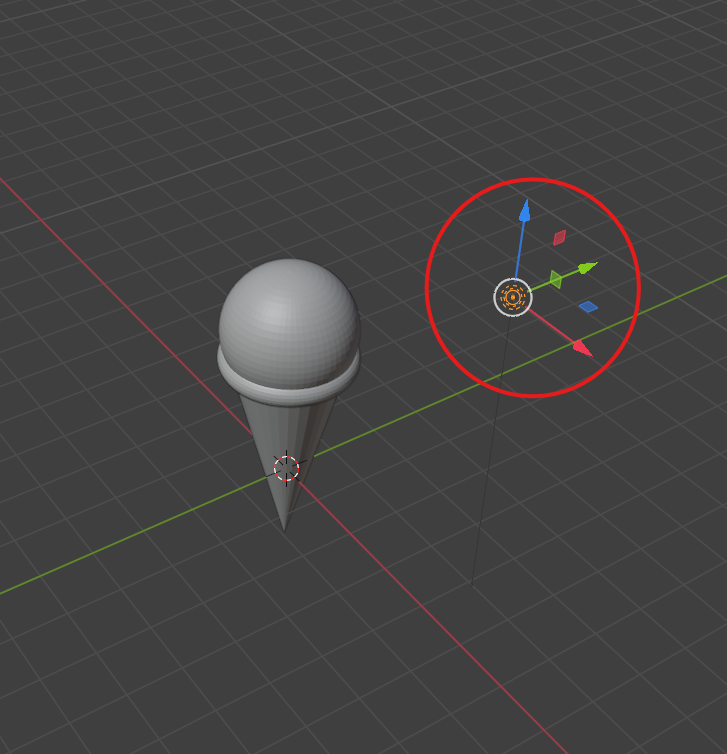
- Locate your camera by looking around your scene. Usually, your camera is somewhere near the center where the axis meet and look like a sideways pyramid with an orange dot at the tip. This is your camera. You can also locate it in the outliner on the right hand side of your viewport.
-
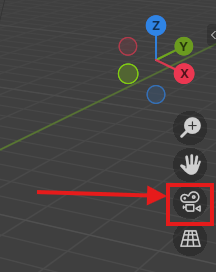
Your camera works similarly to a model in that you can rotate and move it around to change what it is capturing. Ideally, it would be nice for your camera to be pointing at your icecream cone so we can render an image of it. You can enter the camera view by clicking on the camera icon beneath the gizmo on the right side of your viewport.
-
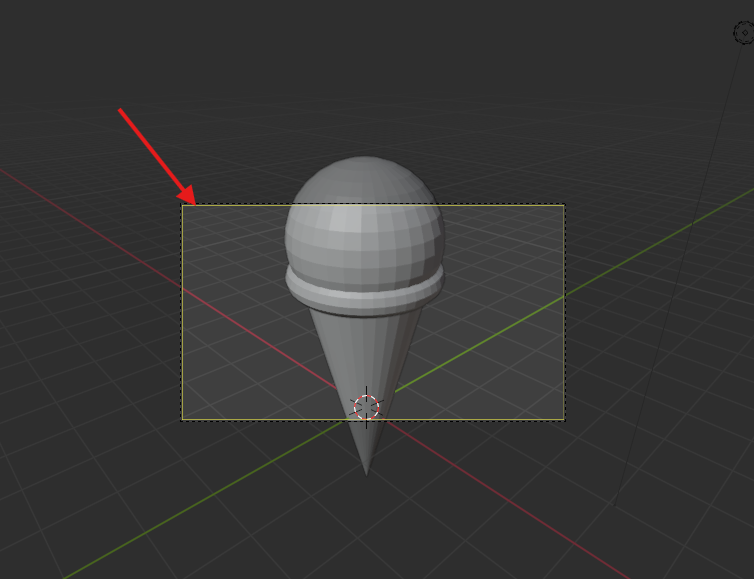
Now, we are in the camera view and you can get a sense of where the camera is pointed. If you are unhappy with the angle, you can adjust it by left-clicking on the lock button beneath the camera button. Now you can toggle your camera view similarly to how you were able to navigate around your model before.
1.Zoom: Middle mouse button scroll
2.Pan: Hold Shift + Middle mouse button and drag mouse
3.Rotate: Hold Middle mouse button and drag
- Once you have finished adjusting the camera, click on the lock again to unlock it. Now middle mouse button click anywhere in the viewport to escape the camera view. Your camera view will load as whatever it was last time you opened it.
2. Using the light
Once you have found a camera angle that you are satisfied with, it’s time to change where the light is located. Treat your light as a real light source. If your light is behind your model and the camera is in front of your model, your model is going to be backlit. If the light is also in front of the model by the camera, there is going to be a lot of light on the model.
- Adjust the light as you did with the camera. Selecting the light by clicking on the light in your scene or in the outliner and then using the “move” or “scale” option to place it where you want. I suggest for this activity, placing the light either directly above or beside where the camera is so that there is a lot of light shining on the object for the render. Once you do your first render, feel free to move your light around into a different spot if you are unhappy with the lighting.
3. Rendering a 2D image of your model
Now it is time to render your 2D image!
- At the top of the Blender application next to “File” and “Edit” there is a button that says “Render”. Click on that and then select “Render Image”. Allow it to process, this may take a minute or two depending on how complex your model is!

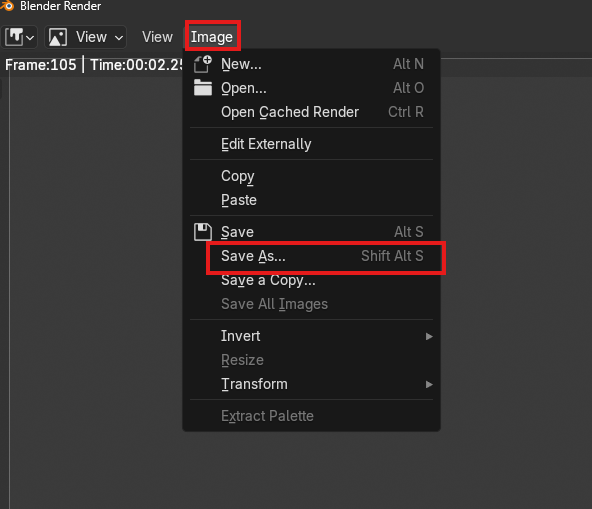
- When your image appears, which may be in a second Blender window, you can see what your model looks like with the basic lighting in a camera! If you want to save this image, you can click on “Image” at the top of the Render window and select “Save As” to pick a spot to save it to.
Great job! Now you know how to use the camera, light, and how to render an image in Blender!