--- layout: default title: Whisper.ai (Mac) nav_order: 5 parent: Workshop Activities customjs: http://code.jquery.com/jquery-1.4.2.min.js `` —
Whisper.ai Transcription Activity
- If you are using a Mac, download Whisper Transcription from the App store.
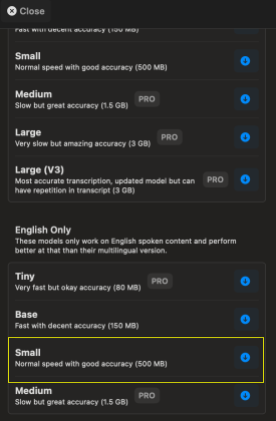
- Open Whisper Transcription and close the introductory window unless you are planning to purchase the Pro version. In the setup window, select the model that best fits your project (based on languages, accuracy, etc.). For transcriptions in English, the Small file size under English Only will offer the most accurate results out of the free options.
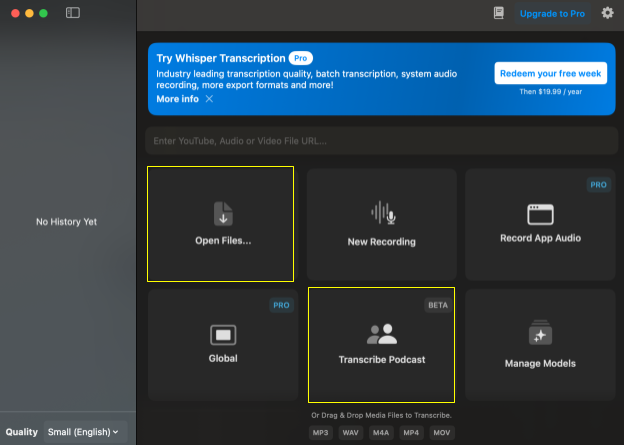
- Once you are in the main window, click Open Files or Transcribe Podcast and select an audio file to transcribe. The Transcribe Podcast option allows you to manually enter speakers in the free version.
- If you don’t have an MP3 audio file to transcribe, download this file. This file is snippet of a podcast rather than the full episode (to reduce processing time for this workshop).
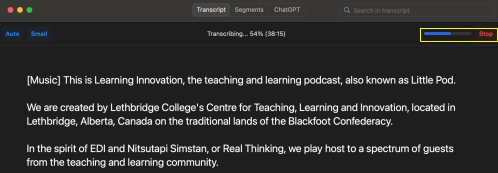
- The application will automatically start transcribing and you will see the transcript developing in real time. Wait for the transcript to finish loading. You will see the percentage completed and estimated wait time remaining at the top of the screen.

- To give you an idea of the wait time, a 30-minute audio file will typically take 90-120 minutes to complete transcribing.
- You can click Stop in the top right to stop transcription at any time. You will still be able to export text saved so far.
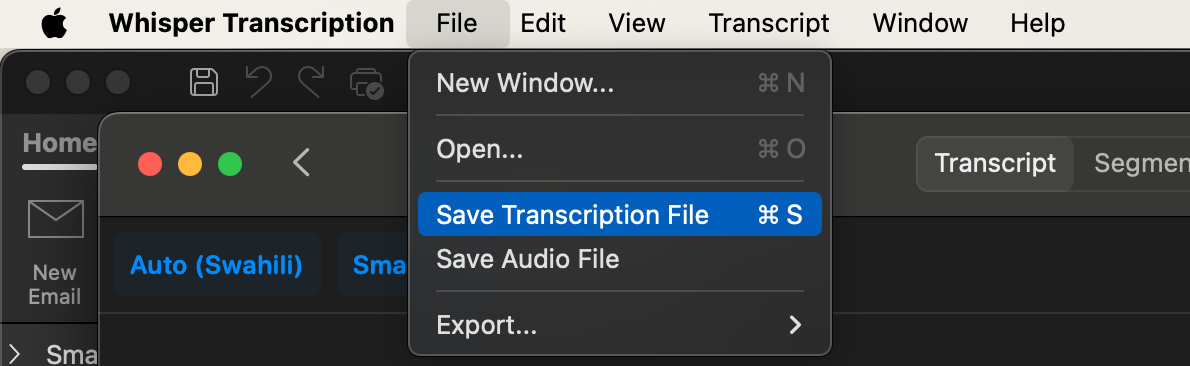
- To save the file in the application, navigate to your top toolbar and select File > Save Transcription File.
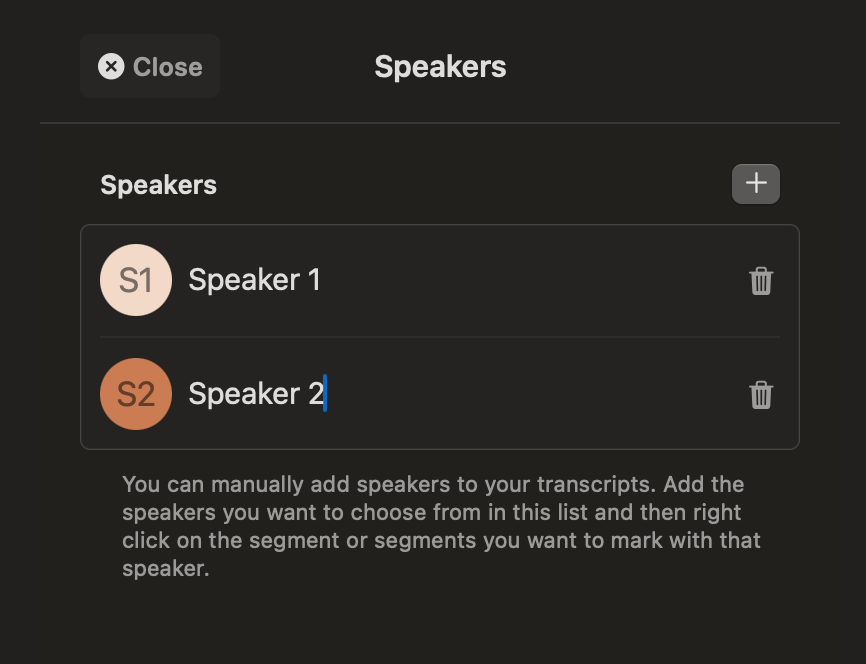
- Optional: If you selected the Transcribe Podcast function, you can manually add two speakers in the free version.
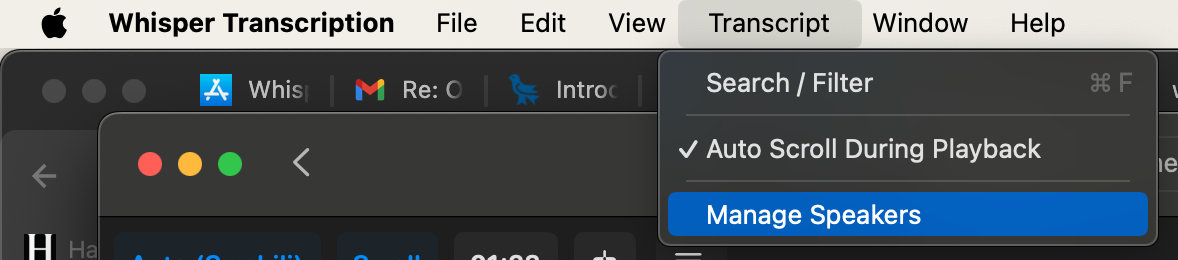
- In the top toolbar of your computer, select Transcript > Manage speakers.
- Click the plus sign to add speakers and name them.
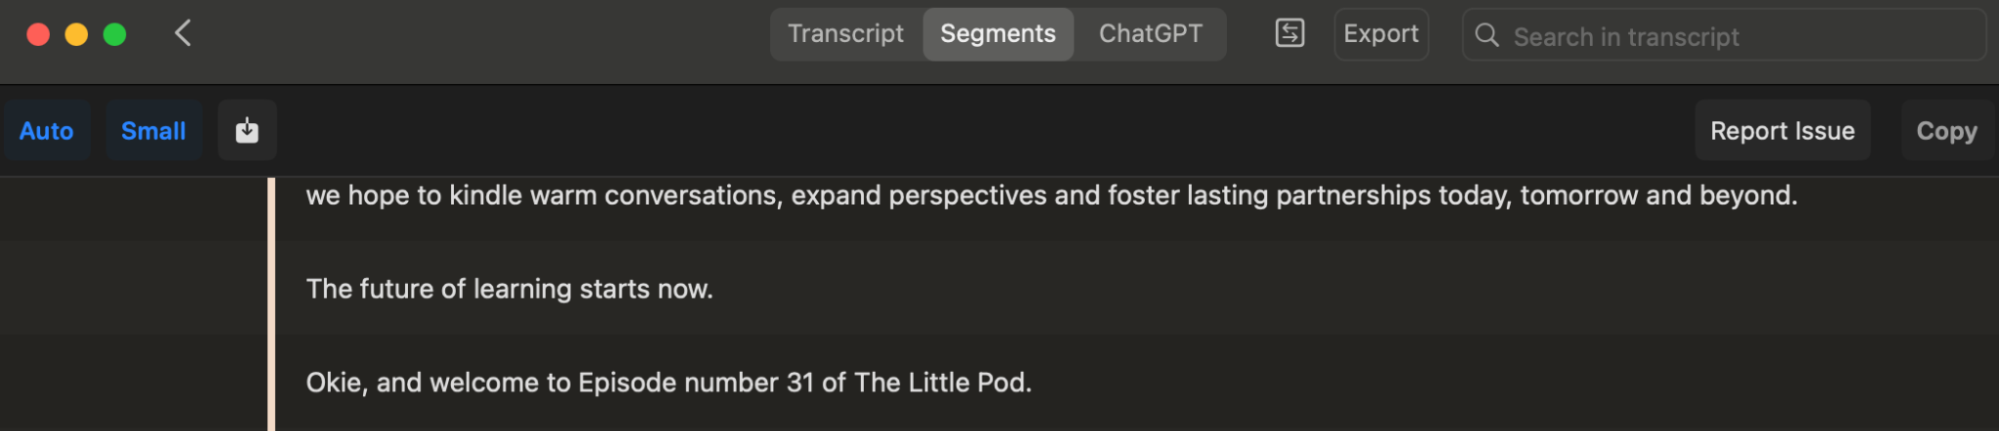
- Return to your transcript (available through the left pane on the Whisper home window) and select Segments at the top.
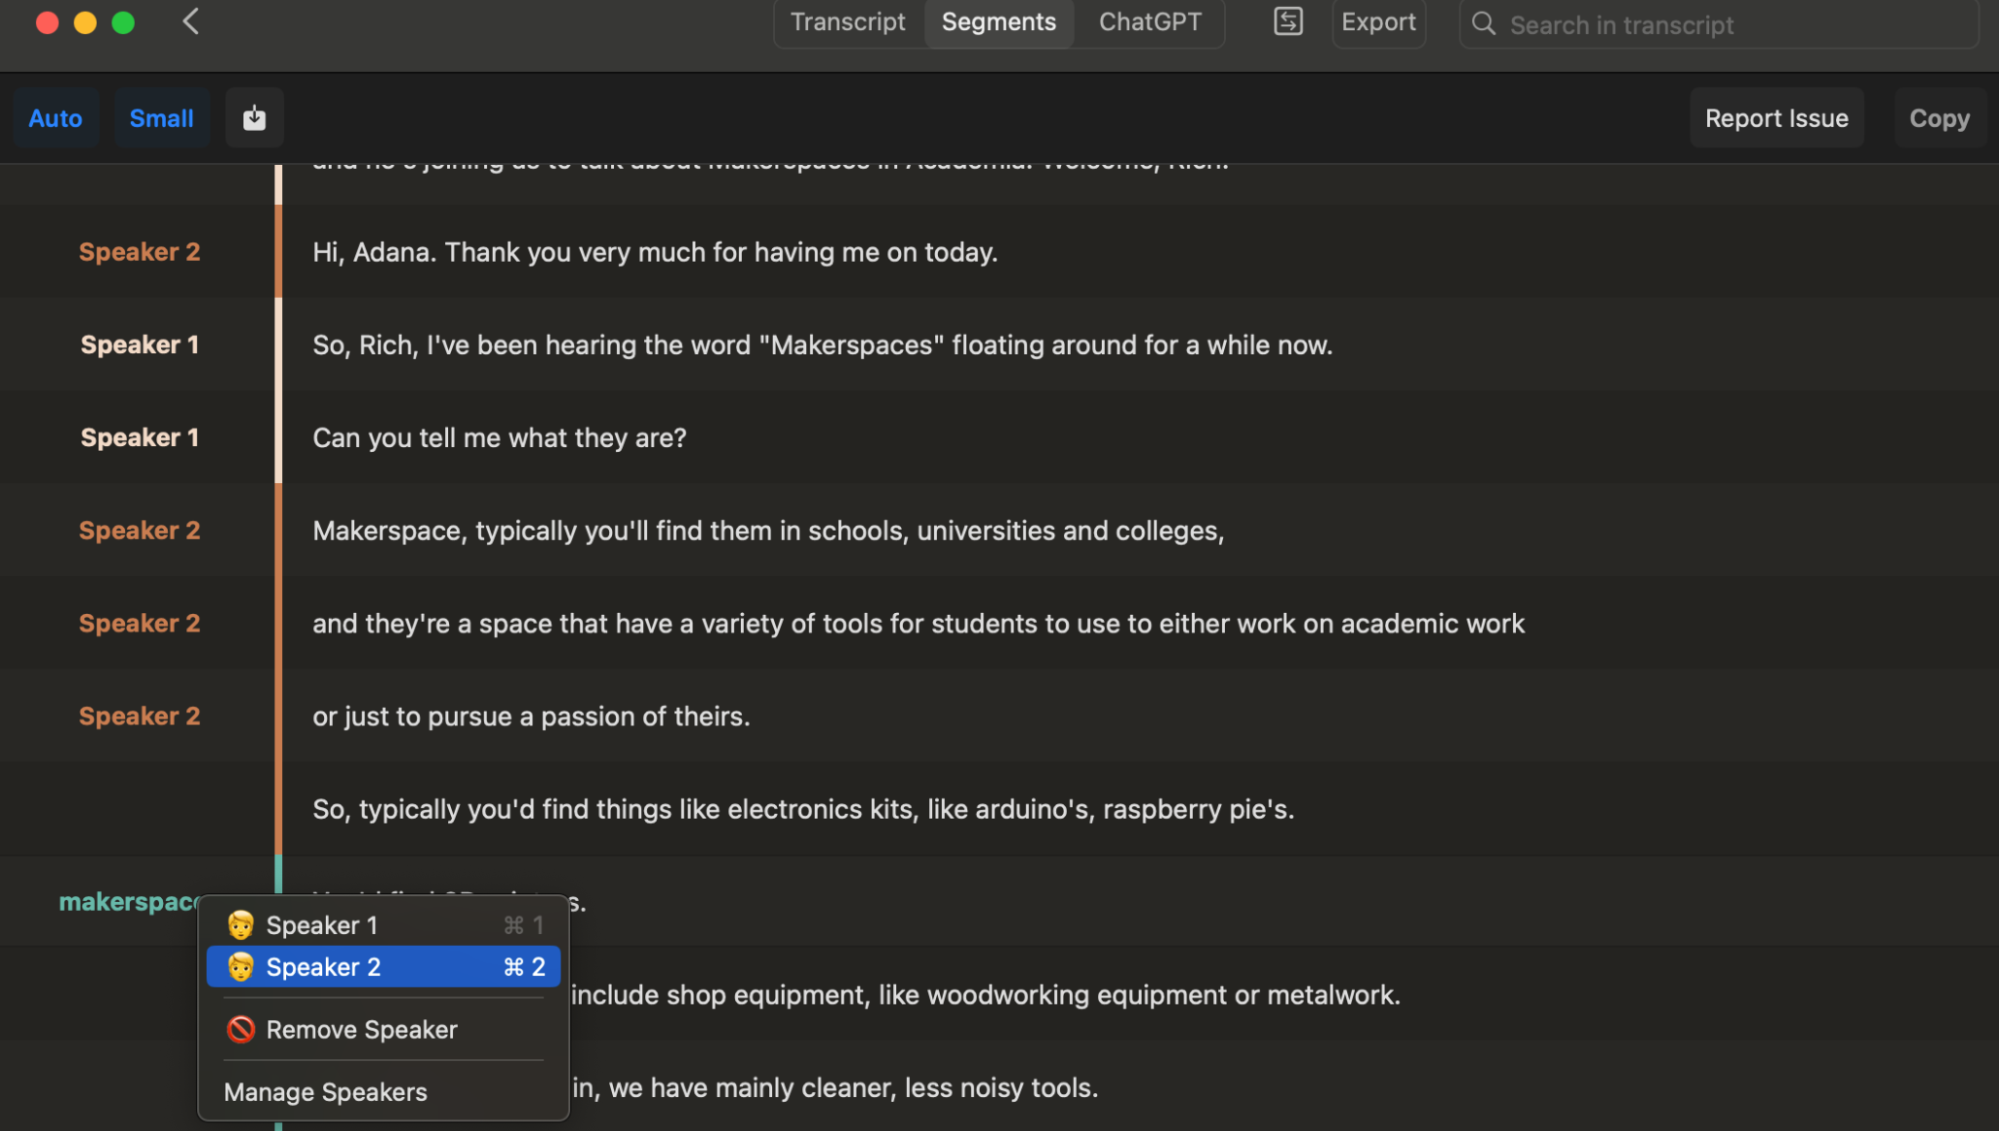
- Click the left margin on the lines that you want to assign speakers to, and select your speaker.
- In the top toolbar of your computer, select Transcript > Manage speakers.
- To export the transcription file to your computer once it has finished transcribing, select Export at the top right.
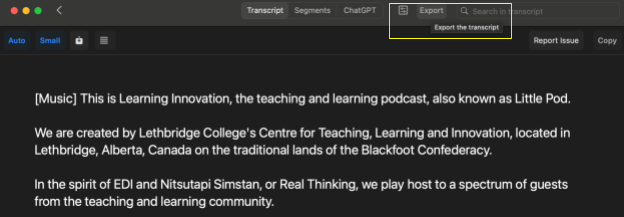
- You can toggle the Style and Grouping settings on the right pane.
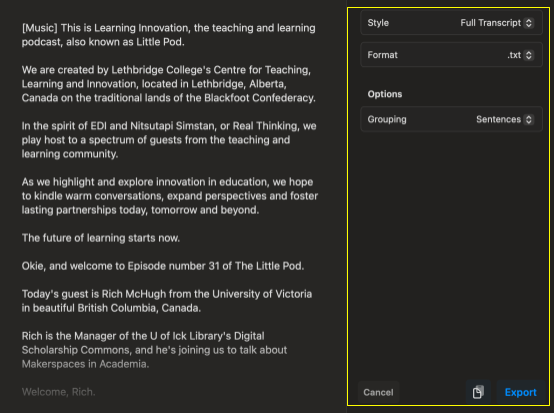
- Under Style, selecting Full Transcript will give you the text only, while selecting Segments will allow you to include time stamps.
- If you selected Full Transcript, you can group lines by sentences or speaker paragraphs (if speakers have been added) under Options.
- If you selected Segments, you can enable speaker names and time stamps under Options. - Click Export. To open your new file in Microsoft Word, right click on the file in your finder and select Open with > Microsoft Word.
- You can toggle the Style and Grouping settings on the right pane.
Congratulations! You’ve exported your file, which is now ready to edit/clean on Microsoft Word.