Advanced Fonts with XeLaTeX
If you and your group have any questions, or get stuck as you work through this in-class exercise, please ask the instructor for assistance. Have fun!
XeLaTeX is an alternative compiler to regular LaTeX that supports Unicode text and other modern font formats. That means you can type in any language, and not just in English letters.
Let’s create a new project for this activity in Overleaf.
-
Create a new project in Overleaf and choose the first one (Blank paper)

-
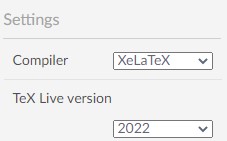
Change compiler. Click the top left Menu button, scroll down to Settings, click the drop down next to Compiler, then select XeLaTeX.
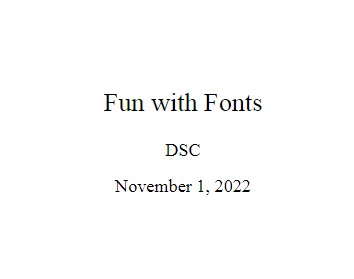
- Replace the original text with the following to set up your title page:
\documentclass[pdf]{article}
\usepackage{fontspec}

% This sets the default font of the document
\setmainfont{Times New Roman}

% This sets the sans serif font for this document
\setsansfont{Arial}

% This sets the mono font for this document. You can also choose the colour for font (coloud would also work in the above lines)
\setmonofont[Color={4CA6A6}] {Courier New} %4CA6A6 is the hex code for teal.

\title{Fun with Fonts}
\author{Your name here}
\date{\today}

\begin{document}
\maketitle

\end{document}
- Change the font Copy and paste the below line between your
\maketitleand\end{document}statements.
 This is the default font, Times New Roman.
 % use \sffamily to switch to sans serif font
 \sffamily Here is some text in Arial, a sans serif family font.
 % use \ttfamily to switch to mono font
 \ttfamily Here is some teal text in Courier New, a mono font.
 % use \rmfamily to go back to default font
 \rmfamily Set back to times new roman

If you want to explore more fonts covered in the fontspec package, check this.
- Add a font package for Japanese, Chinese, or Korean
- Add
\usepackage{xeCJK}to the top of the file with the other\usepackagestatements. - Add
\setCJKmainfont{IPAMincho}below the other font statements - Go to Google Translate and translate a phrase from English to Japanese
- Copy the Japanese translation into your overleaf document.
- Re-compile - you should now see the Japanese text in the pdf.
- Add

- Add a font from outside Overleaf

- Go to Google Fonts and download the Asap font family files by clicking the Get Font button on the top right.
- Unzip the downloaded folder. Note that there is a folder called “static” in the downloaded files. You will need the files inside that folder.
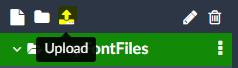
- Click the top left folder icon to make a new folder in Overleaf. Name the folder AsapFontFiles. Note: the folder name is case sensitive!
- Upload the font files (extension .ttf) that are inside the folder “static” into your new Overleaf folder using the Upload button on the top left.
- Now, you need to tell the package
fontspecwhere the font files are/ For that, copy and paste into your document, after the\package{fontspec}line.
- Go to Google Fonts and download the Asap font family files by clicking the Get Font button on the top right.
\setsansfont{Asap}[
    Path=./AsapFontFiles/,
    Scale=0.9,
    Extension = .ttf,
    UprightFont=*-Regular,
    BoldFont=*-Bold,
    ItalicFont=*-Italic,
    BoldItalicFont=*-BoldItalic
]
-
This is setting the Asap font as the sans serif font for your document. Remember to delete the line that said
\setsansfont{Arial}, otherwise it will override the determination of Asap as sans serif font. -
Try writing some text in the Asap font:
\sffamily Now we can type in asap! The Quick Brown Fox Jumps Over the Lazy Dog

- Add a Unicode font
- In the top of the document, replace
\setmainfont{Times New Roman}with\setmainfont{Doulos SIL} - Doulos SIL is a Unicode font family. Now you can use unicode characters in your LaTeX document!
- Type some IPA (International Phonetic Alphabet) characters using this browser IPA keyboard and this reference guide, then copy and paste them into your Overleaf document.
- If you have a unicode keyboard installed on your computer, you can type directly in your Overleaf document.
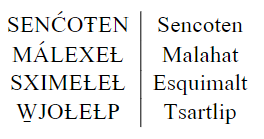
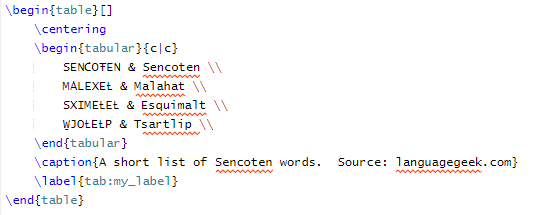
- Type out these SENĆOŦEN words using the SENĆOŦEN Keyboard, then copy-paste them into a table like the image below.
- Hint: use ‘ to add top accent, - for dash accent and _ for low line accent.
- In the top of the document, replace
- OPTIONAL: Using Tipa, a phonetic alphabet font
- Tipa is an older way to use IPA symbols in LaTeX before unicode was supported - you can skip this part of the activity if you like.
- Make a new folder called TipaFontFiles
- Download the tipa font files. Click on “Download the contents of this package” button, then unzip the folder. You will need the files inside the folder tipa > type1.
- Tipa has a lot of different font options, but to keep things simple upload roman (tipa8), bold (tipab10), italic (tipasl8), and bold italic (tipasb10) to your new folder.
- Copy and paste:
\setsansfont{tipa}[ Path=./TipaFontFiles/, Scale=0.9, Extension = .pfb, UprightFont=*8, BoldFont=*b10, ItalicFont=*sl8, BoldItalicFont=*sb10 ] - Remember to delete the old text that set Asap as the sans serif font.
- Use pages 14 and 36-56 of the Tipa manual to type up some phonetic symbols.
- Try to write out the IPA pronunciation for Lekwungen:

- Solution:
\sffamily l@\textvbaraccent{k}\textsuperscript{w}@N@n
- If you want more resources, here are some helpful links:
- More help on XeLaTeX
- More help on font commands
Congratulations - now you can use fonts with XeLaTeX!