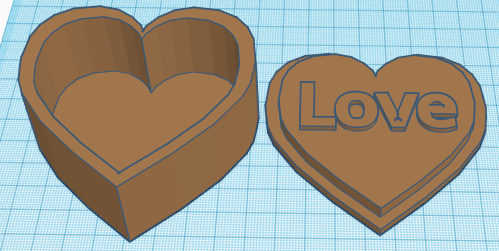
Heart-Shaped Box Activity
-
Open up TinkerCad, create an account or log-in. Open a new design.
- Make a heart:
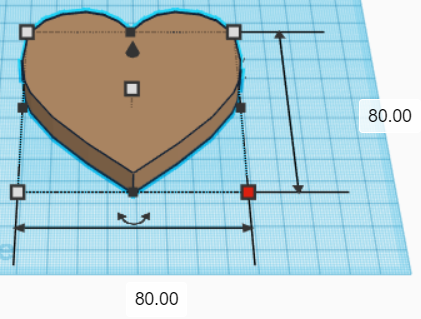
- Grab a Heart from the Basic Shapes panel on the right and drag it onto the workplane.
- Resize the heart so that its length and width are both 80mm by dragging the white square handles on the base and top of the heart (or by clicking on one of the white square handles and entering “80” in the fields).
- Change the height of the heart to 30mm by clicking on the handle in the middle of the heart.

- Make a second heart:
- Duplicate the heart by clicking Duplicate at the top-left of the screen or by clicking Ctrl + D.
- Resize the heart so that its length and width are both 70mm by dragging the white square handles on the base and top of the heart (or by clicking on one of the white square handles and entering “70” in the fields).
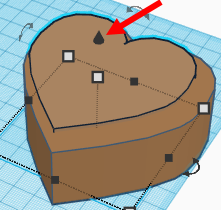
- Raise this heart 2mm from the workplane by dragging the small black “cone” on the top of the heart upwards.

- Make a copy for the lid:
- Select both hearts by holding down the Shift key and clicking them.
- Click on Duplicate and drag the new hearts to a clear area on the workplane.
- There should now be four hearts on the workplane.

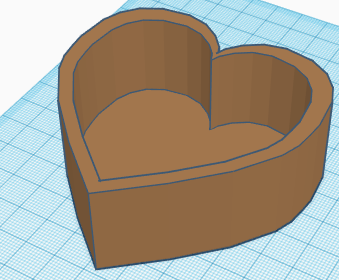
- Make the box out of one set of hearts:
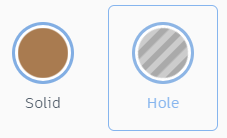
- Make the smaller heart a hole by changing the Shape from Solid to Hole at the top-right of the screen.
- Select both hearts and click Align at the top-right of the screen.
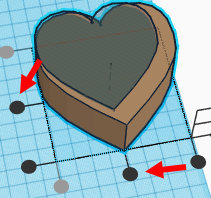
- Click on the two middle black circular handles to bring the hearts into alignment.
- Click Group at the top-right of the screen to combine the objects into one.

- Make the lid out of the second set of hearts:
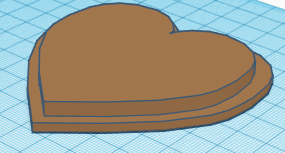
- Change the height of the larger heart to 3mm by clicking on the white square handle in the middle of the heart.
- Change the height of the smaller heart to 6mm.
- Resize the smaller heart so that its length and width are both 68mm by dragging the white square handles on the base and top of the heart (or by clicking on one of the white square handles and entering “68” in the fields). This allows the lid to fit easily in the box.
- Select both hearts and click Align at the top-right of the screen.
- Click on the two middle black circular handles to bring the hearts into alignment.
- Click Group to combine the objects into one.

- OPTIONAL: Place text on the inside of the lid.
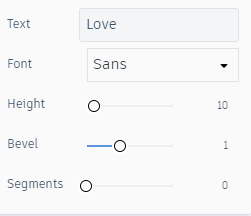
- Grab a Text from the Basic Shapes panel on the right and drag it onto the workplane.
- Write whatever is to be written on the inside of the box in the Text field.
- Change the Bevel to approximately 1. This makes the text thicker and therefore easier to 3D print.
- Resize the length and width to be small enough to fit on the inside of the lid.
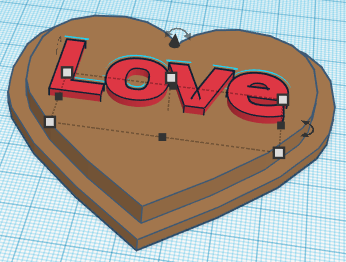
- Drag the text into the lid.
- Select the text and the heart, then click Align at the top-right of the screen.
- Click on the two middle black circular handles to bring the hearts into alignment.
- Select the text and the lid, then click Group.

- Export your design as 3D printable files:
- Select the main box.
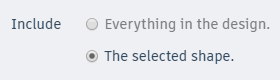
- Click on the “Export” button on the top right of the toolbar. Select the option include “the selected shape” and then select “.STL” and save the file to your computer.
- Repeat with the lid.