Inkscape’s Selector Tool
We are starting with the Selector tool because you will be using this for almost everything you make in Inkscape, especially moving objects around on the page area.
The Selector tool is designed to help you do most of the things you’d ever want to do with an object: move, scale, or rotate it.
Take your time with this tutorial because the Selector tool can sometimes seem confusing until you get used to it.
Let’s get practicing!
1. Draw three boxes on the Inkscape page area
Background
- We need to have some objects to play with in order to get used to using the Selector tool, so we are are going to draw three squares on the page area and manipulate them using the Selector tool.
- The process of making our squares will also introduce you to Inkscape’s Toolbox and to some optional but handy keyboard shortcuts.
- Please do not worry about the exact sizes, shapes, or colours of the squares at this point, as we just need to have something to start with.
Practice
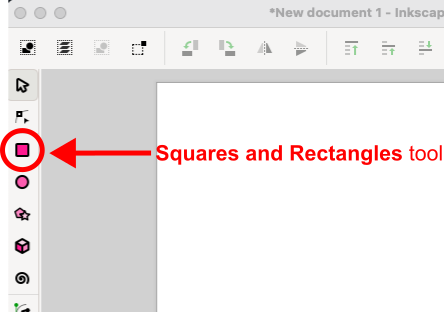
1.1. Click on the Squares and Rectangles tool in the toolbox.
Tips
- The Squares and Rectangles tool is located third from the top of the toolbox.
- Optional keyboard shortcut: hit R on your keyboard.
- You will know you have activated the Squares and Rectangles tool because the cursor will change to a square and a + sign. Note that the + sign is the now the centre of the cursor:
.
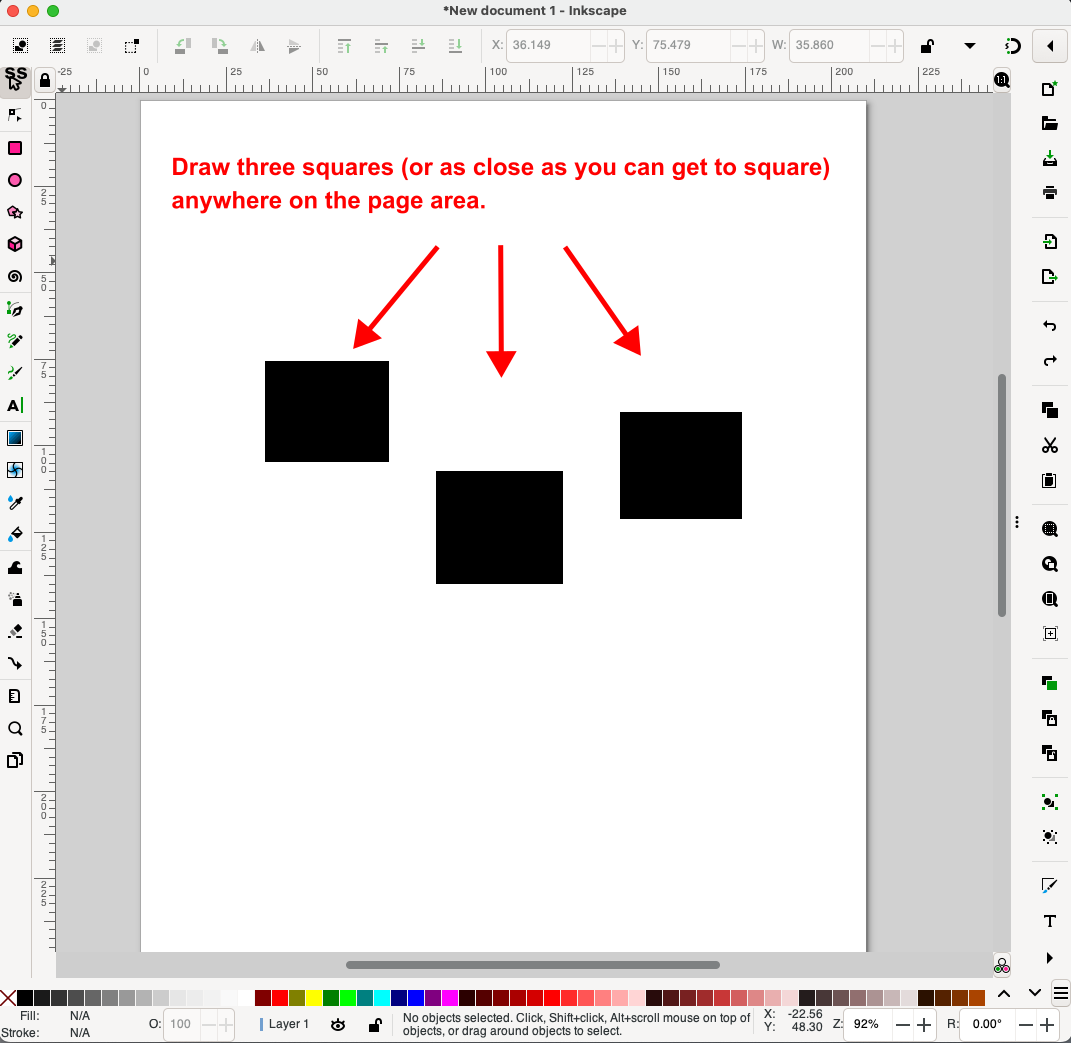
1.2. Draw three squares (or as close as you can get to square), spaced apart from each other, on the page area.
Tips
- Left click and drag in any direction to make a square to your desired size.
- The proportions of the squares (or rectangles) do not matter at this point, as we just need some objects to work with.
- Release left click when you are happy with your square’s size and repeat the process until you have drawn three squares.
2. Practice using the Selector tool
Background
- Now that we some objects to play with, it is time to get used to the Selector tool.
- Note that clicking on an object more than once will activate a different features of the Selector tool.
- We are going to use the Selector tool manipulate our boxes in the four options available when using this tool:
- move literally moves objects around on the page area.
- scale changes the size of objects
- skew slants objects, for example, skewing (also know as shearing) a square into parallelogram shape
- rotate rotates objects relative to their centre point
- We will also use the Selector tool to select single and multiple objects in different ways.
Practice
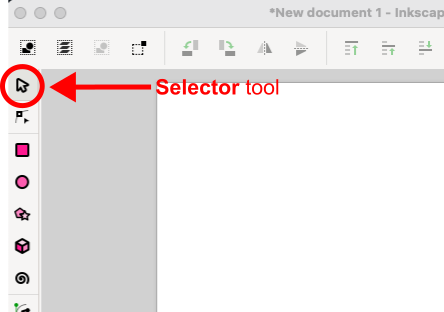
2.1. Click on the Selector tool in the toolbox.
Tips
- The Selector tool is located at the top of the toolbox.
- Optional keyboard shortcut: hit S on your keyboard.
- You will know that the Selector tool is active because the cursor will change to a pointer arrow:
.
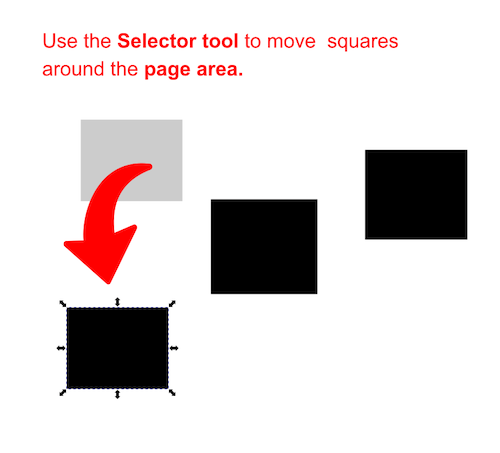
2.2. On one of the squares, click and hold move it around the page area.
Tips
- Click within the body any of your squares and move them around the page area anywhere you like.
- Release the left-click hold to stop moving the square(s).
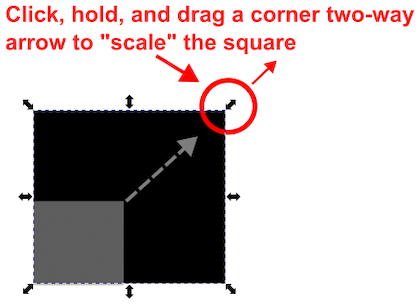
2.3. On one of the square’s corner two-way arrows, click and hold, then motion your mouse to change the square’s scale.
Tips
- When you click on a square you will notice that two-way-arrows appear around the outside edges of the square
.
- You can click and hold on any one of the arrows and then slide the square bigger and smaller.
- Holding the ctrl key will lock the proportions of the square while you change its size.
- Notice that the corner arrows scale a square’s size but also change its vertical and horizontal proportions.
- The edge arrows (the top, right, bottom, and left arrows) also control scale, but only in one plane at at time.
- Release the mouse hold to stop scaling.
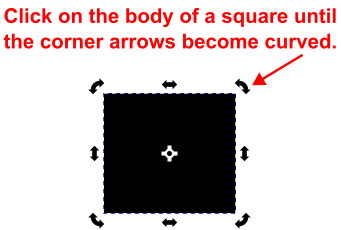
2.4. Click twice on a square until the corner two-way arrows become curved.
Tips
- Any unselected objects, like our example squares not surrounded by two-way arrows, will need to be clicked on twice to make the curved two-way arrows appear.
- Squares already surrounded by two-way arrows will only need to be clicked on once to make the curved two-way arrows appear.
- This is to set us up to use the skew and rotate features of the Selector tool.
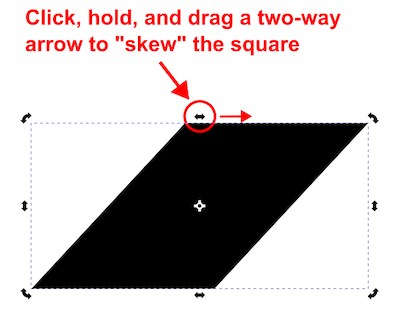
2.5. On one of the straight two-way arrows (not the curved ones), click and hold, then motion your mouse to skew the square.
Tips
- Release the mouse hold to stop skewing.
- You can skew using any of the straight two-way arrows, but the curved arrows allow you to rotate objects, like our example square, which we will practice next.
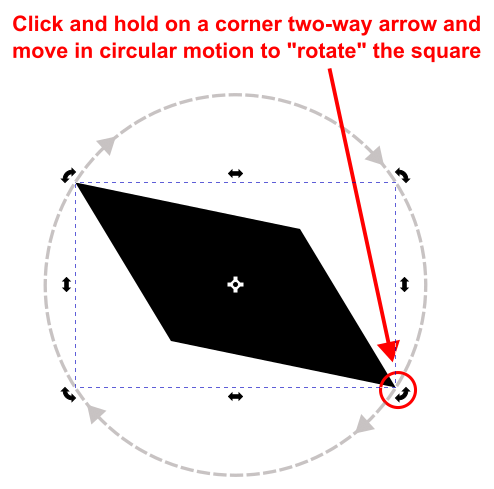
2.6. On one of the curved (corner) two-way arrows, click and hold, then move your mouse in circular motion to rotate the square.
Tips
- Release the mouse hold to stop rotating.
- You can rotate using any of the curved two-way arrows.
We have now covered the four features of the Selector tool. The Selector tool is helpful when you want to arrange and scale objects roughly how you would like. Inkscape has several ways to manipulate objects and with greater precision, which you can learn about in our other tutorials.
All done ✓ You are now ready to move on to your next tutorial.