Installing Inkscape and Introducing its Interface
If you have not already done so, please complete the the pre-workshop section before doing this tutorial.
Now it is time to install Inkscape on your computer. Note that this tutorial is for Inkscape 1.4.
Please ask for assistance if you run into any snags. Here we go!
1. Download and install Inkscape
Background
- When you install Inkscape, you will be walked through a few choices to make prior to opening the program for the first time.
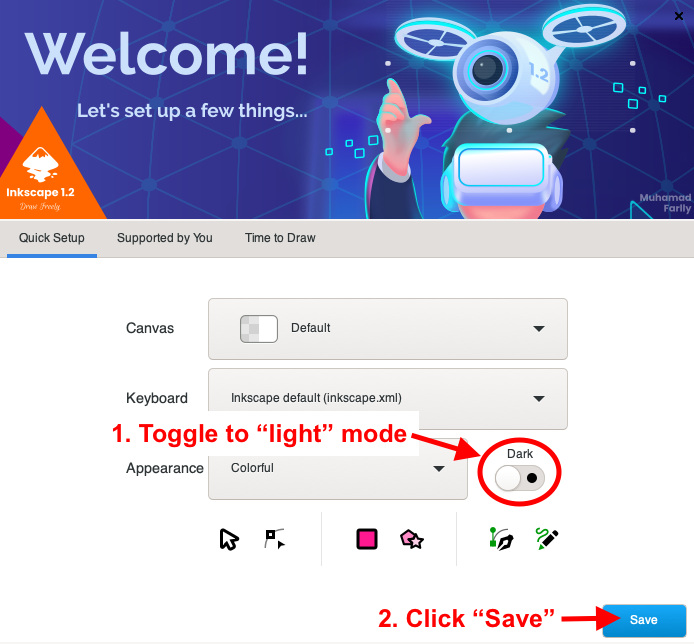
- We will click through the suggested options and make only one change, which is setting the theme to “Light” mode, mostly because it will be easier to see the tutorial images.
- The images in this tutorial might look slightly different than what you see in your version of Inkscape, depending on your system (Windows, macOS, or Linux).
- Inkscape takes up roughy 600MB of space on your hard drive.
Practice
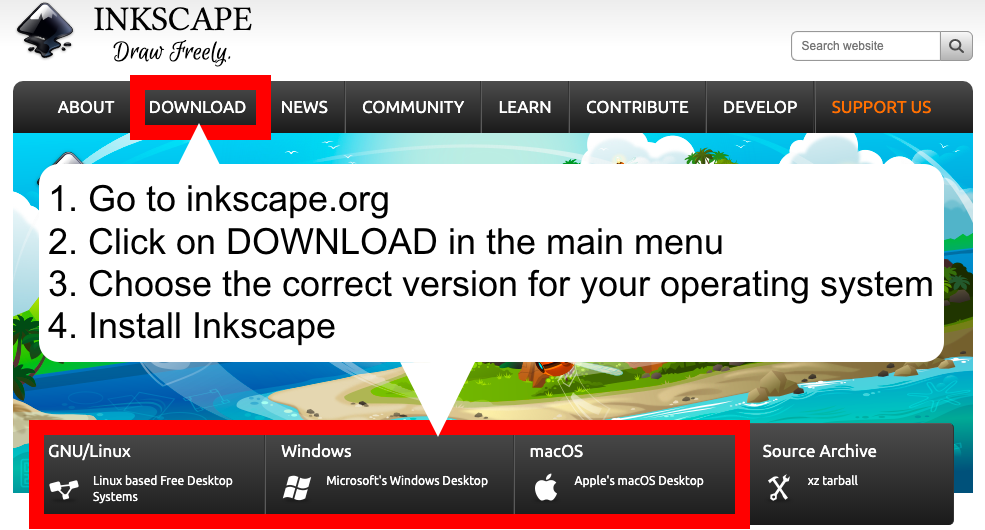
1.1. Go to inkscape.org (↪) and install the correct version of Inkscape for your operating system (macOs, Windows, or Linux).
1.2. In the “Quick Setup,” or “Welcome,” window, toggle to Light mode and click Save.
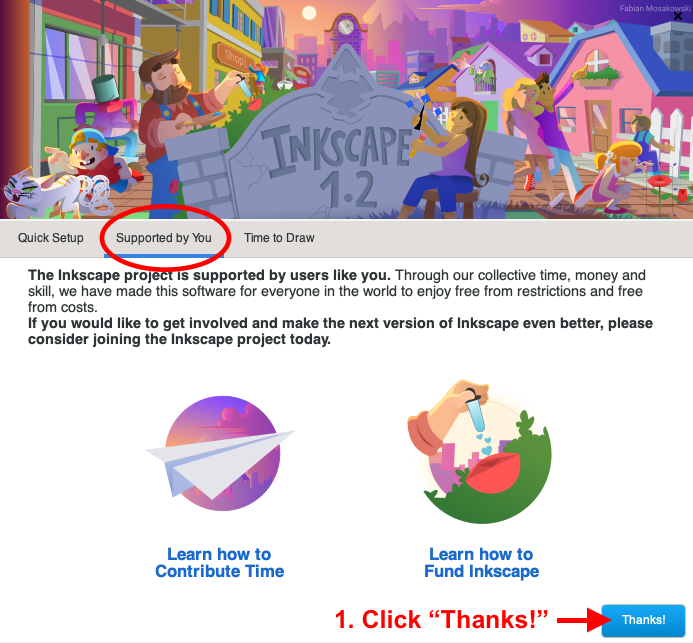
1.3. In the “Supported by You” window, click Thanks!.
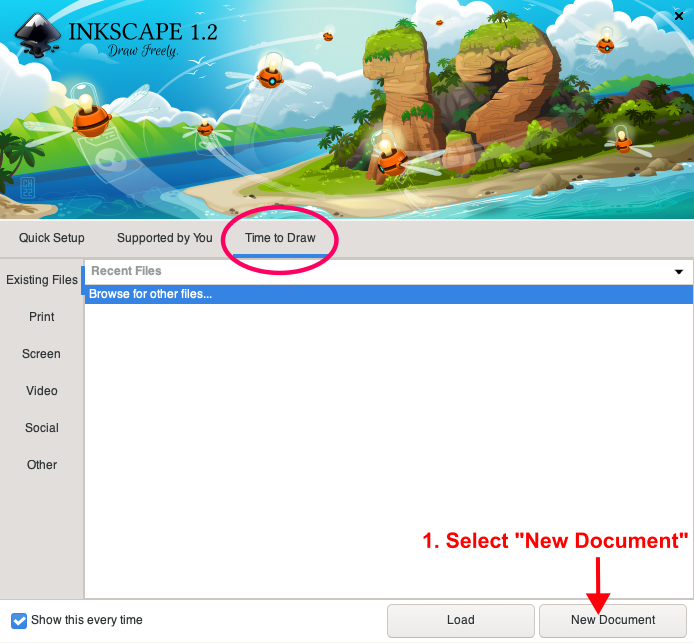
1.4. In the “Time to Draw” window, click New Document.
You should now see a blank page in Inkscape’s main interface, which should look something like this example (macOS version):
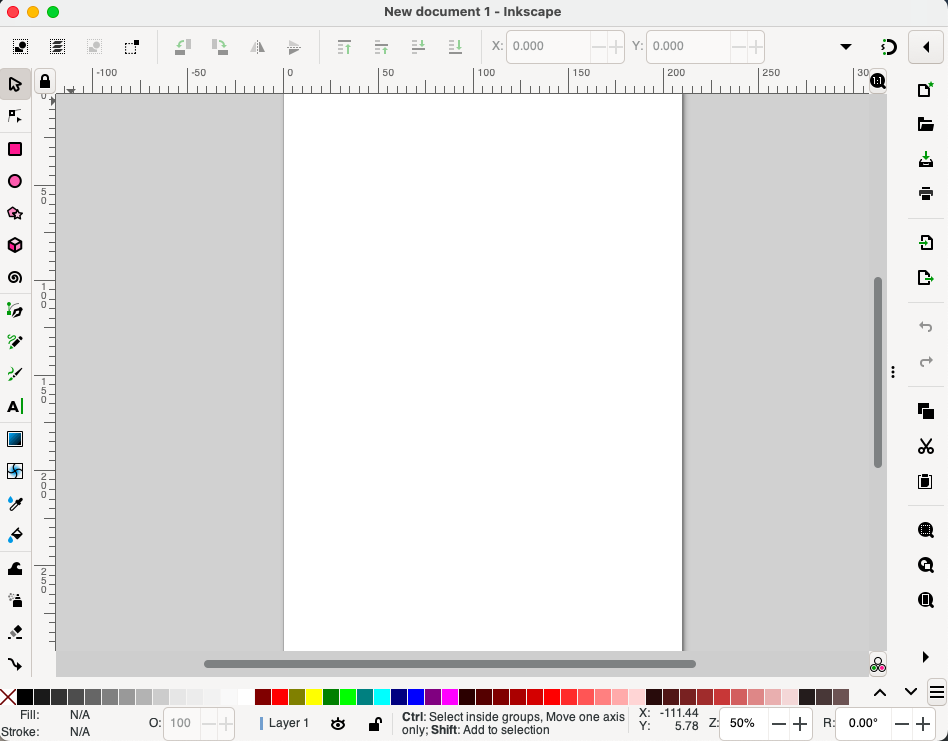
1.5. Familiarize yourself with Inkscape’s interface by taking a few minutes to look at the following picture:
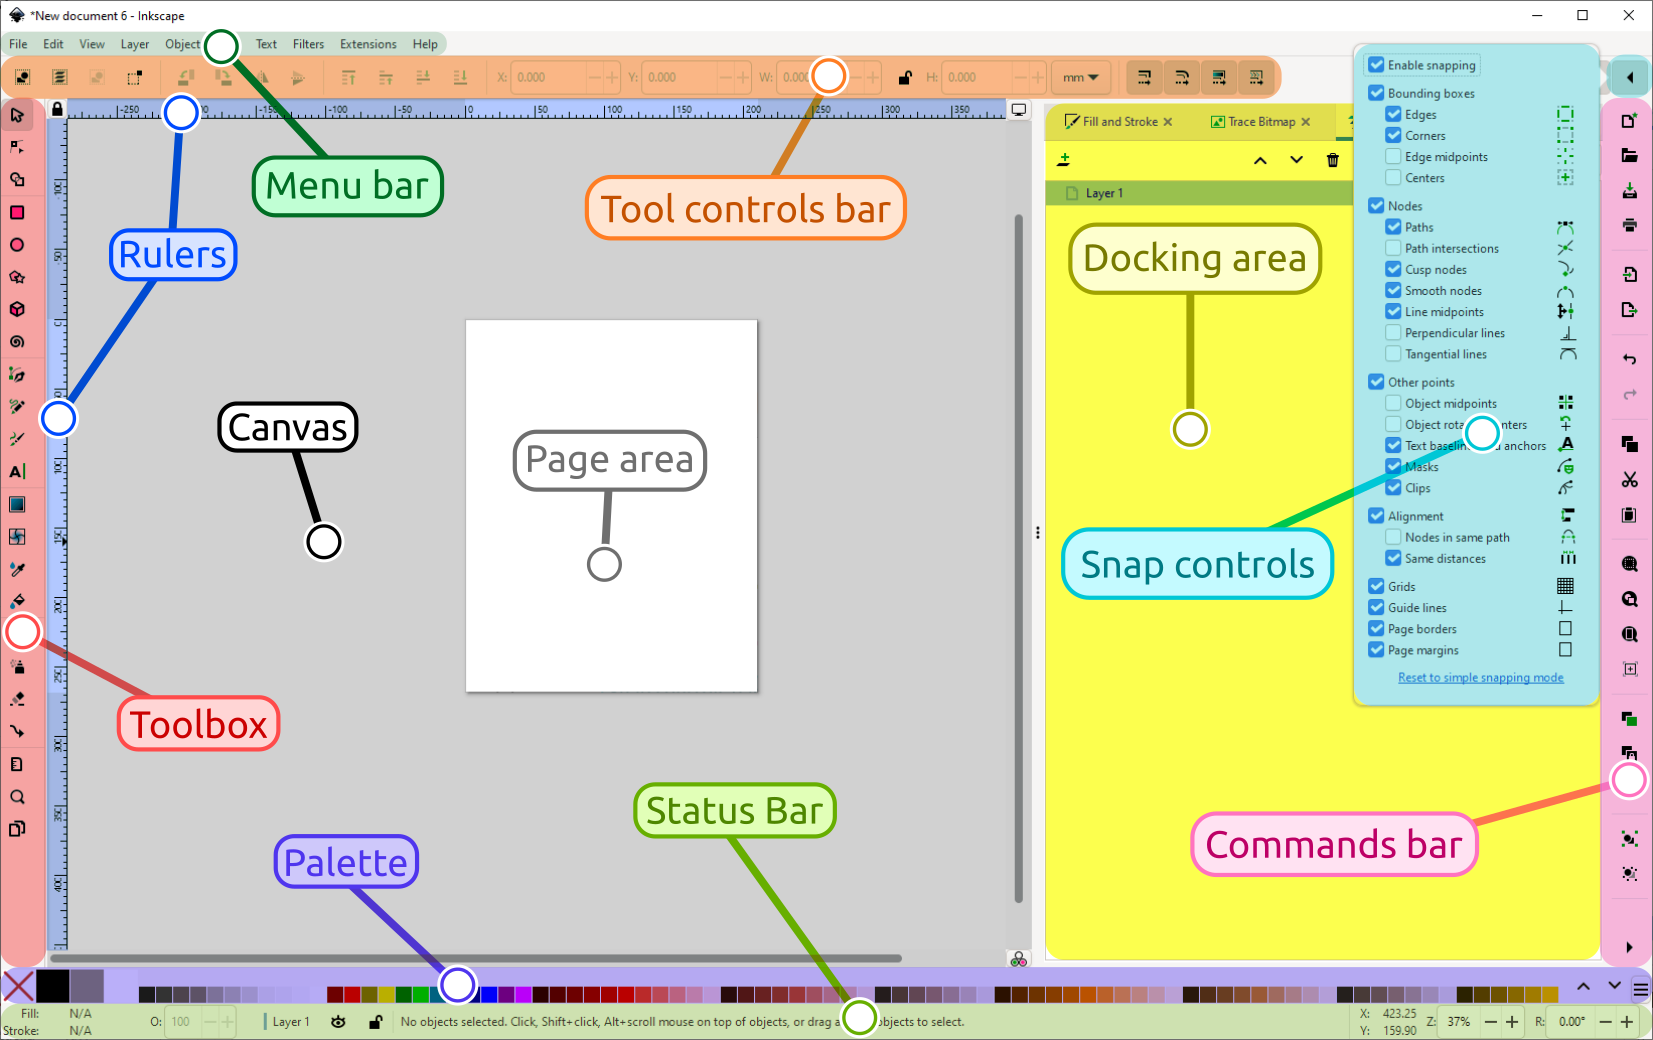 Image source: The Inkscape Beginner’s Guide (↪).
1.6. Get familiar with how to move around Inkscape:
- Left-click is to select
- Mouse scroll wheel moves the page up and down
- Shift + mouse scroll wheel moves the page side to side
- Ctrl + mouse scroll wheel zooms in and out
- Holding down the mouse scroll wheel drags the page around
All done ✓ You are now ready to move on to your next tutorial.