Animated Gifs with Camtasia
![]()
Learning outcomes:
- Participants will be able to know and do the following by the end of this workshop:
- Participants will be able to identify key elements that support multimedia principles of learning
- Participants will be able to identify key tools that will help create clear concise GIFs
- Participants will be able to understand the importance of time and how to start and end GIFs
- Participants will be able to download and transpose the GIFs into files such as Google Docs and Webpages.
- By the end of the workshop participants will be able to add new annotations, transitions, behaviours, animations, cursor effects. By the end of the workshop participants will be able to screen record and create a GIF that supports learning
Introduction to Camtasia and GIF Creation
Prior Knowledge required to complete the activity:
- Download Camtasia free trial or if you are using the main desktop computer, then Camtasia is already downloaded.
- Understand and know the importance of Multimedia principles such as the signaling principle
In-Lesson Activity Steps & Associated Learning Objects:
1. Record a video using Camtasia
- First, open the program with the software you want to demonstrate how to use
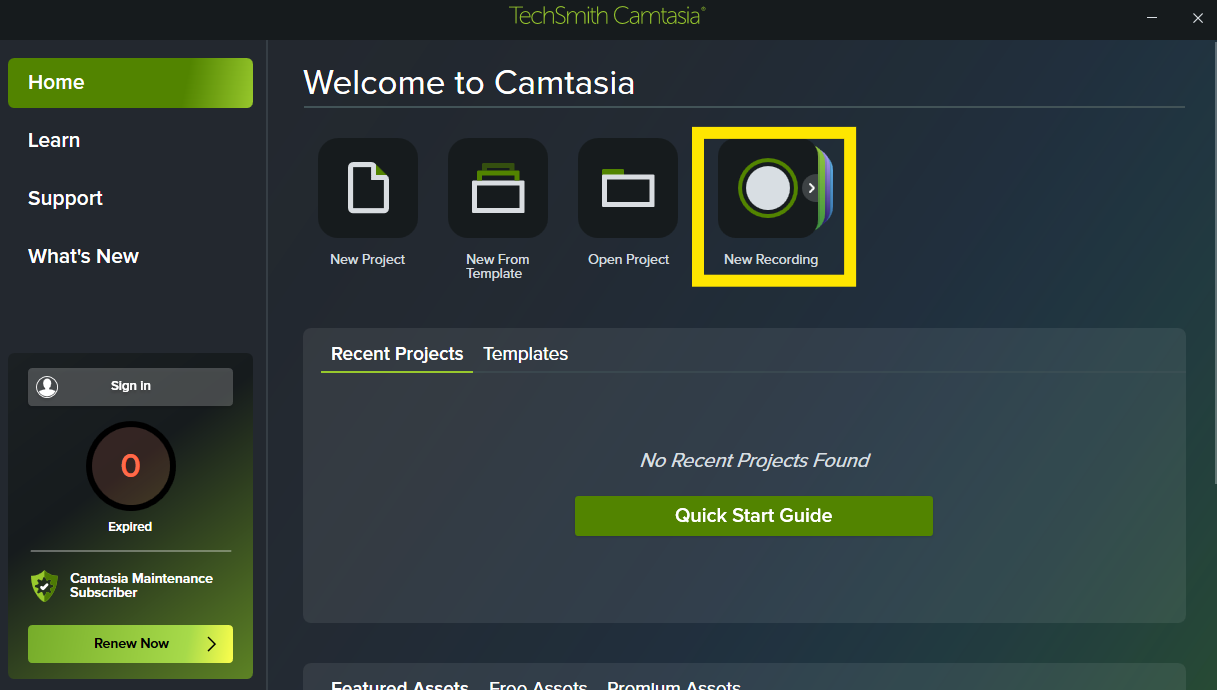
- Next on Camtasia, click New Recording
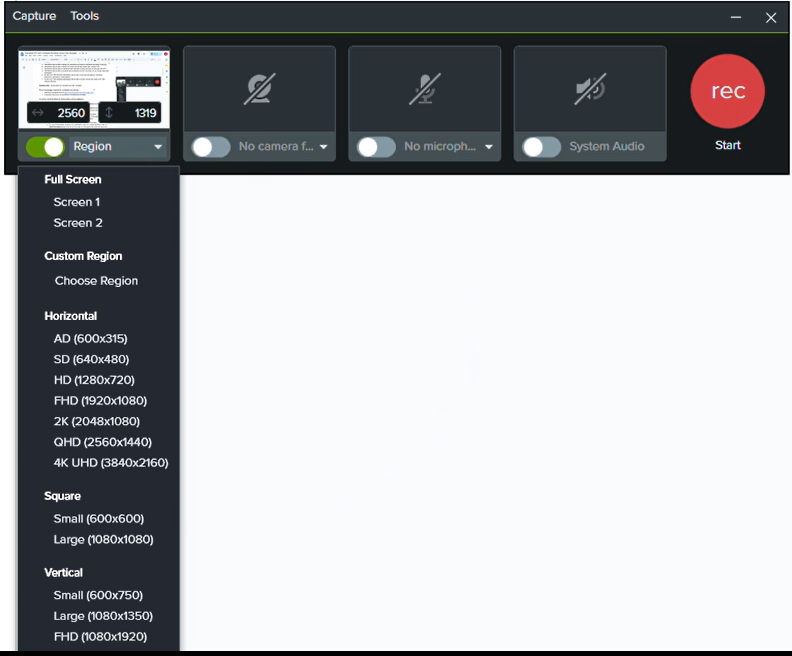
- You can now select the region you wish to record in order to adjust it according to what you would like, click on the two arrows near the area it says the size (number X number) and select Choose Region
- If you would like to add a video of yourself, tick on the Facetime option, if you would like to add built in or system audio (same thing), but for the purpose of this workshop we will only select the screen record option as an animated GIF has no sound.
- Finally click Start Recording
- Camtasia will count down from three seconds before it starts recording.
- Do your demonstration showing your explanation using your cursor and then press the Stop Recording button at the top of the screen (in the screen bar) when you are done. (Please note: try to limit your recording to approximately 20-25 seconds max)
- The video will automatically transfer to Camtasia in order to move onto editing
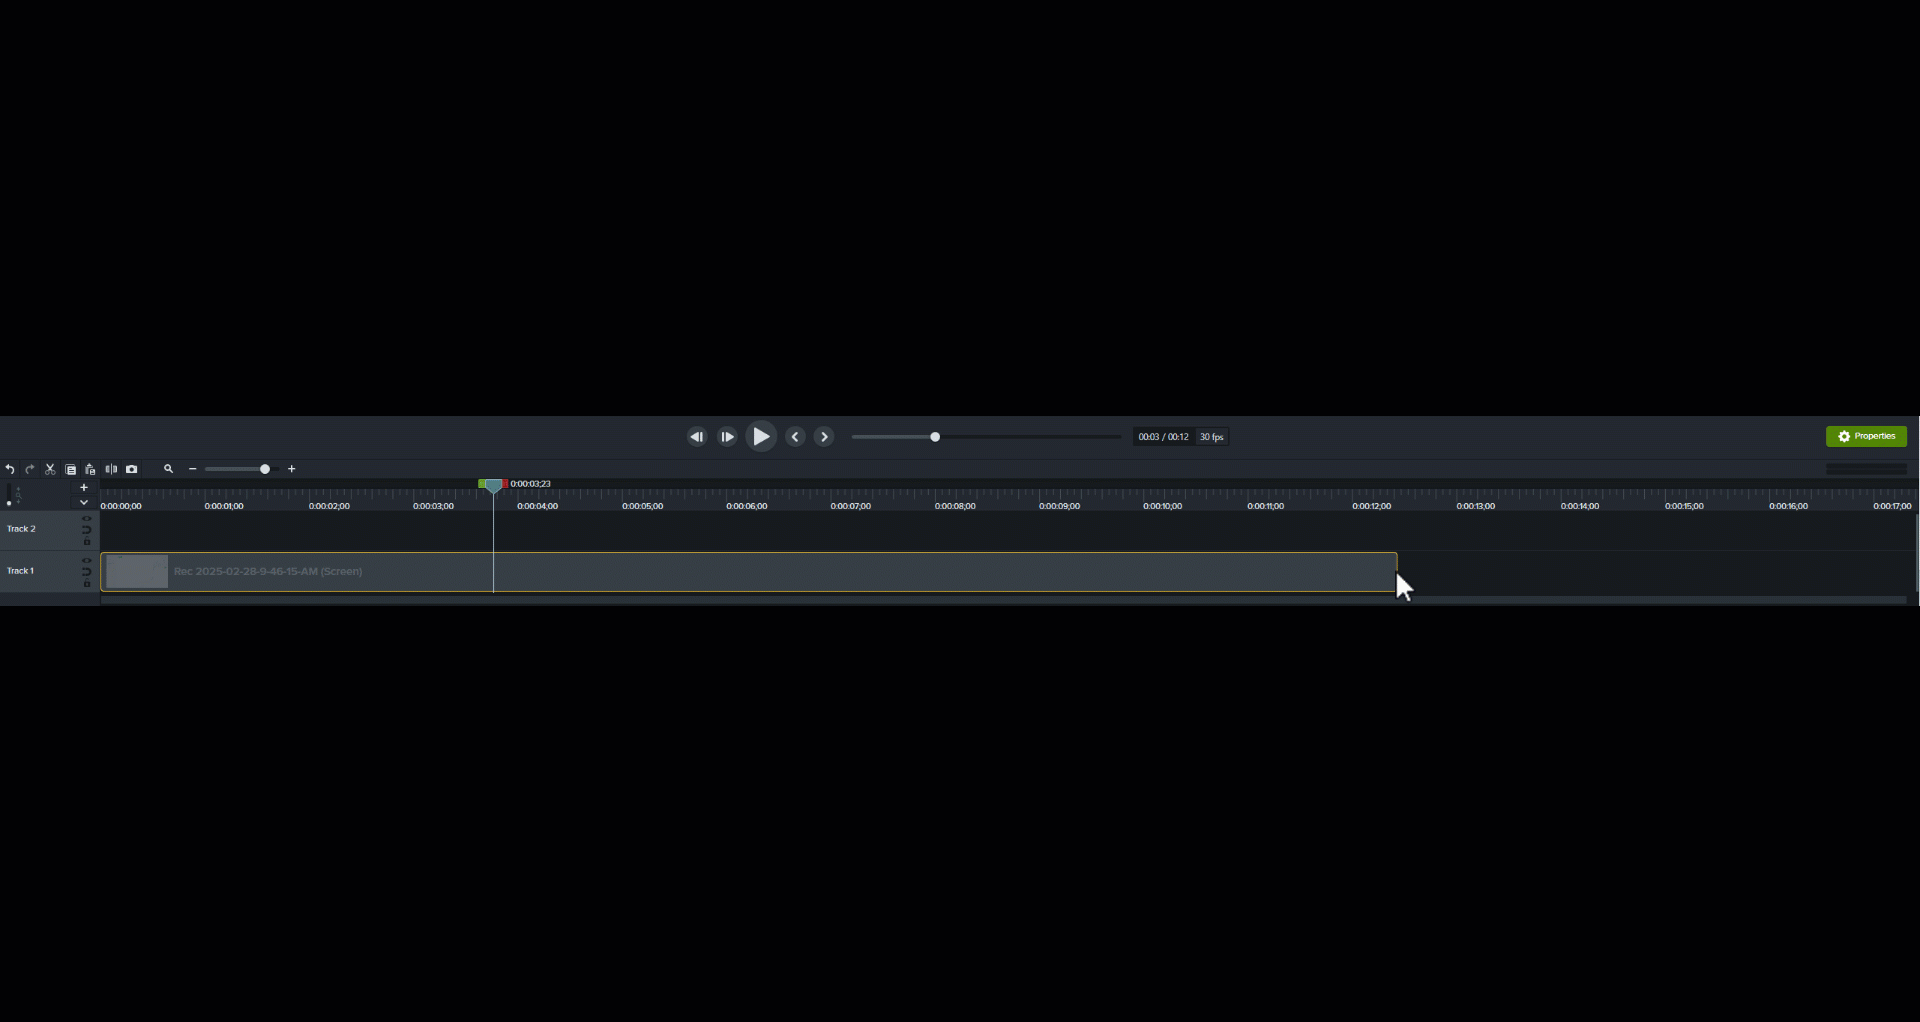
View and Play the Recording by pressing the play button below the video. (Note: pressing the spacebar will start and stop the video which is very handy while editing)
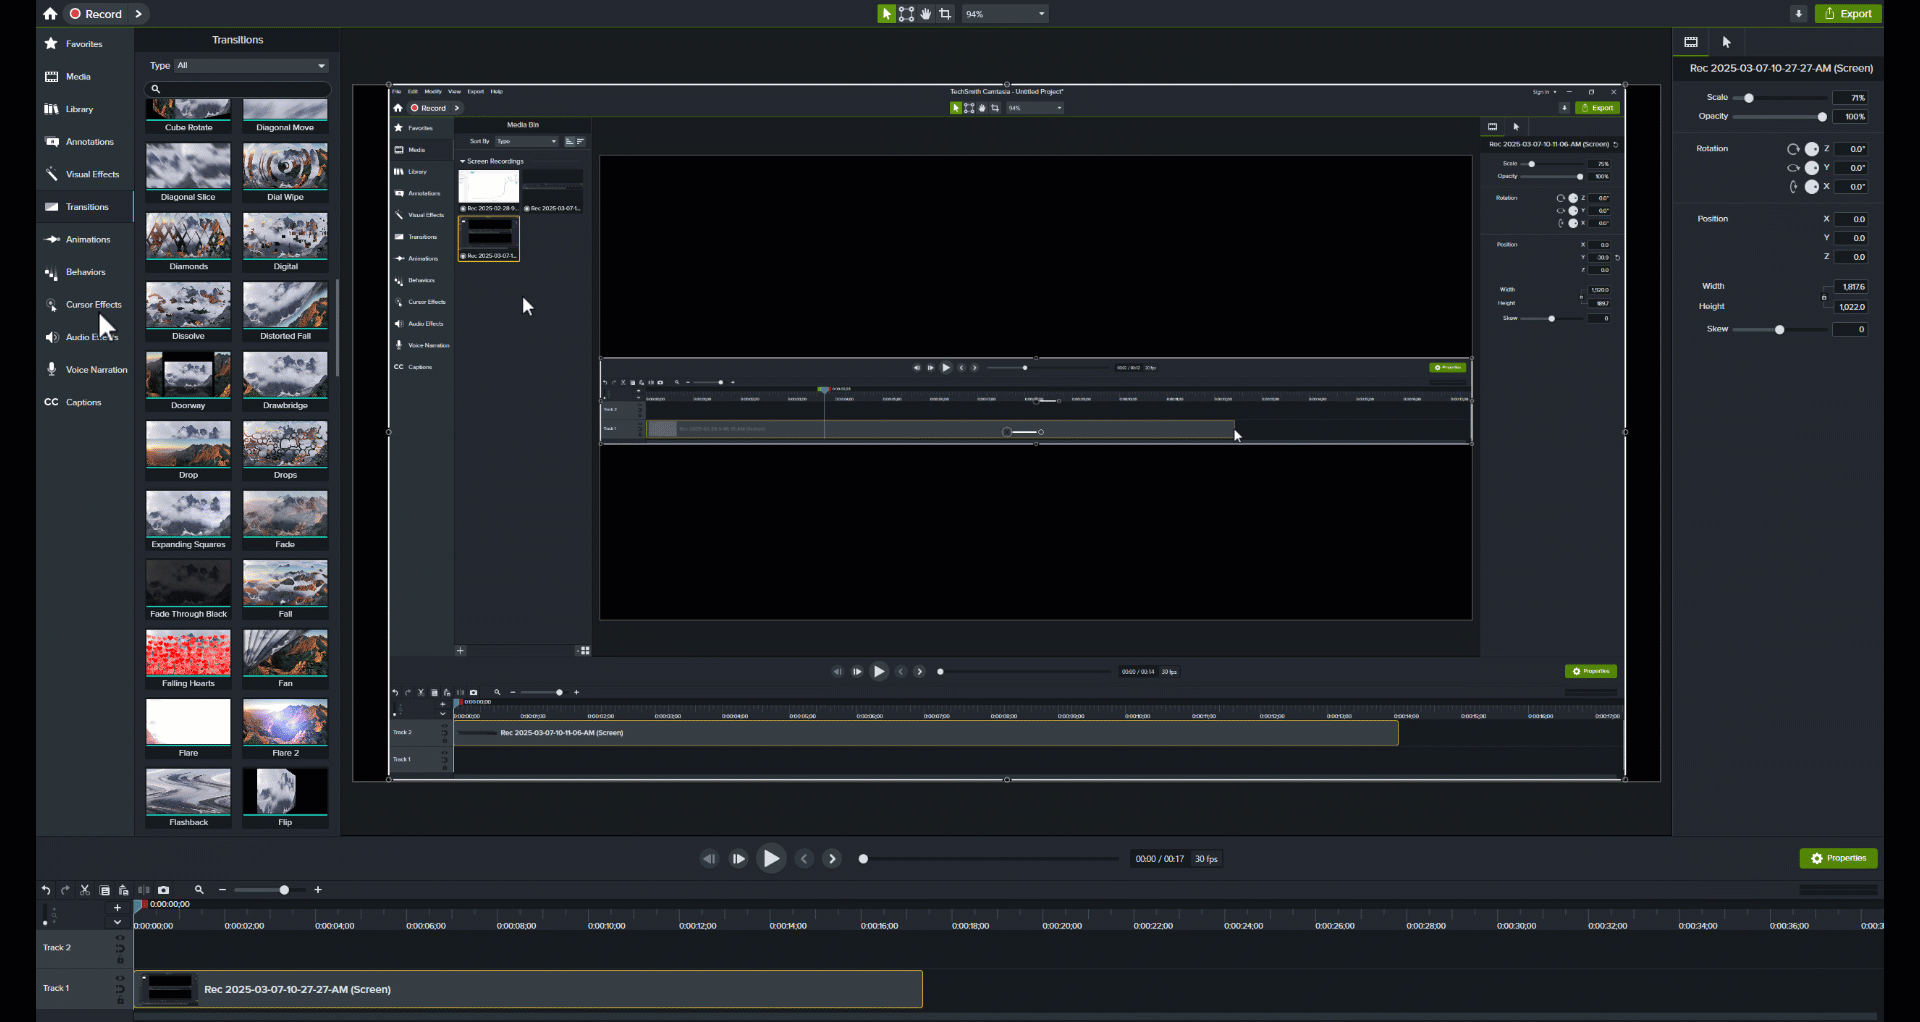
3. Editing a recording using Camtasia
- Trim the start and end of the video by selecting the video in the timeline and then moving the mouse pointer over the end of the video clip and then drag the handle to the left. The same can be done with the beginning of the video if you’d like.
- If you would like to cut parts inside the video, move your cursor in the timeline to the starting location you wish to trim, and drag the red toggle to the end of the location. This will highlight and in a blue the desired location you wish to cut.
- Next click on the scissors to cut the highlighted part of the video
-
If you do not like the change, select the backwards arrow or command Z Note: Aim for your recording and final edits to be less than 25 seconds
4. Adding Transitions
- Select the transitions tab
- Next select Circle Reveal and drag it to the beginning of your video in the timeline below.
- Next select Fade and drag it to the end of your video in the timeline below.
-
Now modify the length of these transitions by moving your cursor to the edge and dragging the handle to make it last longer or shorter.
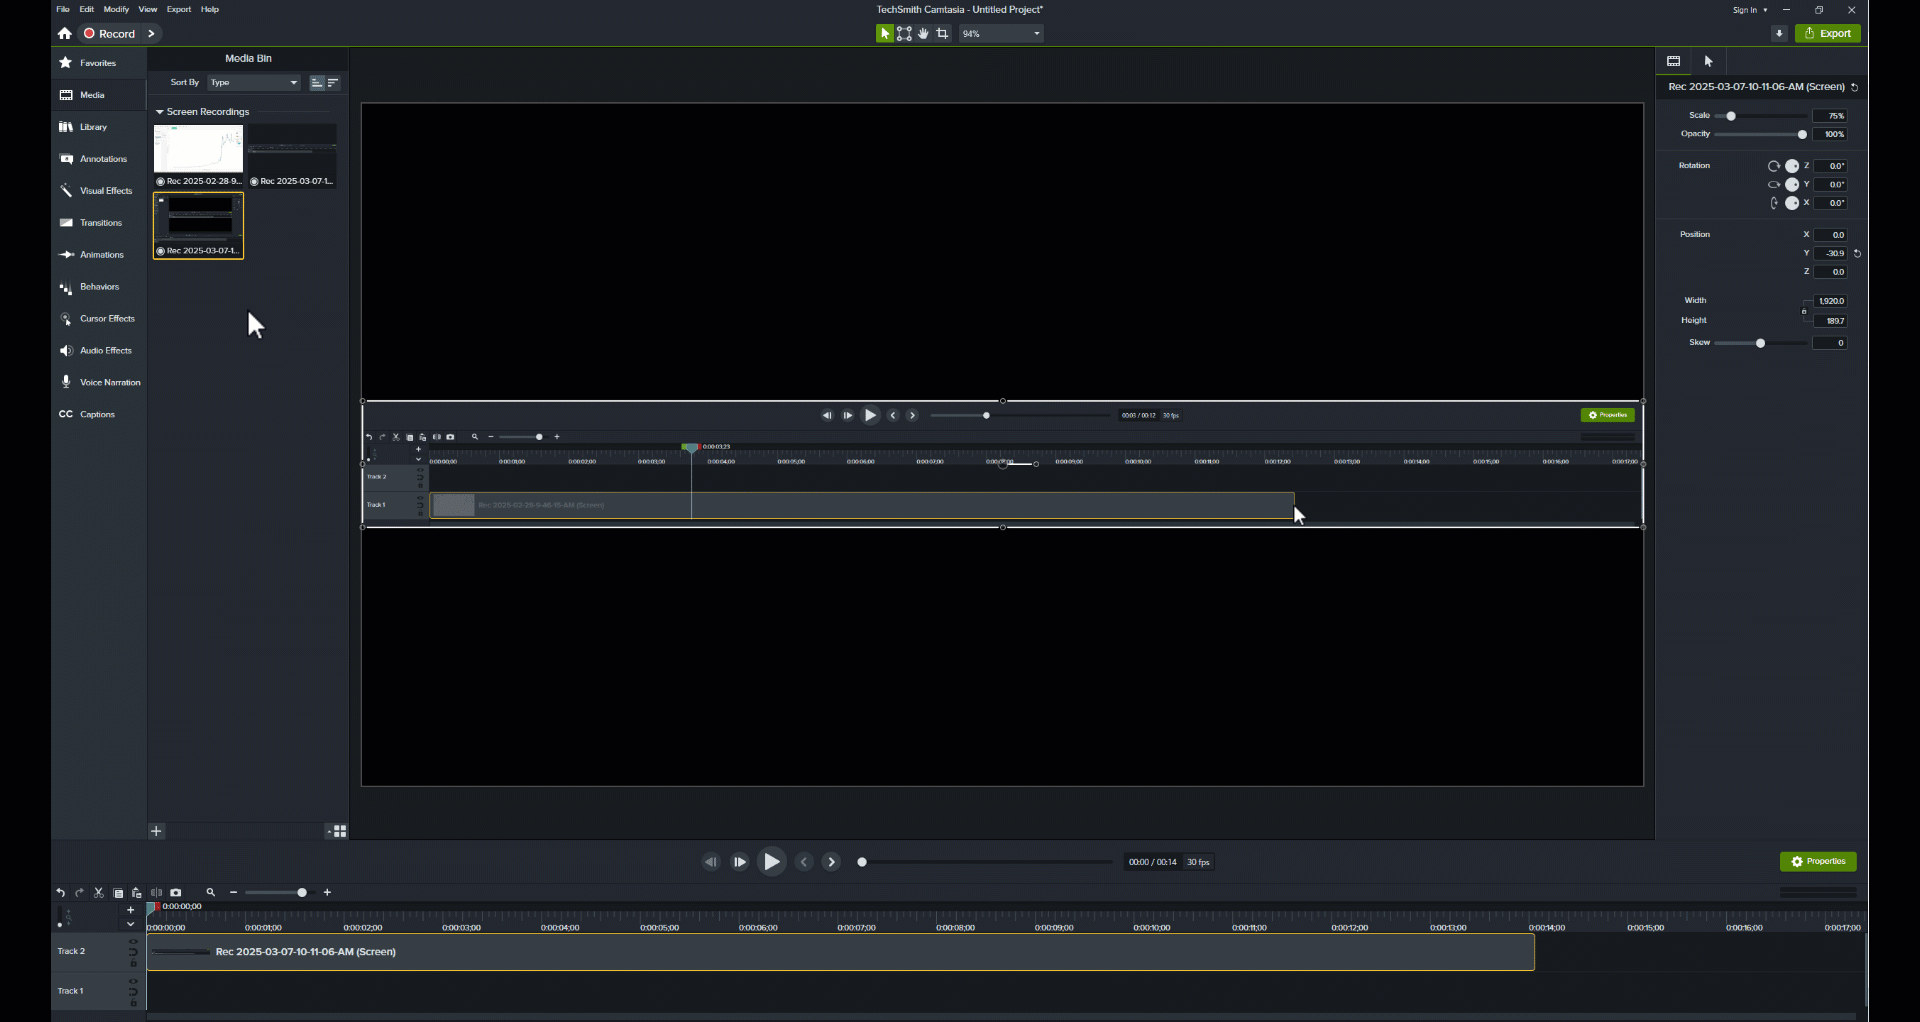
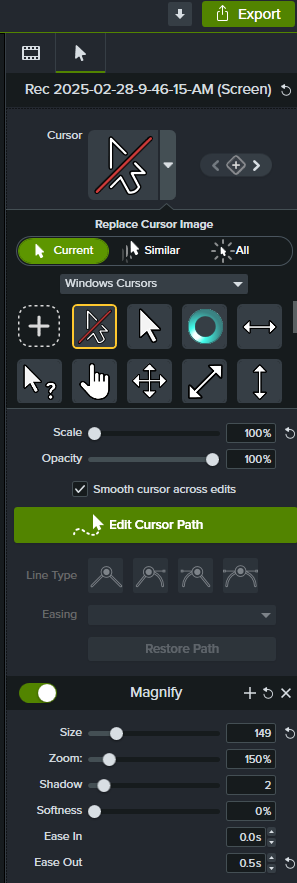
5. Scale curser/ Adding Cursor Effects
- To adjust cursor of the whole video, go to the right hand side of the screen and select cursor effects
- Click and drag the magnify to the video timeline
- Now adjust the length by moving in the edges. Adjust the end of the video cursor to end 1-2 seconds before the end of the video
-
Also on the right hand side under magnify window, adjust the Ease out to 0.5s
- Select the cursor magnify element in the bottom of the video timeline
- Now modify some of the parameters according to what works for your video (you can adjust the size of the curser, shadow, softness, zoom and the ease in/ out).
Final Checks of a Good animated Gif
- It is between 5-25 seconds
- It has a Circle Reveal for the beginning
- It uses a Magnify for the Cursor
See Animated Gif for an example with these elements (note the other animated gifs in this activity are just the steps with none of the extra features in order for it to be focused on the designated step).

Paid version Steps 6. Save and Exporting to create animated GIF (only available in paid version)
- Go to File and Save as. This will save your file as a camtasia file so that you can go back and modify or adjust later.
- Next to export it and create an animated GIF, select Export (green icon at the top right)
- Click Local file
- File format Animated GIF (.gif)” and “export”
- If the file is too large to add to Github, repeat the previous steps but in step d, select options and change dimensions of GIF to 50%