Video Recording with a 360 Camera
1. Settings/Set Up.
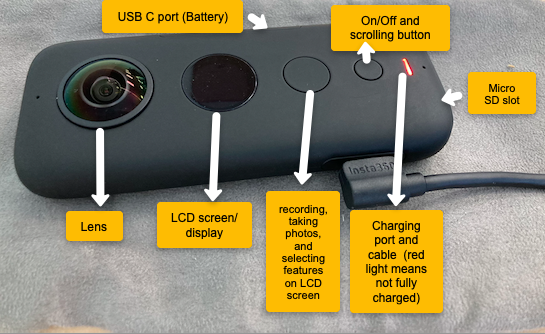
- Charging camera: open up USB C port (side of camera), get the charging cable and plug it in to a usb charger. When it is complete the red light will turn off.
Note: you can place your camera on a soft surface (such as the case). - Micro SD card: located on the bottom of the Insta camera Note: make sure there is no orange colour showing as that means it isn’t properly shut.
- Cleaning (wiping the lens): make sure to use the provided cloth
2. Taking a Picture and Video Recording
- When turning on your Insta360, it will open to the picture setting. To take a picture click the big button.
- To switch to video, click on the little button.
3. Buttons and Settings
- On/Off and changing between video, photos and settings. (small button): scroll by clicking the button to switch between video, photo or settings. (All changes are in settings and visible on LCD screen). HOLD for 3 seconds to power on and off.
- To switch to settings, click the little button 3 times in a row. Once you see the settings icon. Click the big button to select it
- Once settings is selected, you can switch from camera settings, to video, to wifi and general by clicking the big button.
- To switch and change settings under the camera settings, click the little button and change the timer from 5 to 10 seconds for example.
- Under video you can modify FPS (Frame Per Seconds), the ISO, shutter
- Menu: for starting/ending, selecting, recording or taking photos (large button)
- LCD screen
Note that the big button is like the enter key whereas the little button is more of a scrolling key
Great work!