Introduction to Academic Posters With The #BetterPoster Template
In this exercise, you will create an Academic Poster using PowerPoint and the #BetterPoster template. If you have any questions or get stuck, please ask your instructor for assistance.
NOTE: If you are already familiar with the Canva design tool, you may want to use our Canva #BetterPoser template -instead- of the PowerPoint template and related instructions below.
- Open PowerPoint & a Poster template:
- If you were able to find a conference poster template for your faculty during the pre-work for this workshop, open it now.
- Here is the #BetterPoster Template for you to download and use.
- Confirm or change the size and orientation of your poster:
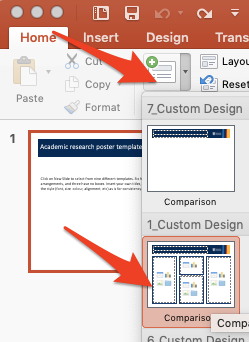
- Click on the Design tab in the top ribbon, and then on the far right click on the Slide Size drop-down, and then Custom Slide Size…
- The template’s default poster size is 54” x 36” (or 137.16 x 91.44 cm) which should be ok for most academic posters.

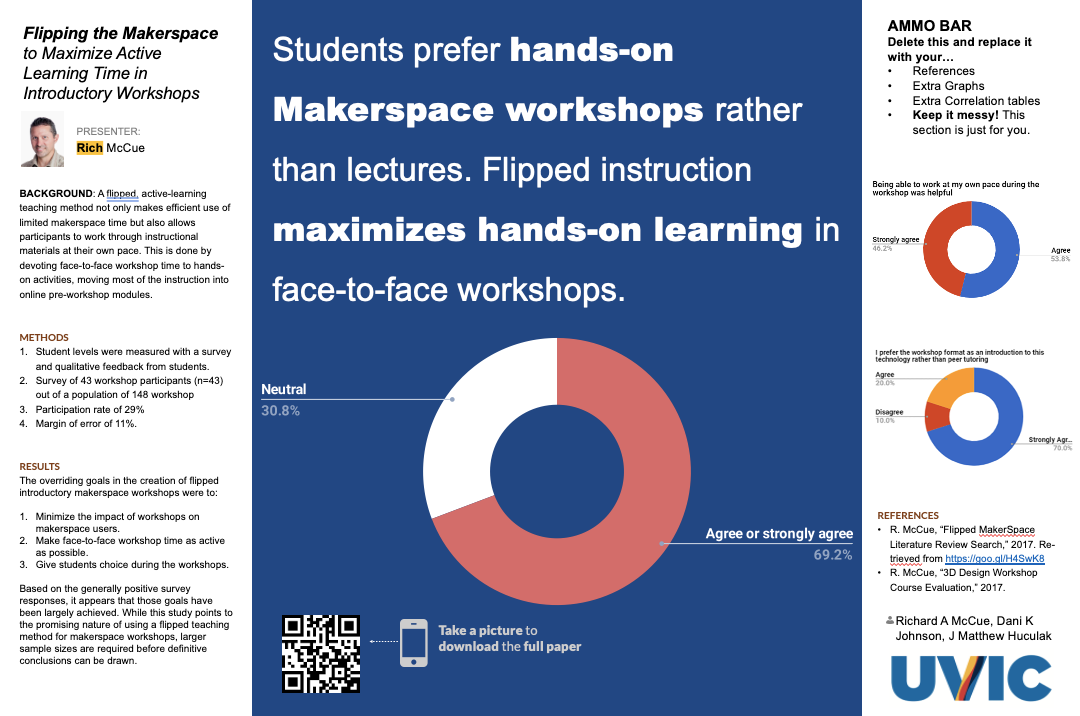
- Add a title and subtitle in the two text blocks at the top left of the poster.
- For example, if the title is long, you could put the first few words in the top title with the larger font: “Flipping the Makerspace:” and then the rest of the title on the line below with the smaller font: “to Maximizing Active Learning Time in Introductory Workshops.”
- You might want to consider adding a small text block into the title in order to add author, affiliation, and conference or event information. To do this go to the Insert tab, and then select the Text Box button on the ribbon. You will need to change the font colour to white using the tool on the Home tab.
- Copy and paste the summarized text into the poster columns, flowing from left to right, down columns, leaving room for the photos and/or charts you would like to include.
- Your poster needs to be readable at a distance so body text should be no smaller than 32 points, and your text should be black on a white or very light background.
- If you are printing your poster use a serif font (e.g. Times New Roman). If your poster will be online only, then use a non-serif font (e.g. Ariel).
- Inserting & formatting pictures:
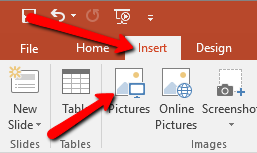
- Make sure the picture you would like to insert is on your laptop’s hard drive. Now select the Insert tab on the top menu, and then click on the Pictures button. Navigate to find the photo on your computer and press the Insert button.
-
Drag the photo to the location on your poster where you would like it to sit, then resize the photo and make sure you’ve left enough space for a caption below the photo. Insert a text box for a caption below the photo (see step 5b for how to insert a new text box).

- Ideally, you edit your photos before importing them into PowerPoint, but if you need to do some minor editing in PowerPoint, right-click on the image and then select Format Picture… Next click on the image icon (see graphic to the right), and then experiment changing the Sharpness, Brightness, Contrast, Saturation, and Temperature.
- Inserting charts:
- Make sure your chart is exported or saved from Excel (or other data analysis software) on your computer in SVG, JPG, or PNG format (SVG is the preferred format).
- Select the Insert tab on the top menu, and then click on the Pictures button. Navigate to find the chart on your computer and press the Insert button.
- Drag the chart to the location on your poster where you would like it to sit. If you need to make space in your text, press your enter key a number of times.
- Resize the chart and make sure you’ve left enough space for a caption below it. Insert a text box for a caption below the chart (see step 5b for how to insert a new text box).
- Add a QR Code to your poster that links to your research paper or report:
- Start by copying the URL of your academic paper from your web browser (assuming it is available online somewhere).
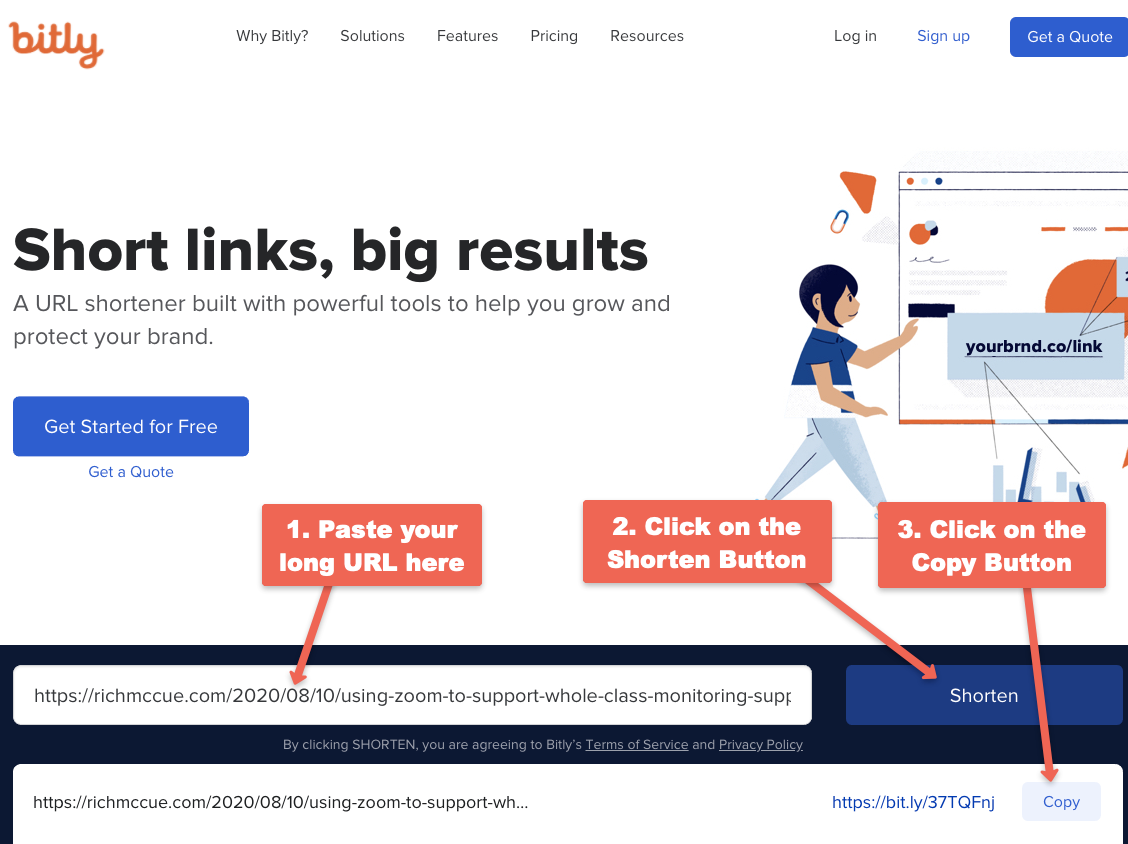
- Next we need to shorten the URL to your blog post so that the dots on the QR code you create aren’t too small for cameras to read.
-
You can do this by going to Bit.ly then paste your URL into the Shorten your link field and pressing the blue Shorten button - see graphic below (you don’t need to set up an account to do this unless you want to track the number of people going to your paper).
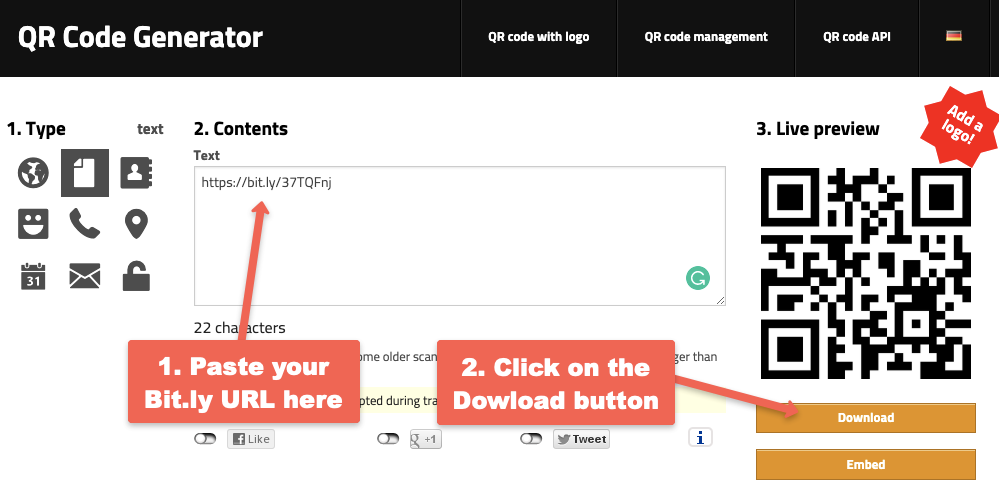
- Create the QR Code for your poser by copying the short Bit.ly URL you just created and going to the QR Code Generator.
- Paste your Bit.ly URL into the text field.
- Click on the download button.
- Select the Insert tab on the top menu, and then click on the Pictures button. Navigate to find the QR Code image on your computer and press the Insert button.
- Drag the QR Code to the location on your poster where you would like it to sit, then resize it.
- Final formatting tip for your poster: Make sure your poster is balanced across your three columns with text, photos, and charts.
-
You can print your poster at Zap Copy in the student union building: https://zapcopy.com/printing/